
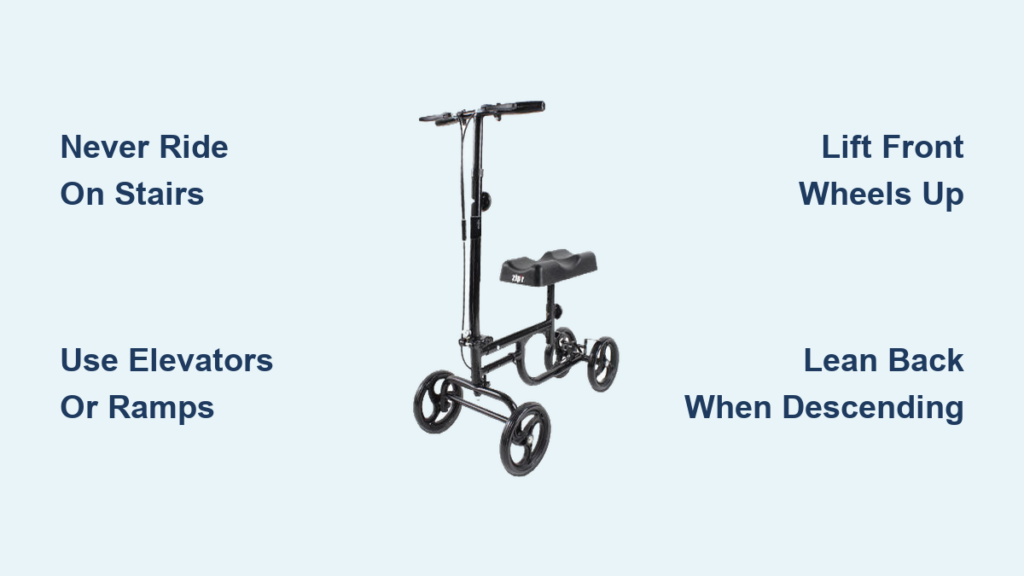
You’ve just had foot or ankle surgery and your doctor recommended a knee scooter for mobility. It’s stable, fast, and far more comfortable than crutches, until you hit a staircase. The question arises: can I ride my knee scooter up or down stairs? The answer is clear and non-negotiable: no. Riding a knee scooter on stairs is extremely dangerous and should never be attempted. But that doesn’t mean you’re stuck. This guide will show you exactly how to handle stairs safely while using a knee scooter, including what to do instead, how to manage curbs, and essential safety practices for navigating vertical transitions.
You’ll learn why stairs are off-limits, how to use elevators and ramps effectively, and the correct techniques for handling single-step curbs. We’ll also cover device setup, safe propulsion, and real-world strategies to maintain independence without risking injury. Whether you’re at home, at work, or out in public, this guide gives you the tools to move confidently and safely.
Never Ride on Stairs

Stairs Are Off-Limits
Under no circumstances should you attempt to ride a knee scooter up or down a flight of stairs. The risk of tipping, losing balance, or falling is extremely high. Even a single misstep can lead to serious injury, especially to your healing leg. The scooter’s narrow wheelbase and low ground clearance make it unstable on step edges, and the lack of full leg control removes your ability to correct a wobble in time.
Stairs create a tipping hazard with every step. As the front or rear wheels catch on an edge, the device can lurch forward or backward, throwing you off balance. This danger increases with each additional step. Escalators are equally unsafe due to moving parts and unpredictable traction.
Seek Alternative Routes
Always choose a stair-free path. Use elevators whenever possible. If you’re entering an elevator, reverse in so you can roll forward when exiting. This avoids tight turns in a confined space. If no elevator is available, ask for assistance. A family member, friend, or staff member can carry the scooter while you use handrails or crutches if medically cleared for limited weight-bearing.
Never try to improvise a way up or down stairs. The risk far outweighs any convenience. If your home has stairs and no elevator, consider temporary relocation to a ground-floor space during recovery.
Navigate Curbs Safely
Ascend a Single Curb
While full staircases are prohibited, single curbs like sidewalk edges can be managed with proper technique. Here’s how to safely go up a curb:
- Approach front wheels first. Roll the scooter straight toward the curb until the front wheels touch the edge.
- Lift front wheels. Lean forward slightly and use your arms to lift the front of the scooter onto the higher surface.
- Brake and stabilize. Once the front wheels are up, apply the hand brakes immediately to prevent rolling backward.
- Step up with good foot. Place your uninjured foot onto the curb.
- Roll up rear wheels. Release the brake and gently push forward to bring the back wheels up.
Keep movements slow and controlled. Avoid sharp angles. Approach the curb straight on.
Descend a Single Curb
Going down a curb requires careful weight distribution to avoid tipping forward:
- Position at edge. Roll the scooter to the very edge of the curb.
- Engage brakes. Squeeze both hand brakes firmly.
- Lower front wheels. Lean back slightly and slowly lower the front wheels off the curb until they rest on the lower level.
- Step down with good foot. Carefully step down with your uninjured leg.
- Roll down rear wheels. Slowly release the brake and roll forward to bring the back wheels down.
Always look where you’re going and ensure the landing area is clear of obstacles.
Set Up Your Scooter Correctly
Adjust Knee Rest Height
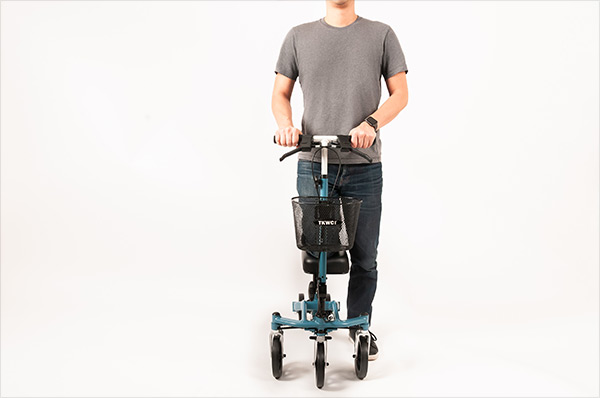
Proper setup is essential for control and safety. Start with the knee rest. Stand beside a stable surface and bend your injured knee to 90 degrees. Measure from the floor to the back of your bent knee. Adjust the knee platform to match this height exactly.
When seated, your knee should rest comfortably at a right angle, hips level, and foot hanging freely off the back. If the platform is too high, it lifts your leg and destabilizes the scooter.
Set Handlebar Height
Incorrect handlebar height strains your back and reduces steering control. Stand on your uninjured leg. Adjust the handlebars so they align with your wrists or waist. Grip the handles with your elbows bending slightly at about 90 degrees. Avoid hunching or overreaching.
Use the adjustment dial or lever on the handlebar post. Loosen, set height, then tighten securely.
Safety Check Before Every Use
Always verify these components before riding:
• Knee rest and handlebar pins are fully inserted
• Locking levers are closed
• Brakes engage smoothly
• Wheels spin freely and are free of debris
A quick inspection prevents accidents caused by loose parts or failed mechanisms.
Mount and Dismount Safely
Mounting the Scooter
Never rush this step. Do it on a flat, stable surface:
- Position beside scooter. Stand with injured leg closest to the device.
- Lock brakes. Ensure hand brakes are fully engaged.
- Grip handlebars. Hold with both hands for balance.
- Place injured leg. Bend knee and rest it fully on the pad with foot hanging off the back.
- Ground good leg. Keep your uninjured foot on the floor for support.
- Test stability. Shift weight slightly before releasing brakes.
Alternative method: Sit on a chair or bed, place injured leg on pad, then pivot onto the scooter while using arms for support.
Dismounting Properly
- Stop completely. Come to a full stop.
- Lock brakes. Engage both hand brakes.
- Keep hands on bars. Maintain balance.
- Step off with good leg. Move your uninjured foot to the ground first.
- Follow medical advice. Only put weight on injured leg if cleared by your doctor.
Rushing this process increases fall risk, especially on uneven surfaces.
Propel and Steer with Control
Use Smooth Kicks for Movement
Push off the ground with your uninjured leg using controlled, steady kicks. Avoid jerky or aggressive motions. Keep your back straight, head up, and eyes forward. This posture improves balance and reduces strain on your arms and shoulders.
Turn Safely at Any Speed
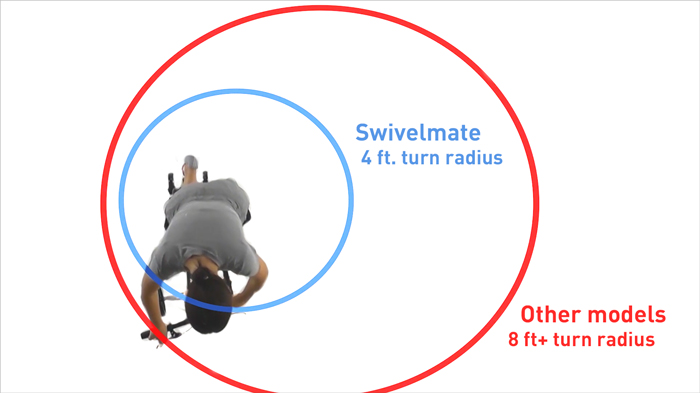
Turn the handlebars to steer, but always slow down before turning. Sharp turns at speed can cause tipping, especially on slick or uneven surfaces.
For tight spaces, use the 3-point turn:
- Scoot backward slightly.
- Pivot the handlebars.
- Move forward in the new direction.
This mimics a car’s turning technique and works well in hallways or doorways.
Brake Effectively
Most scooters use hand brakes like a bicycle. Squeeze both levers simultaneously to stop or slow down. Test brakes before every use. On declines, apply light, consistent pressure to control speed. Don’t let the scooter run away.
Some models have a foot brake near the rear wheel. Press down to engage. Regardless of type, always lock the brakes when stopped, mounting, or dismounting.
Handle Different Surfaces Wisely
Indoor Navigation Tips
Smooth floors like tile, wood, and linoleum are ideal. Watch for these common hazards:
• Area rugs that can catch wheels
• Electrical cords across pathways
• Wet spots on floors
• Furniture corners protruding into walkways
Move slowly and leave space for braking. The scooter requires more room to turn than walking.
Outdoor Use Guidelines
Sidewalks and paved paths are manageable if clear of cracks and debris. Avoid these hazards:
• Potholes in pavement
• Loose gravel surfaces
• Wet leaves on ground
• Ice or snow conditions
These can cause sudden loss of traction and lead to falls.
All-Terrain vs. Standard Models
Standard scooters work best on smooth surfaces only. All-terrain models have larger, rugged wheels designed for grass, gravel, or uneven ground.
If you live in a rural area or have a long outdoor driveway, consider renting or buying an all-terrain version. Never use a standard scooter on rough terrain.
Avoid Common Hazards
Never Carry Heavy Loads
Do not carry bags, groceries, or bulky items in your arms while using the scooter. This removes your hands from the brakes and shifts your center of gravity. Use an attached basket for small items only. Keep loads light and centered.
Wear Proper Footwear
Your pushing foot needs grip and support. Avoid these unsafe options:
• Flip-flops with no ankle support
• Slippery soles that slide on smooth floors
• Loose shoes that might slip off
Wear closed-toe, non-slip shoes like sneakers. This improves traction and protects your foot if it slips under the scooter.
Follow Weight Limits
Every scooter has a maximum weight capacity, usually between 250 and 350 pounds. Exceeding this limit stresses the frame, wheels, and brakes, increasing the risk of mechanical failure. Check your model’s specifications and adhere strictly.
Maintain and Store Properly
Inspect Before Each Use
Spend 30 seconds checking these components:
• Wheels for mud, stones, or hair wrapped around axles
• Brake responsiveness by squeezing both levers
• Frame for cracks or bends
• Adjustment pins and levers are secure
Address any issues before riding. A loose wheel or weak brake can lead to a fall.
Clean Regularly
Wipe the knee pad with a damp cloth to prevent skin irritation. Clean the frame and wheels, especially after outdoor use. Dry thoroughly to prevent rust on metal components.
Fold and Unfold Correctly
To fold the scooter:
- Open the side lever.
- Pull the release pin.
- Gently fold the frame in half.
To unfold the scooter:
- Lift upright into position.
- Pull lever to clear pin hole.
- Let frame snap into place.
- Confirm pin is fully inserted through the hole.
- Close lever securely.
Practice this at home. A poorly locked scooter can collapse during use.
Store Indoors
Keep your scooter in a dry, indoor location. Moisture causes rust, especially on folding joints and brake cables. Avoid leaving it in garages, basements, or outdoors.
Choose the Right Mobility Aid

Knee Scooter vs. Crutches
Knee scooters are more stable and comfortable than crutches. A 2022 study found 14 falls among knee scooter users compared to 22 falls among crutch users. Scooters eliminate underarm pressure and upper body fatigue, making them ideal for long-term non-weight-bearing recovery.
Knee Scooter vs. Walker
Walkers offer more upper body support but are slower and less maneuverable. Scooters are better for covering distance and navigating open spaces. Choose based on your strength, balance, and environment.
Who Should Use a Knee Scooter
Knee scooters work best for these situations:
• Foot, ankle, or lower leg injuries requiring non-weight-bearing recovery
• Users with good upper body strength and coordination
• Temporary mobility needs during healing
Knee scooters may not be recommended for:
• Severe balance issues affecting safety
• Upper body weakness limiting steering control
• Permanent mobility needs without medical guidance
Final Safety Reminders
Always Prioritize Safety Over Speed
Go slow. Rushing increases fall risk. You’re not in a race. Your goal is to heal safely. Slow, controlled movements give you time to react to obstacles and maintain balance.
Stay Environmentally Aware
Scan ahead for these potential problems:
• Changes in surface type or elevation
• Obstacles blocking your path
• People walking in your direction
• Wet or slippery areas
Anticipate problems before they happen. If a path looks risky, find another route.
Consult Your Healthcare Provider
Before using a knee scooter, get clearance from your doctor or physical therapist. They can confirm it’s appropriate for your injury and recovery stage. Follow their weight-bearing instructions exactly.
Frequently Asked Questions About Using a Knee Scooter on Stairs
Can I use a knee scooter on stairs?
No. You should never attempt to ride a knee scooter on stairs. The device is extremely unstable on step edges and poses a high risk of tipping and falling. Always dismount and use an elevator, ramp, or seek assistance instead.
How do I get up stairs if I can only use a knee scooter?
You cannot use the scooter on stairs. Instead, use an elevator whenever available. If no elevator exists, ask someone to carry the scooter while you use handrails or crutches if your doctor has cleared you for limited weight-bearing.
Can I use a knee scooter on a single step or curb?
Yes, single curbs can be navigated with proper technique. Approach the curb straight on, lift the front wheels up first, apply brakes, then bring up the rear wheels. For descending, brake firmly, lean back, and lower the front wheels slowly before stepping down with your good leg.
Are escalators safe to use with a knee scooter?
No. Escalators are just as dangerous as stairs. The moving parts and unpredictable traction create serious tipping hazards. Always use elevators instead.
What should I do if I encounter stairs with no elevator available?
Seek assistance from another person. Ask them to carry the scooter while you navigate the stairs using handrails or an alternative mobility device if permitted by your doctor. Never attempt to carry the scooter yourself while walking on stairs.
Can I modify my knee scooter to handle stairs?
No modifications can make stairs safe for knee scooter use. The device design simply cannot handle vertical transitions. Plan your routes to avoid stairs entirely during your recovery period.
Key Takeaways for Safely Handling Stairs with a Knee Scooter
Never attempt to ride your knee scooter on stairs or escalators. This is the single most important safety rule. The device is designed for flat surfaces only, and stairs create an extreme tipping hazard that could re-injure your healing leg.
Always use elevators or ramps as your primary method for vertical transitions. When elevators aren’t available, ask for human assistance. Have someone carry the scooter while you use handrails or an alternative device if your doctor approves.
Master single curb navigation using the proper techniques. Approach straight on, lift front wheels first when ascending, and lean back when descending. Always engage brakes before any transition.
Set up your scooter correctly before first use. Adjust the knee rest to match the distance from your knee to the floor. Set handlebars at wrist or waist height with a slight elbow bend. A proper fit prevents fatigue and improves control.
With the right knowledge and preparation, you can navigate your environment safely during recovery. Prioritize safety over speed, stay aware of your surroundings, and consult your healthcare provider with any questions about using your knee scooter.



