
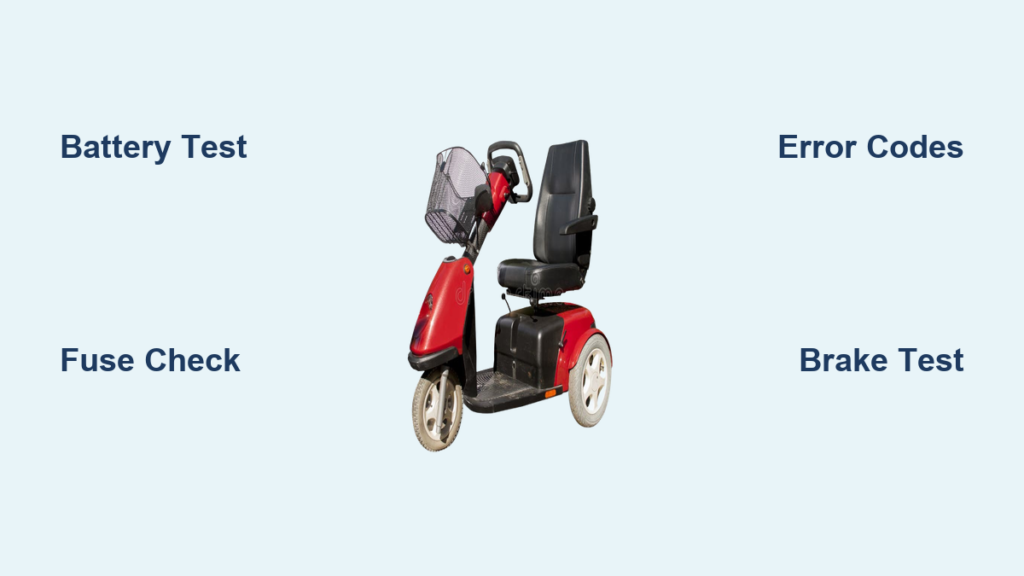
If your medical scooter won’t start, loses power, or makes strange noises, you are not alone. Thousands of mobility device users face these issues every year, and a sudden breakdown can mean missed medical appointments, isolation, or dangerous situations if brakes or steering fail. Medical scooter repair is essential for maintaining independence, whether you are recovering from injury, managing a chronic condition, or relying on your scooter for daily errands.
The good news? Most common scooter problems like dead batteries, blown fuses, error codes, and mechanical misalignments are diagnosable and fixable, often within 24 to 72 hours. In this guide, you will learn how to identify failure signs, troubleshoot basic issues safely, and understand when to call a professional. We will walk through battery testing, error code meanings, fuse replacement, and maintenance steps to extend your scooter’s life.
Mobile Repair Service Options
On-Site Diagnosis and Fix
Mobile medical scooter repair brings the technician to your home, apartment, or care facility, eliminating the need to transport a heavy, non-functional device. This service model is now standard across major providers in cities like Jacksonville, FL, East Tennessee, and Saint Charles, MO. Technicians arrive equipped with multimeters, replacement fuses, common wiring harnesses, and battery load testers to perform immediate diagnostics.
Most on-site repairs take 1 to 3 business days, with urgent cases often resolved within 24 hours of the initial call. If parts are in stock, many issues including battery swaps, fuse replacements, and throttle recalibrations can be completed during the first visit. Some companies even offer same-day emergency service for critical mobility failures.
Shop-Based vs. Hybrid Models
While mobile service dominates for convenience, some users prefer shop-based repair at dedicated mobility centers in locations like Broomall, PA, or Allentown, PA. These facilities often feature test tracks to verify performance after repairs, ensuring brakes, steering, and speed operate correctly before return.
Many providers now use a hybrid model, offering both drop-off service and free local pickup and delivery for qualifying repairs. This gives users flexibility, especially when complex diagnostics or transaxle work is needed. Regardless of model, most shops provide a 90-day warranty on parts and labor, giving peace of mind that the fix will last.
Decode Common Error Signals
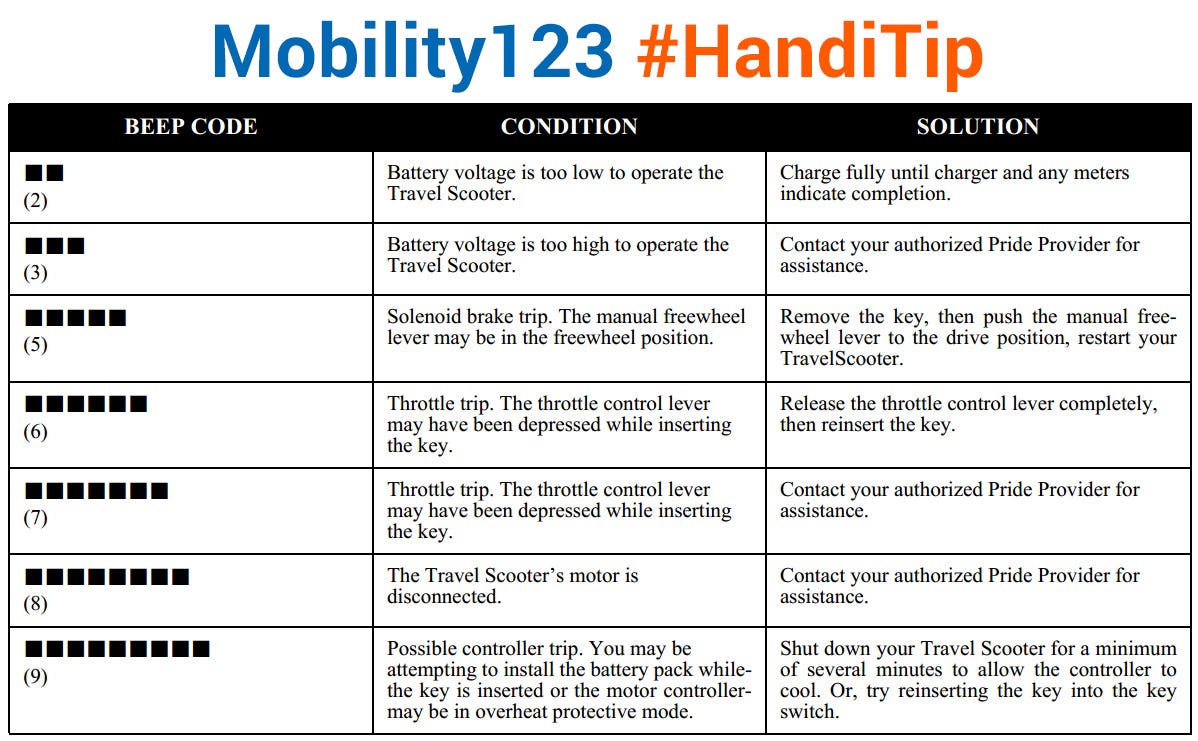
Beeping and Flash Codes Explained
When your scooter will not move, the first clue is often an audible or visual signal. Five beeps on a Pride Mobility GoGo model mean the drive lever is in neutral or the brake system is not engaged. To fix this, turn off the power, locate the drive lever near the controller or base, push it fully into Drive, then restart.
Other brands use LED flash codes to indicate faults. For example, 1 flash means throttle error, 3 flashes means motor fault, and 5 flashes indicates a speed potentiometer issue. Each manufacturer has unique code patterns. Technicians use diagnostic tools and factory manuals to interpret these signals accurately. Never guess because misreading codes can lead to replacing good parts.
No Power? Check These First
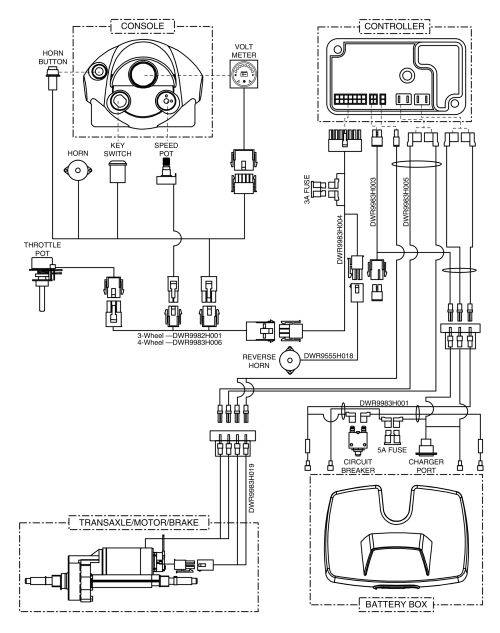
If your scooter shows no signs of life, start with these three checks. First, inspect battery connections and tighten loose terminal bolts on both 12V batteries. Second, test the fuse, usually a 10-amp located near the power block. Use needle-nose pliers to remove it and replace if the internal strip is broken or discolored. Third, reset the circuit breaker by looking for a paddle-style switch near the controller and pressing it firmly back in if it popped out.
These three checks resolve over 60% of no power cases. If lights still do not come on, the issue may be deeper, like a failed controller or broken wire harness.
Battery Failure Diagnosis
Test Voltage and Load Performance
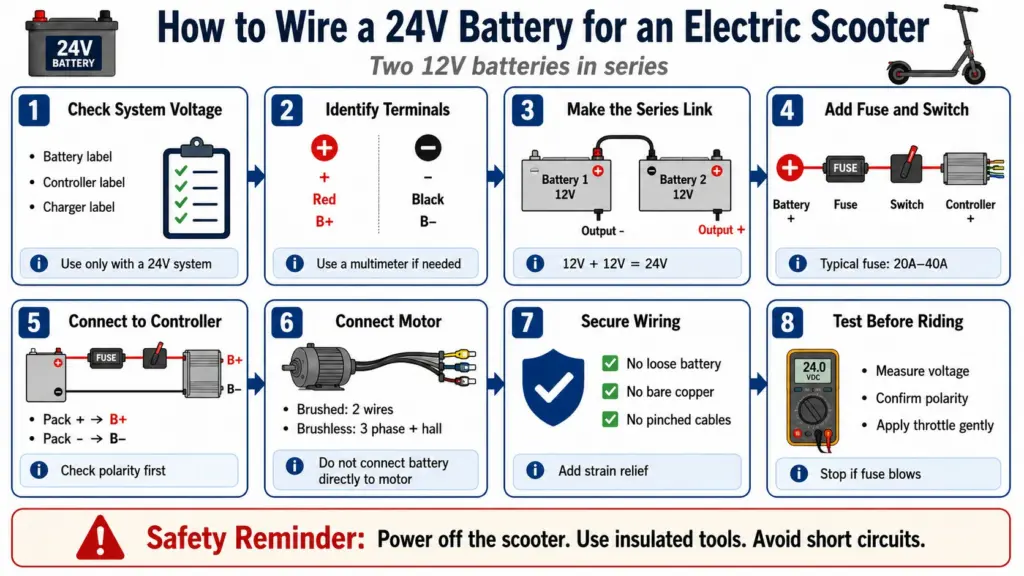
Batteries are the number one replacement item in medical scooters, lasting about 2 years on average, less in hot climates or with daily heavy use. To test batteries, measure resting voltage with the scooter off. A healthy 24V system should read 24 to 25.2V across both batteries.
For load voltage, turn the scooter on and measure again while operating. A drop below 22V under load means one or both cells are failing. For definitive results, take batteries to a supply store for professional load testing. Always replace batteries in pairs to prevent imbalance and further damage.
Signs of Battery Degradation
Watch for these red flags indicating battery failure. Reduced range means going from 10 miles to only 3 to 4 miles per charge. Slow acceleration or power loss on inclines is another warning sign. Also pay attention if the charger light stays green even after unplugging and replugging.
If your scooter struggles on slight hills or dies mid-trip, it is likely time for new batteries. Reputable providers stock OEM-compatible units, including deep-cycle MK Battery models designed for mobility devices.
Fuse and Circuit Protection
Why Fuses Blow
A blown fuse typically results from climbing slopes over 8 to 12 degrees, exceeding the scooter’s weight capacity, or using the scooter off-road unless it is built for that purpose. Fuses protect the motor and wiring from overload. Replacing a fuse without addressing the root cause leads to repeat failures.
Safe Replacement Steps
To replace a fuse safely, follow these steps. Turn off the scooter and unplug the charger. Locate the fuse panel near the power block. Use needle-nose pliers to remove the fuse. Insert an identical 10-amp blade fuse. Finally, power on and test.
If the new fuse blows immediately, stop because there is likely a short circuit or motor issue requiring professional diagnosis.
Mechanical Alignment Fixes
Steering Lock Override
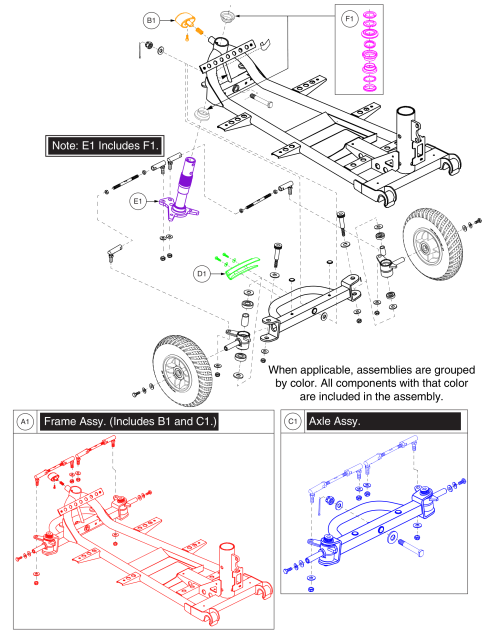
If the front wheel will not turn, check the steering lock on the front column. It is usually marked with a triangle or exclamation symbol. To unlock, push the knob inward and rotate counterclockwise a quarter turn. To lock for transport, push in and turn clockwise. This prevents accidental steering during movement.
Seat Removal and Reinstallation
Seats that spin freely or will not lock often just need reseating. Remove the seat and ensure the rotation lever is up during reinsertion. Push down firmly until you hear a click. Check secondary levers for front-to-back adjustment.
For stuck seats common on Revo 2.0 or Pride Go Chair, open any under-seat storage first. Then lift straight up from the center because tilting binds the metal post in the rubber sleeve.
Tire and Brake Safety Checks
Inspect for Wear and Traction
Tires should be checked monthly. Look for cracks or dry rot, uneven tread wear, and loss of grip on wet surfaces. Pneumatic air-filled tires need regular pressure checks. Low pressure increases rolling resistance and strain on the motor. Solid or foam-filled tires last longer but offer less shock absorption.
Replace tires showing significant wear, especially if riding outdoors or on uneven terrain.
Brake Adjustment and Testing
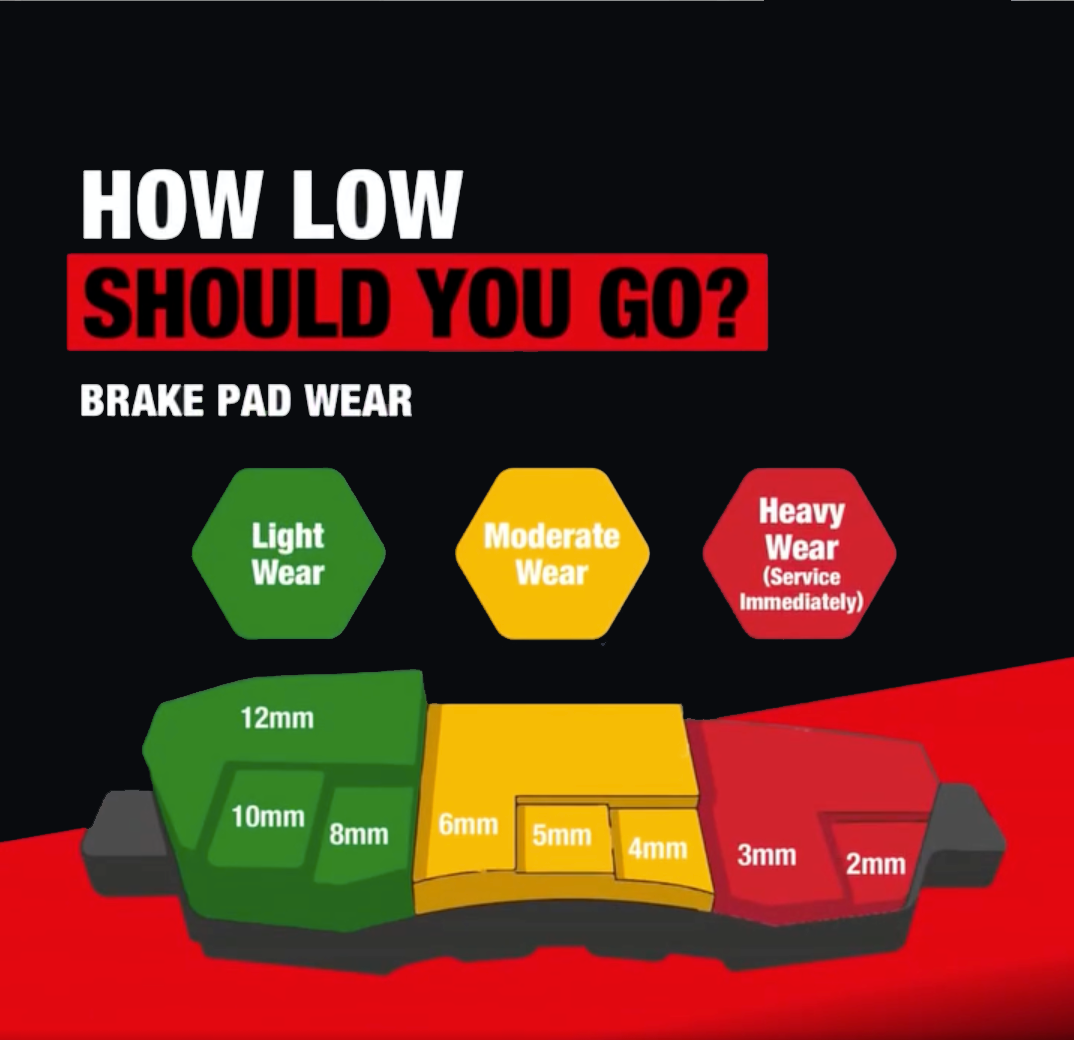
Brakes must engage automatically when power stops. Test by turning on the scooter, moving forward slightly, and releasing the throttle. The scooter should stop within 2 to 3 seconds. If it rolls, brakes may need adjustment or pad replacement.
Some models have electromagnetic brakes that fail silently. Only a technician can test these properly. Never ride with compromised brakes because this is a major safety hazard.
Throttle and Control Issues
Throttle and Potentiometer Failure
If the scooter jerks, moves erratically, or will not respond to throttle input, the issue is likely the throttle assembly or speed potentiometer. These components wear over time, especially with frequent use.
Symptoms include delayed response when pressing the tiller, sudden speed surges, and one-sided motor engagement that pulls to one side. Replacement requires disconnecting the control harness and installing a new unit. Always match the part to your scooter’s make and model because Pride, Golden, and Drive Medical all use different connectors.
Wire Harness Damage
The main wire harness runs from the battery to the controller, motor, and tiller. If wires are pinched, frayed, or chewed by pets, the scooter may cut out randomly.
Inspect under the seat and along the frame. Look for exposed copper, melted insulation, and loose connectors. Do not tape over damaged wires because this is a fire risk. Replace the entire harness section or have a technician do it.
Preventative Maintenance Plan
Annual Tune-Up Essentials
Even if your scooter seems fine, schedule a professional tune-up once a year. Daily users should consider biannual checks. A full service includes battery load test and terminal cleaning, electrical connection tightening, brake and light inspection, steering column and wheel bearing check, and tire pressure adjustment for pneumatic tires.
This prevents small issues from becoming major breakdowns.
DIY Monthly Checks
Between professional visits, perform these monthly maintenance tasks. Charge batteries nightly. Wipe down controls and seat. Tighten visible bolts on armrests and shrouds. Test horn and lights. Listen for new noises during operation.
Catching a squeak or wobble early can save hundreds in repairs later.
Authorized Repair vs. General Techs
Benefits of Brand-Authorized Service
Many repair centers are authorized service providers for brands like Pride Mobility, Golden Technologies, and Drive Medical. This means access to OEM parts instead of generic knockoffs, factory training on model-specific quirks, use of proprietary diagnostic software, and compliance with warranty requirements.
For example, Pride scooters have unique beep codes that only trained techs can interpret correctly. Unauthorized repairs may void existing warranties.
Supported Brands and Compatibility
Reputable shops service nearly all major brands including Pride, Golden Technologies, Drive Medical, Whill, Zoom, Sceptrum, Merits, Solax, EV Rider, Sunrise Medical, Harmar, and Segway. Even if you bought your scooter online or secondhand, most providers will repair it without requiring a purchase receipt.
Insurance and Repair Costs
Does Insurance Cover Repairs
Yes, many providers accept Medicare, Medicaid, and private insurance for repairs, even if the device was not purchased from them. Coverage varies, but common reimbursable services include battery replacement, motor and controller repair, and brake and steering fixes.
Call your provider with the device serial number and a description of the issue. They will verify benefits and file claims on your behalf.
Transparent Pricing and Financing
Look for companies with no hidden fees and free estimates. Typical costs include battery replacement at $150 to $300 for a pair, fuse or connector fix at $50 to $100, and full diagnostic at $75 to $125, often waived with repair.
For major repairs like transaxle replacement, financing options are usually available. Some shops also offer trade-ins or consignment for gently used scooters.
When to Repair vs. Replace
Evaluate Cost vs. Lifespan
As a rule of thumb, if repair costs exceed 50% of a new scooter’s price, consider replacement. If the scooter is over 5 years old with multiple past repairs, replacement may be more reliable.
However, if the frame is solid and only one component like batteries or a motor failed, repair is almost always the smarter choice.
Upgrade Opportunities
Some repair shops offer upgrade paths, for example installing LED lights, larger tires, or improved seating during service. Discuss options with your technician to enhance comfort and performance.
Frequently Asked Questions About Medical Scooter Repair
How Do I Know If My Scooter Battery Needs Replacement?
Watch for reduced range, slow acceleration on hills, and a charger light that stays green despite full charging. If your scooter struggles on slight inclines or dies mid-trip, batteries are likely failing. A professional load test can confirm this.
Can I Repair My Medical Scooter Myself
Simple tasks like checking fuses, resetting circuit breakers, and tightening battery connections are safe for DIY. However, complex electrical work, motor repairs, and brake adjustments should be left to certified technicians to avoid safety hazards and voiding warranties.
How Much Does Medical Scooter Repair Cost
Typical costs range from $50 to $100 for fuse or connector fixes, $150 to $300 for battery replacement pairs, and $75 to $125 for full diagnostics, often waived with repair. Major repairs like transaxle replacement cost more but financing is usually available.
How Long Does Scooter Repair Take
Most repairs take 1 to 3 business days. If parts are in stock, many issues can be resolved during the first visit. Urgent cases are often completed within 24 hours, and some providers offer same-day service for critical failures.
Does Insurance Cover Medical Scooter Repair
Yes, Medicare, Medicaid, and private insurance often cover repairs including battery replacement, motor and controller repair, and brake fixes. Contact your provider with the device serial number to verify benefits before service.
What Brands Do Repair Technicians Service
Most shops service all major brands including Pride Mobility, Golden Technologies, Drive Medical, Whill, Sunrise Medical, and Harmar. Authorization ensures OEM parts and factory-trained diagnostics, but most providers will work on any scooter regardless of where it was purchased.
Key Takeaways for Medical Scooter Repair
Medical scooter repair is about restoring independence, not just fixing machines. With mobile service, insurance support, and expert diagnostics, most breakdowns can be resolved quickly and affordably. Understanding common issues like battery failure, fuse blows, and error codes helps you respond confidently when problems arise.
Stay proactive by charging regularly, inspecting tires and connections, and scheduling annual tune-ups. Address small issues like squeaks or wobbles early to prevent expensive repairs later. When in doubt, call a certified technician because risking safety with DIY fixes on critical systems is never worth it.
With proper care, your medical scooter can provide reliable mobility for years to come.



