If your electric scooter is not stopping as quickly or smoothly as it used to, you are not alone. Brake issues are among the most common maintenance problems riders face, and electric scooter brake repair is essential for safety, performance, and longevity. Whether you hear squeaking, feel a mushy lever, or notice increased stopping distance, these symptoms point to worn pads, misaligned calipers, cable slack, or hydraulic leaks. This guide covers everything from quick cable tweaks to full hydraulic line replacements, helping you restore reliable braking power fast.
You will learn how to identify problems accurately, make precise adjustments, replace worn components, and avoid common mistakes that compromise safety. Whether you ride a Gotrax, Segway, Xiaomi, or Ninebot, the principles are the same across most modern e-scooters. Let us dive into the core systems and solutions that keep your brakes responsive and safe.
Diagnose Brake Issues Early

Spotting brake problems early prevents accidents and extends component life. Do not wait for total failure. Subtle changes in lever feel or sound can signal trouble before it becomes dangerous. A well-maintained brake system should engage firmly within the first quarter-press of the lever and bring the scooter to a smooth stop without noise or drag.
Use both performance cues and visual checks to assess your brakes. Test them weekly if you ride daily, or before every trip if used occasionally. Addressing minor issues now avoids roadside emergencies later.
Check Lever Feel and Response
The brake lever tells you more than you think. A mushy or loose lever often means cable slack in mechanical systems or air in hydraulic lines. If you have to pull the lever all the way to the handlebar for any stopping power, that is a red flag.
For mechanical brakes, check if the cable moves visibly when you pull the lever. Excessive movement means slack needs adjustment. On hydraulic models, a spongy feel usually indicates trapped air or low fluid, and both require bleeding or line replacement.
Also test brake light activation. On most scooters, the brake light should turn on at the same moment braking begins. If it only comes on when the lever is fully pressed, the sensor is misaligned, often due to incorrect cable tension.
Inspect for Common Warning Signs
Look and listen while spinning the wheel and applying the brake.
- Squeaking or grinding noises. High-pitched squeals often mean pads are worn or contaminated with oil. Grinding sounds may indicate metal-on-metal contact, and you should replace pads immediately.
- Persistent rubbing. If the rotor drags against the pad even when brakes are released, the caliper is likely misaligned or the cable is too tight.
- One rub per revolution. This typically means the rotor is bent, not misaligned. Spin the wheel slowly and watch the gap between rotor and pads.
- Visible leaks. On hydraulic systems, check for oily residue around the caliper, hose connections, or reservoir. Any leak means fluid loss and compromised braking.
Catch these signs early, and you will avoid sudden brake failure.
Adjust Mechanical Brake Cables

Mechanical disc brakes use steel cables to actuate the caliper. They are simple, reliable, but prone to stretching over time. As cables stretch, brake response dulls. Fortunately, they are easy to fix with an Allen wrench and a few minutes. Most issues stem from cable slack, which reduces stopping power and delays engagement. Adjusting tension restores firm lever feel and ensures timely brake light activation.
Remove Major Cable Slack
Start here if the brake lever feels extremely loose.
- Locate the cable clamp on the brake caliper, usually near the arm pivot.
- Loosen the clamp bolt with a 4mm or 5mm Allen wrench.
- Pull the cable taut by hand, just enough to remove obvious slack.
- Re-tighten the clamp securely.
Do not over-tighten, because this can cause brake drag. After clamping, spin the wheel. It should rotate freely without rubbing.
Fine-Tune With Barrel Adjuster
Use the barrel adjuster for small tweaks, ideal after pad replacement or minor wear.
- Find the barrel adjuster, typically on the brake lever or caliper.
- Turn it counterclockwise, as viewed from above, in 1/6-turn increments.
- After each turn, gently push the cable upward to help it move through the housing.
- Test the wheel spin. Stop adjusting once you feel slight drag, then back off 1/4 turn to ensure free rotation.
This method lets you dial in precision without loosening the main clamp.
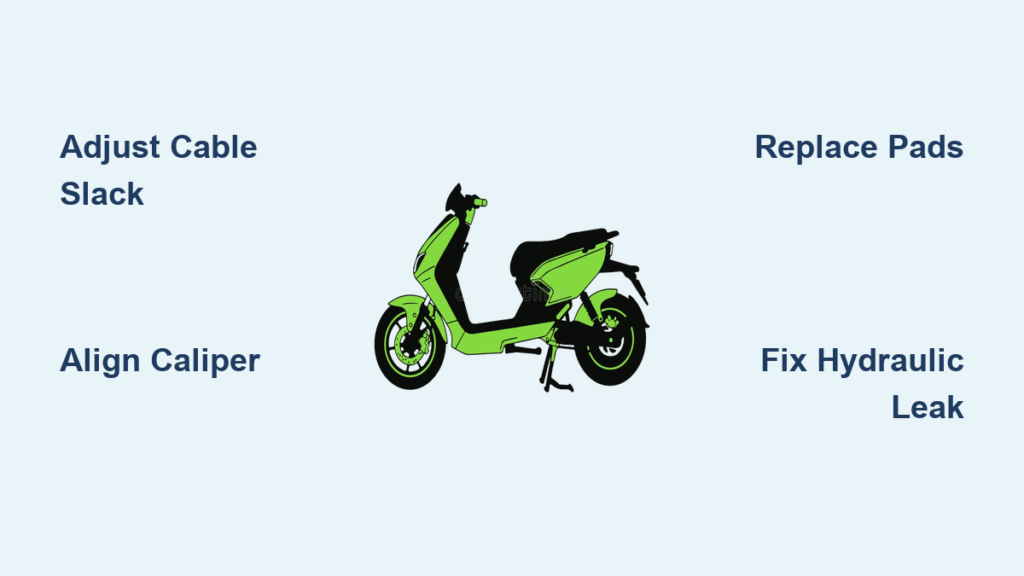
Align Brake Calipers Correctly

Even with perfect cable tension, a misaligned caliper causes uneven pad wear, noise, and reduced braking efficiency. Proper alignment centers the rotor between both pads so they contact evenly when engaged. Misalignment is common after bumps, tire changes, or pad swaps. You can fix it with a simple centering technique or go full realignment for stubborn cases.
Center Caliper With Lever Method
This method is quick and effective for minor misalignment.
- Loosen the two caliper mounting bolts slightly, just enough to allow side-to-side movement.
- Spin the wheel and pull the brake lever fully.
- While holding the lever, tighten the bolts in sequence: front bolt first, then back, then both fully.
- Release the lever and spin the wheel. Rubbing should disappear.
This uses the rotor force to self-center the caliper. It works about 80% of the time.
Perform Full Caliper Realignment
Use this when basic centering fails or pads wear unevenly.
- Release all tension by loosening the cable clamp completely.
- Access the inner pad adjuster. Use a 2mm Allen wrench to loosen the grub screw on the back of the caliper by one full turn.
- Create clearance by turning the rear adjuster outward one full turn, if accessible.
- Center the rotor visually. Loosen mounting bolts and align the rotor perfectly in the caliper gap using alignment slots or centerlines. Tighten bolts while holding position.
- Set the inner pad. Turn the rear adjuster in one and a half turns, then back off 1/4 turn until the wheel spins freely. Fine-tune in 1/8-turn steps.
- Secure the grub screw by fully tightening the 2mm screw. This locks the inner pad position.
- Set the outer pad. Pull cable taut, re-clamp, then use the barrel adjuster to remove final slack. Back off slightly if drag occurs.
Now both pads engage evenly, maximizing stopping power.
Replace Worn Brake Pads
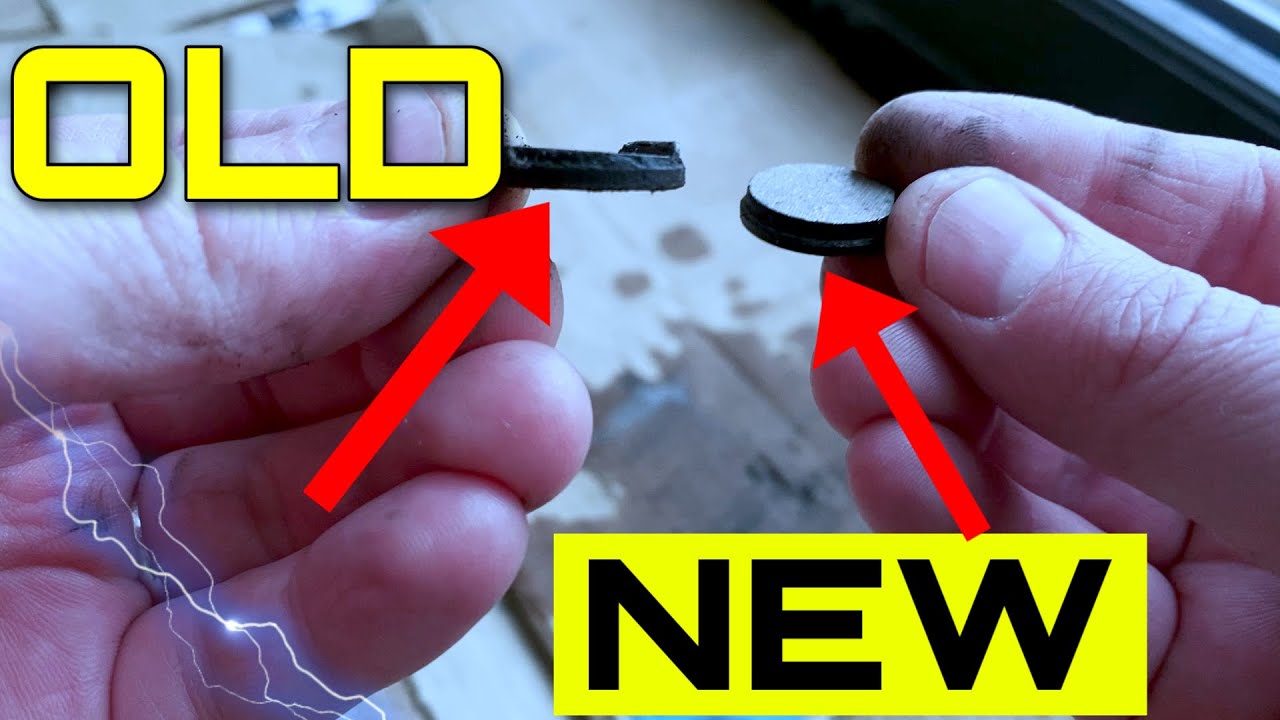
Brake pads wear down like tires. They are consumables. Most last 500 to 1,000 miles depending on riding style and terrain. Ignoring wear leads to rotor damage and dangerous braking. Check pad thickness monthly. If friction material is less than 1mm thick, replace them. Also replace if contaminated with oil or hardened from heat.
Remove Old Pads Safely
No special tools are needed, just pliers and care.
- Identify the retention pin holding the pads in place.
- Use pliers to straighten the bent end of the pin.
- Pull the pin out completely.
- Lift the old pads up and slide them out of the metal backing plate.
Inspect the rotor while pads are out. Clean it with isopropyl alcohol if dirty or glazed.
Install New Brake Pads
Match pads to your model. Common types fit TRP, Tektro, Shimano MT200, M365, and Zero 10X calipers.
- Slide new pads into the same slots on the metal casing.
- Reinsert the casing into the caliper, aligning holes precisely.
- Thread the metal pin through.
- Bend the end at an angle with pliers to lock it in place.
Ensure the pin is secure. Vibration can loosen it over time.
Test After Replacement
Never skip testing after replacing pads.
- Lever feel should be firm, not spongy.
- Visual check confirms pads do not rub when released.
- Test ride by accelerating to 10 to 15 mph and applying brakes gently. Stop should be smooth, with no stuttering or loud squeaking.
Initial squeak is normal. Pads need 5 to 10 braking cycles to seat properly.
Sync Brake Light and Regen Braking
On electric scooters, brake levers do double duty. They activate friction brakes and send a signal to cut motor power and engage regenerative braking. If the brake light turns on too late or not at all, your safety and scooter efficiency suffer.
Match Activation Timing
The brake light must illuminate the instant mechanical braking begins.
- Problem. Light only comes on when lever is fully pulled? Cable is too tight.
- Solution. Loosen the cable clamp slightly and retest. Use the barrel adjuster for fine control.
Test by watching the tail light while slowly squeezing the lever. It should turn on within the first 10 to 20% of travel.
Verify Electronic Connection
Check the 2-pin waterproof connector at the lever and controller.
- Unplug and inspect for corrosion or bent pins.
- Reconnect firmly until it clicks.
- Some models use hall effect sensors. Ensure magnet alignment is not disrupted.
Proper sync ensures faster stops, protects the motor, and conserves battery via regen braking.
Repair Hydraulic Brake Lines
Hydraulic brakes offer superior stopping power but require more care when issues arise. A spongy lever, fluid leak, or total brake failure means you likely need a line replacement. Unlike mechanical systems, hydraulics rely on sealed fluid pressure. Air bubbles or leaks ruin performance. While bleeding is an option, many riders opt for plug-and-play replacement kits. They are faster and more reliable.
Gather Essential Tools
You will need the following items.
- Stiff wire for threading through the stem
- Allen wrench set to avoid rounding bolts
- Isopropyl alcohol for cleaning
- New pre-filled brake line and caliper with mineral oil
- Torque tool for reservoir screw
- Zip ties for cable management
Choose OEM or compatible kits for Gotrax, Ninebot, or RS5 Series Roadrunner models.
Remove Old Hydraulic Line
Work carefully. Mineral oil stains and damages paint.
- Document routing by taking photos of cable paths before unwrapping.
- Remove the caliper by popping it off the rotor. Leave the mounting bracket attached to the fork.
- Disconnect the lever. Remove end cap and loosen lever bracket. Unplug quick disconnect for brake signal wire. Loosen reservoir nut slightly, keeping lever upright to prevent spill. Pull lever assembly out.
- Preserve the banjo grommet. Carefully remove the brass banjo grommet that seals the connection. Reuse or replace exactly.
- Extract the old line. Cut it out, tape a stiff wire to one end, and pull through the stem. Leave 1 foot of wire sticking out both ends.
Keep all small parts organized throughout the process.
Install New Pre-Filled Line
Modern kits come pre-bled, so bleeding is not required.
- Thread new line by taping it to the wire and pulling smoothly through the stem.
- Prepare connector by removing plastic bushing and exposing hydraulic plug.
- Assemble by sliding rubber boot and cinch nut over the line. Insert new hydraulic plug. Hand-tighten cinch nut.
- Seal properly by tightening firmly with Allen wrenches. The banjo nut crushes to form a pressure seal. Under-tightening causes leaks.
- Mount caliper by transferring bracket screws, aligning with rotor, and tightening.
- Reconnect by plugging in brake signal wire. Press until it clicks.
- Re-wrap cables using zip ties to secure neatly, following original routing.
Done right, this restores like-new braking feel.
Maintain Brakes for Long Life
Preventive care beats emergency fixes. A few minutes of maintenance every few weeks keeps your brakes responsive and safe. Build these habits into your routine to avoid surprises on the road.
Clean Rotors and Pads Regularly
Dirt, dust, and oil reduce friction and cause noise.
- Wipe rotors with isopropyl alcohol weekly.
- Avoid touching rotor surface with bare hands. Oil from skin contaminates it.
- If pads are glazed, meaning shiny surface, lightly sand them or replace.
Never use WD-40 or degreasers near brakes.
Inspect Cables and Hoses
Check monthly for the following issues.
- Frayed mechanical cables
- Cracked or swollen hydraulic hoses
- Loose mounting bolts
- Worn pad thickness
Address small issues before they become big ones.
Monitor Break-In Period
New pads need 5 to 10 braking cycles to seat properly. During this time, expect slight squeaking and avoid hard stops. Recheck alignment and tension after 10 miles. This ensures maximum contact and performance.
Frequently Asked Questions About Electric Scooter Brake Repair
How Do I Know When My Brake Pads Need Replacing?
Check pad thickness monthly. If friction material is less than 1mm thick, replace them immediately. Other signs include squeaking sounds, reduced stopping power, and visible thinning. Worn pads can damage rotors, so do not wait until they are completely gone.
Why Does My Brake Lever Feel Mushy?
A mushy lever usually indicates cable slack in mechanical systems or air in hydraulic lines. For mechanical brakes, adjust the cable tension using the barrel adjuster or cable clamp. For hydraulic systems, you may need to bleed the lines or check for fluid leaks.
Can I Repair Hydraulic Brakes Myself?
Yes, with the right tools. You will need stiff wire, Allen wrenches, isopropyl alcohol, and a pre-filled replacement line kit. Follow proper sealing procedures, especially when tightening the banjo nut. Under-tightening causes leaks, while over-tightening damages threads.
How Often Should I Inspect My Brakes?
Inspect brakes weekly if you ride daily. Before every trip if you use the scooter occasionally. Regular inspection catches wear before it causes failure. Look at pad thickness, check for leaks, and test lever feel.
Why Is My Brake Light Not Turning On?
This is usually a cable tension issue. If the cable is too tight, the brake light only activates when the lever is fully pulled. Loosen the cable slightly using the barrel adjuster until the light turns on within the first 10 to 20% of lever travel.
What Causes Squeaking After Replacing Brake Pads?
Initial squeak is normal after pad replacement. New pads need 5 to 10 braking cycles to seat properly. If squeaking persists, check for contamination on the rotor or uneven caliper alignment. Clean the rotor with isopropyl alcohol and verify pad contact is even.
Key Takeaways for Electric Scooter Brake Repair

Regular electric scooter brake repair is not just maintenance. It is a safety imperative. From adjusting cable slack and aligning calipers to replacing pads or upgrading hydraulic lines, each step brings you closer to confident, reliable stopping power. Use this guide to diagnose issues fast, perform precise fixes, and keep your scooter road-ready.
The most common issues stem from cable slack, misaligned calipers, and worn pads. Address these problems early with regular inspections and simple adjustments. For hydraulic systems, proper sealing and fluid management are critical for consistent performance.
When in doubt, consult a professional e-scooter specialist, especially for hydraulic work. Stay safe, ride smart, and never ignore the signs your brakes are talking to you.