
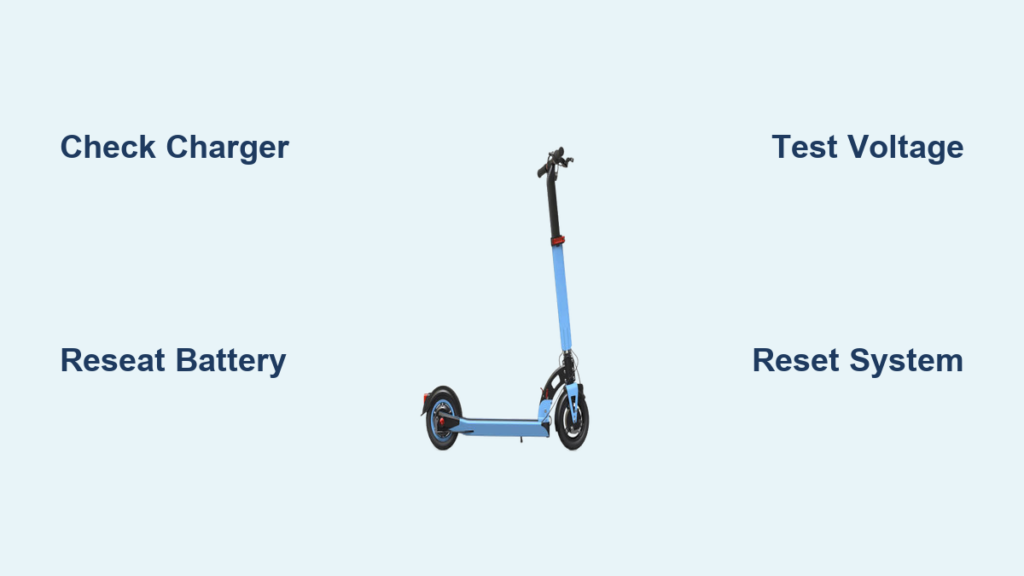
Your electric scooter won’t turn on, won’t move, or suddenly died mid-ride? You’re not alone. A non-working electric scooter is one of the most common issues riders face, and the good news is most problems can be diagnosed and fixed at home. Whether it’s a dead battery, loose wire, or a hidden reset button, this guide walks you through every step to get your scooter running again.
We’ll focus on real-world fixes backed by technical insight, so you can troubleshoot like a pro even without tools. Let’s start with the most likely culprit: power.
Verify Charger and Power Source

Before diving into complex repairs, confirm the basics: is your scooter actually getting power?
Test the Outlet and Charger
Plug the charger into a different wall outlet, preferably one you know works like a lamp socket. If the charger light doesn’t turn on, the issue may be a faulty outlet, a damaged charger, or a tripped circuit breaker.
Look at the charger indicator light:
- No light: Likely a bad charger or dead outlet
- Blinking red/green: Could signal internal fault or incompatible voltage
- Solid red: Charging normally
- Solid green: Fully charged but verify
Try a known-good charger if available. Using the wrong charger can prevent charging or even damage the battery.
Wait Before Testing
If the scooter was completely drained, the Battery Management System (BMS) may have shut down. Plug it in and wait at least 30 minutes before attempting to power on, even if the charger light is green. Some scooters need time to wake up from deep sleep mode.
Check Battery Connection and Terminals
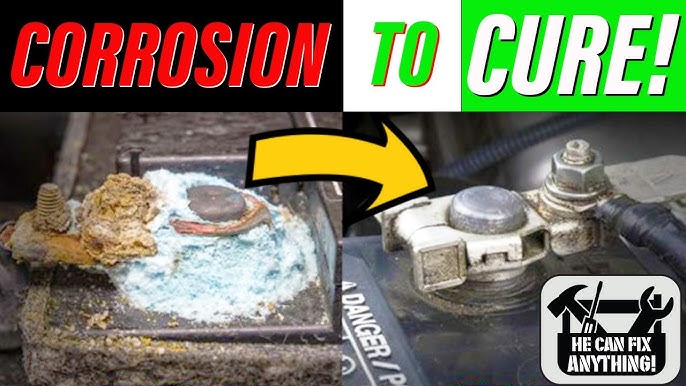
A loose or corroded battery connection is one of the top reasons an electric scooter won’t start, even with a full charge.
Reseat the Battery Pack
Remove the battery completely if accessible, then firmly reinsert it until it clicks. This simple action resets the electrical contact and can revive a scooter that appears dead.
Inspect and Clean Terminals
Check both the battery and scooter-side terminals for:
- Corrosion (white/green crust)
- Dirt or oil buildup
- Bent or burnt metal contacts
Clean gently with:
- A dry cloth for dust
- A cotton swab dipped in rubbing alcohol for grime
- A baking soda and water paste for heavy corrosion (rinse with alcohol after)
Pro Tip: After cleaning, apply a thin layer of dielectric grease to prevent future corrosion, especially if you ride in rain or humid areas.
Test Battery Voltage and Health

Indicator lights lie. A green light doesn’t always mean a healthy battery. Use a multimeter for real data.
Static Voltage Check
Set your multimeter to DC volts. Touch the probes to the battery terminals and compare the reading to nominal voltage (e.g., 36V, 48V). A reading below 30% of nominal suggests deep discharge or cell failure.
Example: A 36V battery reading under 10V is likely in protection mode or dead.
Load Test Under Throttle
With the wheel off the ground, engage the throttle while measuring voltage:
- Healthy battery: Voltage dips slightly but recovers
- Failing battery: Voltage crashes (e.g., from 36V to 20V) and stays low
This indicates degraded cells or a failing Battery Management System.
Signs of Battery Failure
- Won’t hold a charge overnight
- Dies quickly during rides
- Swollen casing or burnt smell
- Scooter beeps but won’t move
If these apply, battery replacement is likely needed. Always match voltage, capacity (Ah), and connector type.
Inspect Fuses and Circuit Breakers
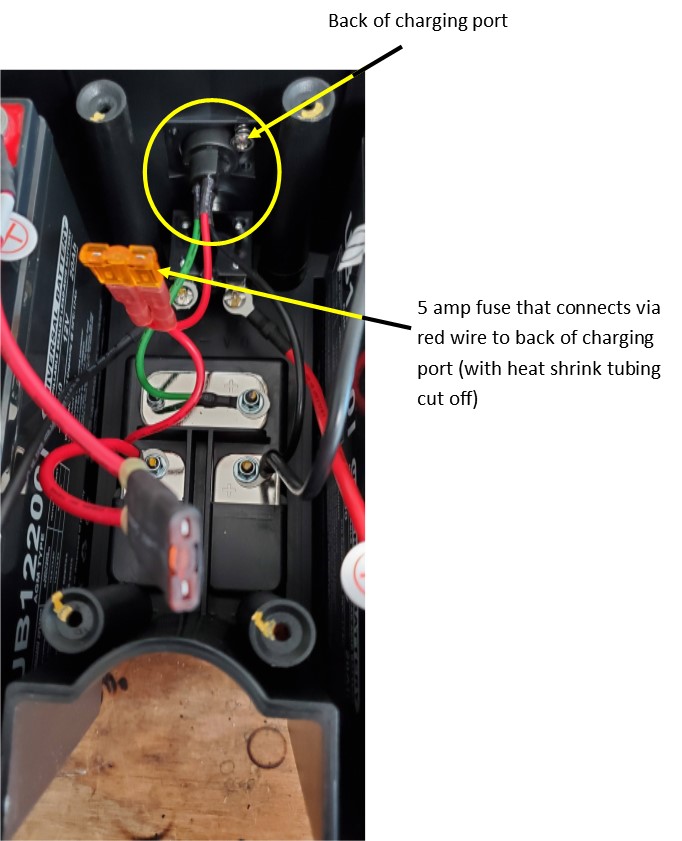
Many scooters have a fuse or resettable breaker that cuts power during surges.
Locate the Fuse
Common locations include inside the battery compartment, under a rubber flap near the deck, or near the controller or power switch.
Visually inspect the fuse by looking for a broken filament inside, or use a multimeter to test for continuity. If blown, replace with same amperage rating only (e.g., 15A). Never use a higher-rated fuse.
Reset the Circuit Breaker
If your scooter has a reset button (often red or black), press it firmly. It may pop out when tripped.
After resetting, wait 10 seconds then try powering on. If it trips again immediately, there’s a short circuit. Stop and inspect wiring.
Perform a System Reset
Electronics glitch. A reset clears temporary faults in the controller or BMS.
Use the Reset Button If Available
Some models (e.g., Segway, Xiaomi) have a hidden reset button near the battery or under the deck. Press and hold for 5 to 10 seconds.
Hard Reset Without a Button
No reset button? Do this:
- Turn off the scooter
- Unplug the battery connector inside the deck
- Wait 5 to 10 minutes (lets capacitors discharge)
- Reconnect the battery
- Try turning it on
This often fixes frozen displays, no power after charging, and beeping without movement.
Examine Wiring and Connectors
Loose or damaged wires break the circuit between battery, controller, and motor.
Visual Inspection Points
Check these areas carefully:
- Folding hinge: Wires bend here and can fray
- Deck edges: Pinched or cut insulation
- Motor and controller connections: Loose plugs
Look for exposed copper, burnt smell or discoloration, or wiggling connectors.
Reseat All Plugs
Disconnect and reconnect:
- Battery to controller
- Throttle to controller
- Display to handlebar
- Motor phase wires
Ensure each clicks or locks into place. A loose throttle wire is a common cause of powers on but won’t move.
Diagnose Power Button and Display

The power button is a frequent failure point, especially on budget scooters.
Test Button Function
Press firmly. Does it click? Feel mushy or stuck? Require long hold (5-10 sec)?
Some scooters need a 5-second press to turn on. Others use double-tap.
If the button feels broken, try pressing around the edges or use a small tool to gently press the internal switch. Don’t force it.
Check Display for Error Codes
If the screen lights up but shows E01, E02, etc., refer to your manual. Flashing lights often mean throttle or motor fault. A blank screen could be dead display or no power.
Common codes include:
- E01: Throttle fault
- E02: Motor hall sensor error
- E04: Low battery
- E06: Controller issue
Troubleshoot Throttle and Motor
If the scooter powers on but won’t move, the problem is likely in the drive system.
Test Throttle Connection
Unplug and reconnect the throttle cable at the controller. Look for bent pins, moisture, or corrosion.
If the throttle is damaged or unresponsive, replace it. Aftermarket throttles are inexpensive and easy to install.
Listen for Motor Response
Turn on the scooter, lift the wheel, and engage throttle:
- Silent motor: No signal or dead controller
- Humming or jerking: Hall sensor or phase wire issue
- Grinding noise: Mechanical motor failure
If the motor hums but won’t spin, check the hall sensor wires (thin red/black/white cables). A break in one can stop operation.
Address New Scooter Issues
Brand-new scooters often fail due to improper initialization.
Charge Before First Use
Never ride a new electric scooter without a full initial charge (8-12 hours). Lithium-ion batteries ship at partial charge (often 40-60%), but using them before a full cycle can damage cells, trigger BMS lockout, or void warranty.
If your new scooter beeps but won’t move after 20 minutes of use, it likely dropped below safe voltage before full charge.
Fix BMS Lock on New Units
Solution:
- Plug in and charge for 48 hours uninterrupted
- Do not attempt to turn it on during charging
- After 48 hours, try powering on
This long charge may revive a locked BMS.
Prevent Future Failures
Most not working issues are preventable with simple habits.
Monthly Maintenance Routine
- Tighten all bolts (especially stem and deck)
- Inspect wiring near hinges
- Clean battery terminals
- Check tire pressure and brake function
Protect from Water and Cold
- Avoid puddles and wet storage
- Let scooter warm up before charging in cold weather
- Apply waterproof sealant to connectors
Charge Smart
- Don’t leave on charger for days
- Avoid charging below 0°C (32°F)
- Store at 50-80% charge if unused for weeks
When to Seek Professional Help
Some issues require expert hands.
Seek Pro Repair If
- You smell burning or see smoke
- Battery is swollen or hot
- Internal controller is burnt
- You lack a multimeter or soldering skills
- Scooter is under warranty
Warning: Opening the deck or replacing internal parts may void warranty. Always check terms first.
Final Checklist: Fix in 8 Steps
Use this quick-reference guide when your scooter won’t start:
- Charge it: Use known-good outlet and charger; wait 30+ minutes
- Check power button: Hold 5-10 seconds; listen for beep
- Reseat battery: Remove and firmly reinsert
- Inspect fuse: Replace if blown; reset breaker
- Reset system: Disconnect battery for 10 minutes
- Check wires: Look for frays; reseat all connectors
- Test voltage: Use multimeter on battery (static and load)
- Look for errors: Check display or blink codes
If all steps fail, the battery or controller likely needs replacement.
Frequently Asked Questions About Electric Scooter Not Working
Why does my scooter beep but not move?
Beeping usually means a fault code. Common causes include low battery, throttle error, brake sensor stuck, or motor issue. Check connections and error codes.
Can I ride with a dead battery?
No. Riding on flat battery strains the motor and controller. Push it instead.
Do all scooters have a reset button?
No. Some use battery disconnect as the reset method. Check your model manual.
How long should a scooter battery last?
Typically 2-4 years or 300-500 charge cycles. Lifespan drops with frequent full discharges or extreme temperatures.
Is water damage covered by warranty?
Almost never. Most warranties exclude moisture damage unless the scooter has a high IP rating (e.g., IPX7) and was used within specs.
Key Takeaways for Fixing Your Electric Scooter
Most electric scooter failures are simple fixes involving loose connections, dead batteries, or forgotten resets. By following this guide, you can diagnose 90% of issues at home. Focus on power, connections, and resets first. When in doubt, consult your manual or contact support, especially if under warranty. Keep your scooter clean, charged, and dry, and it will keep you moving for years.



