
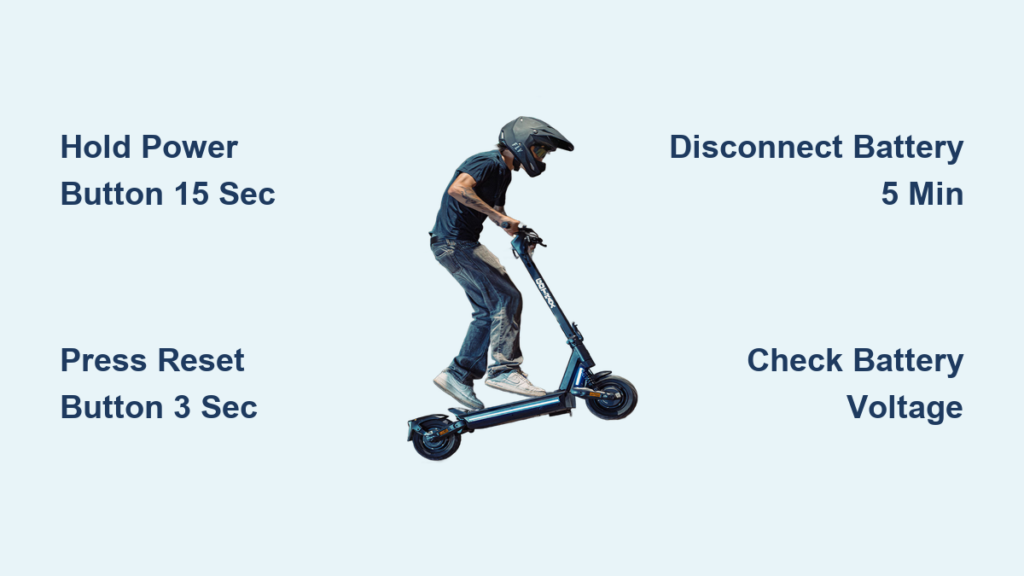
You’re ready to ride, but your Gotrax scooter won’t turn on. You press the power button, nothing happens. You try the reset button, still no response. Even worse, the charger light turns green in minutes, but the scooter stays completely dead. You’re not alone. Thousands of Gotrax scooter owners face the same issue: the reset button isn’t working, and the scooter appears completely unresponsive.
The good news is that in most cases, this isn’t a hopeless failure. The problem often stems from a low battery, charging fault, or system lockup, not a broken reset button. This guide will walk you through proven fixes for a non-responsive Gotrax scooter, covering all models. You’ll learn how to diagnose the real cause, perform effective resets, interpret error codes, and know when to contact support.
Perform a Power Button Reset

If your Gotrax scooter isn’t responding, start with the most reliable soft reset method: the power button hold. This forces the controller to reboot and clears temporary glitches.
Hold for 10-15 Seconds
Many users only press the power button briefly, but a 10-15 second hold is required to force a hard reset. This is especially effective if the scooter froze during use or won’t power on after storage.
Steps:
- Ensure the scooter is off and the kickstand is up.
- Press and hold the main power button.
- Keep holding for 10 to 15 seconds. Don’t release early.
- Wait 2-3 seconds, then press the button normally to turn it on.
Pro Tip: If the display flickers or lights up briefly during the hold, keep going. The system may be waking from a deep sleep state.
Try the 5-Second Flash Method
Some models respond better to a shorter cycle that triggers LED feedback.
Steps:
- Press and hold the power button.
- Watch for the LED lights to start flashing, usually within 5 seconds.
- Continue holding until the flashing stops completely.
- Release, wait 3 seconds, then power on.
Note: This method works best on G2, G3, and VIBE models. If nothing happens, move to a physical reset.
Use the Physical Reset Button
If the power button reset fails, your model may have a dedicated reset button. This is a small red pinhole near the charging port or battery pack.
Locate the Reset Button
- Common locations: Under a rubber flap near the charging port, on the battery casing, or inside the deck.
- Models with reset buttons: G2, G3, G4, APEX, XR Ultra, and sit-down variants.
- Tool needed: Use a paperclip, pin, or pen tip to press it.
Press for Exactly 3 Seconds
Steps:
- Turn off the scooter.
- Insert the tool and press the red button.
- Hold for exactly 3 seconds. Not longer, not shorter.
- Release and wait 10 seconds.
- Press the main power button to restart.
Warning: Don’t press repeatedly. One clean 3-second press is enough. Multiple attempts can confuse the system.
If nothing happens: The scooter may be too low on power to respond. Move to battery diagnostics.
Disconnect the Battery for a Hard Reset

When electronic resets fail, a physical battery disconnect is the most effective fix. This fully drains the controller’s capacitors and resets the BMS.
Access the Battery Compartment
- Removable battery models: G2, G3, G4, and sit-down scooters often have user-accessible batteries.
- Built-in battery models: G5, G6, XR Ultra may require removing screws from the deck plate.
Safety First: Always turn off the scooter before opening any panel.
Disconnect and Wait 5 Minutes
Steps:
- Power off the scooter.
- Open the battery compartment.
- Unplug the main battery connector from the controller.
- Wait at least 5 minutes. This ensures full discharge of residual power.
- Reconnect the plug firmly, ensuring no loose fit.
- Close the compartment and power on.
Why 5 minutes? Shorter waits may not clear the BMS lockout. This step is critical if the scooter has been deeply discharged.
Pro Tip: If the connector is corroded, clean it gently with a dry cloth. Never use water or alcohol.
Diagnose Charging Problems First
A non-working reset button is often a symptom, not the cause. If the battery is dead or the charger isn’t working, no reset will succeed.
Check for the Green Light Trap
If your charger turns green within 10 minutes, the battery is likely not charging. It’s a false signal.
What it means:
- The BMS has detected a fault, such as over-discharge or cell imbalance.
- The charger sees high resistance and defaults to charged mode.
- The scooter appears dead even when plugged in.
Fix: Leave it plugged in for 3-4 hours beyond the green light. If still unresponsive, test the battery voltage.
Test Battery Voltage with a Multimeter

A multimeter is the fastest way to confirm if your battery is alive.
Measure at the Charging Port
Steps:
- Set your multimeter to DC voltage, 20V or 50V range.
- Insert the red probe into the center pin of the charging port.
- Place the black probe on the outer metal ring.
- Read the voltage.
Expected readings for 48V models:
- Fully charged: 54V-56V
- Low but functional: 48V-52V
- Deeply discharged, BMS locked: Below 42V
- Dead or faulty: 0V-5V
If voltage is below 42V: The BMS has locked the battery to prevent damage. A standard charger cannot revive it.
Solution: Use a lithium battery revival mode charger or contact Gotrax support.
Inspect the Charging Port
A damaged charging port is a known issue, especially on the Gotrax G2.
Look for These Signs
- Loose connection when charger is inserted
- Bent or corroded pins inside the port
- Debris, dust, or lint blocking contact
- Physical wobble or cracks around the port
Clean the Port Safely
Steps:
- Unplug the scooter.
- Use a dry toothpick or compressed air to remove debris.
- Shine a flashlight to inspect pin alignment.
- Never use liquids. They can cause shorts.
If pins are bent: Gently straighten with tweezers. If the port is cracked or loose, it likely needs replacement.
Check for Error Codes on Startup

If the scooter powers on but shuts down quickly, it may display error codes that reveal the real issue.
VIBE, GXL V2, APEX Models
| Code | Meaning | Fix |
|---|---|---|
| E1 | Console communication failure | Clean or replace console |
| E2 | Brake lever stuck | Adjust or replace brake sensor |
| E4 | Motor failure | Replace motor wheel |
| E5 | Controller failure | Replace controller |
Action: If you see E4 or E5, do not ride. These can cause sudden power loss.
XR Ultra and XR Elite Error Codes
| Code | Meaning | Fix |
|---|---|---|
| 21E | Controller fault | Replace console |
| 23E | Motor signal loss | Replace motor |
| 30E | Communication error | Replace console |
Note: On these models, the console often acts as the controller interface. Replacing it resolves many system errors.
G5 and G6 Advanced Error Diagnostics
| Code | Meaning | Fix Sequence |
|---|---|---|
| E4 | Overcurrent/MOS fault | Replace controller, then battery if unresolved |
| E6 | Locked rotor | Replace controller, battery, then motor |
| E7 | Undervoltage | Replace battery first |
| E8 | Overvoltage | Replace battery or controller |
Critical: E6 and E7 often follow deep discharge. A battery reset may help, but replacement is common.
Rule Out Mechanical Lockouts
Even with power, safety features can prevent startup.
Kickstand Interlock Active
- The scooter won’t turn on if the kickstand is down or the sensor is dirty.
- Fix: Retract the kickstand fully. Clean the sensor area with a dry cloth.
Brake Levers Engaged
- Slightly pressed brakes signal stop to the system.
- Fix: Ensure both levers are fully released. Check for tight cables or stuck sensors.
Prevent Future Reset Failures
Charge Properly
- Always charge in a dry, room-temperature environment.
- Never leave the scooter plugged in for more than 12 hours.
- Use only the original Gotrax charger. Third-party chargers can damage the BMS.
Store with Partial Charge
- For storage over 2 weeks, keep the battery at 60-70%.
- Recharge every 4-6 weeks to prevent BMS lockout.
Avoid Water Exposure
- Even IP-rated scooters can fail if water enters connectors.
- Dry the charging port before plugging in after rain or washing.
When to Contact Gotrax Support
If you’ve tried all resets and diagnostics with no success, it’s time for professional help.
Warranty Eligibility
- New scooters under 1 month: Likely covered for battery or BMS failure.
- Proof of purchase required: Keep your receipt and serial number. The serial number is found under the deck or near the charging port.
Common Warranty Claims
- Battery not holding charge
- Charging port failure
- Controller or motor defects
Support Hours: Monday through Friday, 9 a.m. to 5 p.m. Central Time, US-based.
Tip: If your scooter is under warranty, do not attempt internal repairs. It voids coverage.
Key Takeaways for Fixing Your Gotrax Reset Button
A Gotrax scooter reset button not working is rarely about the button itself. In most cases, the root cause is low battery voltage, a faulty charger, or a BMS lockout from deep discharge. By following the steps above, starting with a 10-15 second power hold, checking for error codes, testing voltage, and performing a battery disconnect, you can diagnose and fix the real issue.
For newer models like the G5, G6, or XR Ultra, error codes provide precise guidance. For older models like the G2, port damage is common. Cleaning or replacement often resolves charging and reset failures.
If all else fails, contact Gotrax support with your serial number and a clear description of symptoms. With proper care, most scooters can be restored to full function. No replacement needed.
Frequently Asked Questions About Gotrax Scooter Reset Button Issues
Why is my Gotrax scooter not responding to the reset button?
Your scooter likely lacks sufficient power to respond. The battery may be deeply discharged below 42V, triggering a BMS lockout. Test the battery voltage with a multimeter or try a battery disconnect reset to clear the system.
How do I hard reset my Gotrax scooter?
Press and hold the main power button for 10-15 seconds. This forces a hard reboot of the controller. Alternatively, locate the small red reset button near the charging port, press it for exactly 3 seconds using a paperclip, then power on normally.
What does it mean if my charger turns green in 10 minutes?
It means the battery is not actually charging. The charger is detecting high resistance or a fault and defaulting to green. Leave it plugged in for 3-4 hours. If still unresponsive, the battery cells may be damaged or the BMS has locked the pack.
Can I fix a non-working reset button myself?
Yes, in most cases. Try the power button hold, physical reset button, and battery disconnect methods. Clean the charging port and check for error codes. If these fail, the issue is likely hardware, and you may need warranty support.
When should I contact Gotrax support?
Contact support if you’ve tried all reset methods, the battery voltage is below 42V and won’t recover, or error codes persist after troubleshooting. Have your serial number and proof of purchase ready.



