
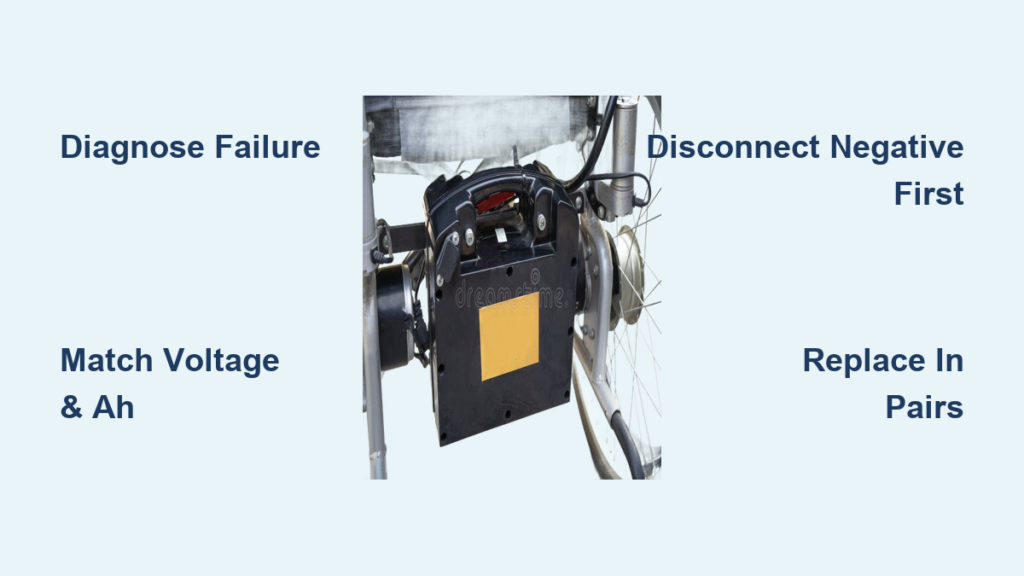
If your mobility scooter isn’t traveling as far as it used to, feels sluggish, or won’t hold a charge, the problem may be your battery. Knowing how to change a mobility scooter battery is a practical skill that keeps your device running reliably and extends its lifespan. Most mobility scooters use 24-volt systems powered by two 12-volt batteries, and replacing them isn’t as complicated as it seems with the right guidance. Whether you have a lightweight travel scooter or a heavy-duty model like the Pride Maxima, this guide walks you through diagnosing the issue, choosing the correct replacement, safely removing old batteries, installing new ones, and maintaining peak performance.
Diagnose Battery Failure Before Replacing

Before replacing your scooter batteries, confirm they are actually the problem. Other issues like faulty wiring or a bad charger can mimic battery failure.
Check for Common Symptoms
Look for these clear signs your batteries need replacement. Reduced range means you cannot complete your usual trips without power loss. Slow acceleration makes the scooter feel weak, especially on inclines. Rapid discharge causes the battery to drain quickly even after a full charge. Swelling or corrosion shows visible bulging or white or green crust on terminals. The charging light staying red or flickering indicates the battery is not accepting charge properly. If multiple symptoms appear together, battery replacement is likely needed.
Test With a Multimeter
Use a multimeter to check voltage before buying new batteries. A fully charged 12V battery should read 12.6 to 12.8V. Below 12.2V under load means the battery is failing. Test both batteries. If one reads significantly lower, replace both. Never skip diagnosis because replacing good batteries wastes money and does not fix underlying electrical issues.
Choose the Right Replacement Battery

Using incorrect batteries can damage your scooter motor, controller, or void the warranty. Match specifications exactly.
Match Voltage and Capacity
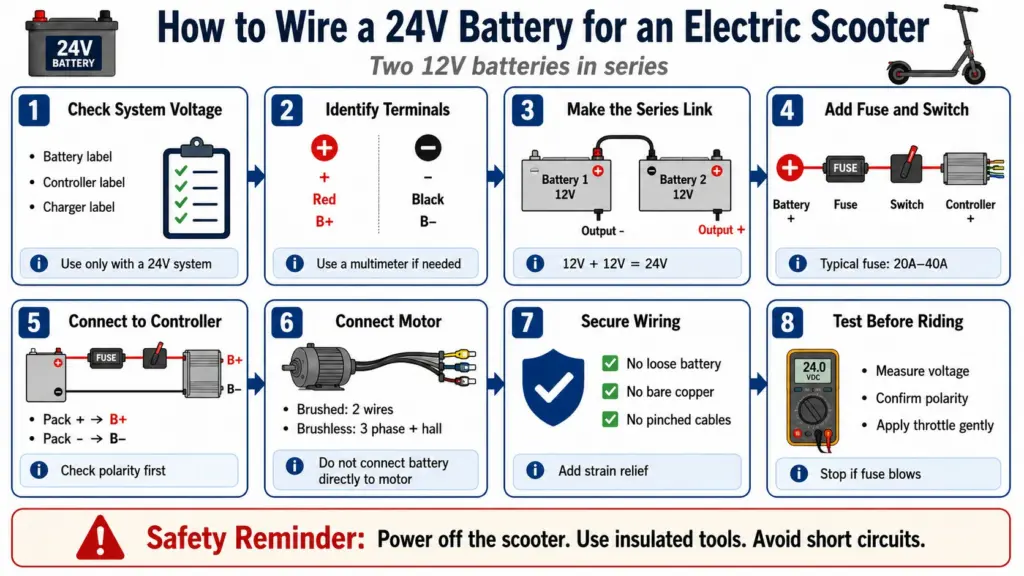
All batteries must match your scooter system. Voltage refers to the electrical force. Most scooters use 24V made from two 12V batteries in series. Amp-hours determines runtime. The 12Ah rating suits light use and short trips. The 18Ah to 35Ah rating is standard for mid-size scooters. The 50Ah to 75Ah rating fits heavy-duty models like the Pride Victory. The 55Ah rating is specific to Pride Maxima. The 100Ah rating provides maximum range but is very heavy. Higher Ah means longer range but increased weight and size. Always verify fit by measuring your battery tray before ordering.
Pick the Correct Chemistry Type
Each battery type has pros and trade-offs. Sealed Lead Acid batteries are heavy, last 1 to 2 years, and work best for budget-friendly standard use. AGM batteries are heavy, last 2 to 3 years, and offer better performance with vibration resistance. Gel batteries are heavy, last 2 to 3 years, and handle deep discharges for frequent long trips. Lithium-Ion batteries are 70% lighter, last 4 to 5 years, and suit frequent users who need easy portability. Lithium batteries cost more but last longer, charge faster, and are easier to handle. Confirm scooter compatibility because some require a voltage regulator or special charger.
Critical Replacement Rules
Avoid these costly mistakes. Always replace in pairs. Never mix old and new batteries. Use the same chemistry. Do not pair AGM with Gel or SLA. Use the same brand and age because batteries degrade together and mismatches cause imbalance. Verify dimensions by measuring your battery tray before ordering. When in doubt, contact your scooter manufacturer with the model and serial number for exact specs.
Prepare Tools and Safety Gear
Having the right tools and following safety steps prevents injury and damage to your scooter.
Gather Essential Tools
You will typically need these items. A Phillips screwdriver removes shrouds and covers. A 5/16-inch wrench fits Pride Go Sport terminals. A 10 mm wrench fits Pride Maxima flag posts. A socket wrench or pliers handles tight terminal bolts. Work gloves protect your hands because batteries weigh 15 to 40 lbs. A towel protects surfaces from scratches. Some kits include spanners and fasteners so keep them handy.
Follow Safety Protocols
Mobility scooter batteries deliver high current and one mistake can cause sparks or short circuits. Power off by removing the key and turning off the scooter. Unplug the charger always disconnect before starting. Remove jewelry because rings or watches can conduct electricity. Disconnect negative first this prevents accidental shorting. Reconnect positive first this ensures safe reassembly. Work in a dry well-lit area. Lift with your legs because batteries are heavy and awkward.
Access the Battery Compartment
Every scooter model hides the batteries differently. Know your type before starting.
Remove Seat and Covers
Start here for most models. Lift the seat lever or pull the handle to release. For captain seats on Maxima models, lift the right-side handle, recline forward, then lift straight up. Travel scooters have seats that lift off with the battery pack. Mid-size and heavy-duty models require removing floor panels or shrouds with screws. Place removed parts on a soft surface to avoid scratches.
Open Battery Enclosures
Types vary by model. Travel scooters like Go-Go style flip the battery box, remove six screws (2 front, 4 back), then two more for the shroud. Pride Go Sport models flip the pack, remove eight Phillips screws, then lift the cover. Victory Sport LX models need no tools. Grasp the edges of the cover and pop it off. Revo and Companion models unscrew the shroud, then access U-1 batteries directly. Always place covers face-down on a towel to protect internal wiring.
Remove Old Batteries Safely
Once exposed, extract the old units without damaging cables or terminals.
Disconnect Terminals in Order
This prevents sparks. Disconnect the negative (black) terminal first. Then disconnect the positive (red) terminal. Label cables if they are loose to avoid mix-ups. Use a wrench to loosen bolts. Catch falling washers. Some connectors slide off while others need full bolt removal.
Lift Out Batteries Carefully
Use built-in handles if available. For U-1 or large SLA batteries, lift straight out without tilting. Place old batteries on the floor immediately to avoid tipping. Inspect the compartment for corrosion or damaged wires. Clean terminals with a baking soda and water mix if needed.
Install New Batteries Correctly
Proper installation ensures safety, performance, and longevity.
Position Batteries in Tray
Match orientation. Positive goes to positive, negative goes to negative. Align terminals with cable reach. Do not force connections. For flag post terminals on Maxima models, insert the bolt through the post, add a washer, and tighten with a 10 mm wrench. For recessed posts, slide connectors on firmly. Double-check polarity. Red to red, black to black. Reversing polarity can fry the controller.
Secure and Reconnect
Connect the positive (red) terminal first. Then connect the negative (black) terminal. Tighten bolts securely because loose connections cause power loss. Snap on terminal covers to prevent shorts. Fasten with Velcro straps or bolts to stop movement. Ensure cables do not hang or rub against moving parts.
Reassemble and Test

Now put everything back together and verify function.
Reattach Covers and Seat
Slide shrouds into plastic lips and press until they click. For Maxima models, align the shroud, press down, then thread the Velcro strap through the loop and tighten. Reinstall the seat by aligning mounting posts and dropping into place. Reconnect any support columns or pins on ShopRider models. Make sure nothing is pinching wires.
Power On and Charge
Insert the key and turn on. Check for the power display. Do not ride yet. Plug in the charger. The light should turn red (charging) then green (full). Charge overnight before first use even if partially charged. Test drive after full charge. Monitor speed, range, and indicator lights.
Maintain Battery Longevity

Proper care doubles battery life and prevents premature failure.
Charge the Right Way
Charge after every use even for short trips. Overnight charging is safe because modern chargers auto-cut off. Do not leave the charger plugged in for days when not in use. Never operate while charging because it stresses the system.
Avoid Deep Discharge
Recharge when the scooter slows or the meter drops below half. Letting batteries die completely kills lead-acid units fast. For storage, charge monthly for scooters or every two weeks for power chairs.
Inspect and Secure Regularly
Check terminal tightness every 2 to 3 months. Clean corrosion with a toothbrush and baking soda mix. Ensure straps are tight because vibration damages loose batteries. Replace SLA batteries every 18 to 36 months. Replace lithium batteries every 4 to 5 years depending on use.
Recycle Old Batteries Responsibly
Mobility scooter batteries contain lead and acid. Never throw them in the trash.
Use Recycling Programs
Return old batteries to retailers like Mobility Scooters Direct or TGA. Take them to auto parts stores like AutoZone or Advance Auto. Use local recycling centers. Many sellers offer free recycling when you buy new ones. Recycling protects the environment and often complies with local laws.
Avoid Common Installation Errors
Even small mistakes can cause big problems.
Prevent These Mistakes
Wrong polarity causes damage. Double-check red to red, black to black. Loose terminals cause arcing, heat, and power loss. Mixing old and new batteries reduces efficiency and lifespan. Ignoring fitment means oversized batteries will not close or may crush wires. Skipping terminal covers risks short circuits from metal objects. When unsure, consult a service center or watch a model-specific YouTube video.
Seek Professional Help When Needed
DIY is cost-effective but some situations require experts.
When to Call a Technician
Call a professional if you are uncomfortable handling heavy batteries. Call if the scooter still fails after replacement. Call if you suspect controller, wiring, or charger issues. Call if your model has complex wiring like lithium conversion. Most local mobility shops offer battery replacement for $50 to $100 including disposal.
For visual learners, search these terms. Pride Go-Go battery replacement. Pride Maxima battery install. Victory Sport LX battery change. Manufacturer channels often have step-by-step videos.
Frequently Asked Questions About Changing Mobility Scooter Batteries
How do I know if my mobility scooter battery needs replacing?
Look for reduced range where the scooter cannot complete usual trips. Watch for slow acceleration or sluggish performance. Check for rapid discharge after a full charge. Look for visible swelling or corrosion on terminals. The charging light staying red or flickering also indicates problems. Multiple symptoms together strongly suggest battery replacement is needed.
Can I replace just one battery in my mobility scooter?
No, always replace both batteries at the same time. Mixing old and new batteries causes imbalance and reduces the lifespan of both. Using batteries from different manufacturers or with different expiry dates creates the same problem. Both batteries degrade together so replacing them as a pair ensures consistent performance.
What voltage battery does a mobility scooter use?
Most mobility scooters use a 24-volt system constructed from two 12-volt batteries connected in series. The voltage must match exactly. Using incorrect voltage can destroy the motor or electronics. Always check your user manual or the label on your existing batteries to confirm the correct voltage.
How long do mobility scooter batteries last?
Sealed Lead Acid batteries typically last 18 to 36 months depending on use. AGM and Gel batteries last 2 to 3 years. Lithium-Ion batteries last 4 to 5 years, which is up to 5 times longer than SLA. Lifespan depends heavily on usage frequency, charging habits, and maintenance practices.
Can I use a car battery in my mobility scooter?
No, never use car batteries or leisure batteries in a mobility scooter. They are not designed for the specific requirements of mobility devices. Car batteries have different voltage and amp-hour specifications. They may not fit the battery compartment physically. Using incompatible batteries can damage electronics or create safety hazards.
Key Takeaways for Changing Your Mobility Scooter Battery
Changing a mobility scooter battery is a straightforward task with lasting benefits. By diagnosing correctly, you avoid wasting money on unnecessary replacements. Choosing the right replacement means matching voltage, amp-hours, and chemistry type exactly. Following safety steps like disconnecting negative first prevents sparks and damage. Maintaining your new batteries through proper charging and regular inspection doubles their lifespan.
Whether you are upgrading to lightweight lithium or sticking with trusted SLA, this process keeps you independent and on the move. Always recycle old units responsibly. Charge properly after every use. Inspect connections regularly. Your scooter performance depends on these simple habits. If you feel unsure at any step, professional installation is available for a reasonable cost and ensures your safety.



