
You’re cruising down a long, winding hill when your brake lever starts to feel spongy. The heat builds, the pads fade, and suddenly you’re relying entirely on friction to slow down, dangerous and unsustainable. This is where engine braking a scooter becomes essential. Unlike cars or manual motorcycles, automatic scooters don’t engine brake passively. Most riders assume they can’t engine brake at all, but they’re wrong. With the right technique, you can harness your scooter’s transmission to slow down safely, reduce brake wear, and maintain control on descents.
The key lies in understanding your scooter’s centrifugal clutch and CVT system. When done correctly, engine braking keeps the rear wheel connected to the engine, creating resistance that naturally limits speed. But if you simply close the throttle, your scooter disengages into neutral, free-wheeling dangerously downhill. This guide reveals exactly how to engine brake a scooter using precise throttle control, explains the science behind it, and gives you actionable steps to apply it safely, especially on automatic models.
Maintain 2,000 RPM for Engagement
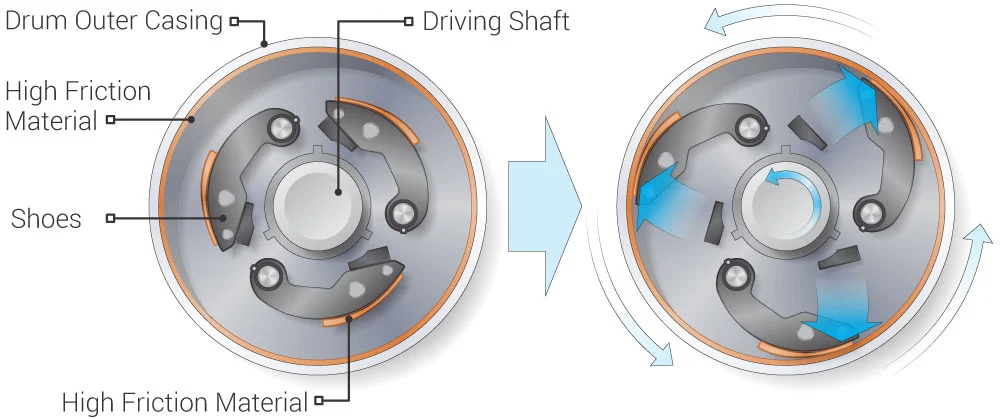
To activate engine braking on an automatic scooter, you must keep the engine spinning fast enough to engage the centrifugal clutch. Below 2,000 RPM, the clutch disengages and the scooter free-wheels. Above it, the clutch shoes stay expanded, creating drag against the rear wheel.
Why 2,000 RPM Is Critical
At idle, typically 1,200 to 1,800 RPM, centrifugal force is too weak to push the clutch linings outward. They retract, breaking the mechanical link between engine and wheel. But at 2,000 to 2,500 RPM, the spinning force overcomes spring tension, keeping the linings in contact with the clutch cup. Even when the wheel spins faster than the engine, like on a downhill, the friction between lining and cup creates resistance, slowing the scooter.
This isn’t power transmission. It’s reverse drag. The engine acts like a speed governor, absorbing kinetic energy and converting it into heat. You’ll feel a steady deceleration, not a sudden jolt.
How to Hold the Right RPM
• Don’t close the throttle completely. Instead, roll it back just enough to stop accelerating, then add a slight twist to maintain engine speed.
• Listen to the engine note. It should stay low and steady, like a soft hum, not drop to a quiet idle.
• Use your tachometer if available. Aim for 2,000 to 2,500 RPM. If your scooter lacks a gauge, practice on a flat road to learn the throttle position that holds this range.
Pro Tip: On long descents, rest your wrist lightly on the handlebar so your hand doesn’t drift and close the throttle accidentally. A small, consistent input is all it takes.
Use Slight Throttle to Prevent Free-Wheeling
Most riders instinctively close the throttle when slowing down. On a scooter, this kills engine braking and puts the vehicle in neutral, especially dangerous on hills.
What Happens When You Close the Throttle
• Engine RPM drops below 2,000.
• Clutch linings retract due to lost centrifugal force.
• Rear wheel spins independently with no engine resistance.
• Scooter accelerates under gravity, forcing you to rely on brakes alone.
This is free-wheeling, and it’s the leading cause of brake fade on long descents.
How to Avoid It
• Apply maintenance throttle. Keep just enough twist to sustain RPM.
• Think hold, not coast. You’re not accelerating. You’re preventing disengagement.
• Feel for resistance. When engine braking works, you’ll sense a gentle pull against forward motion, like light drag.
Warning: Never assume your scooter is engine braking just because it’s in gear. If the throttle is closed, it’s likely free-wheeling.
Combine with Mechanical Brakes for Control
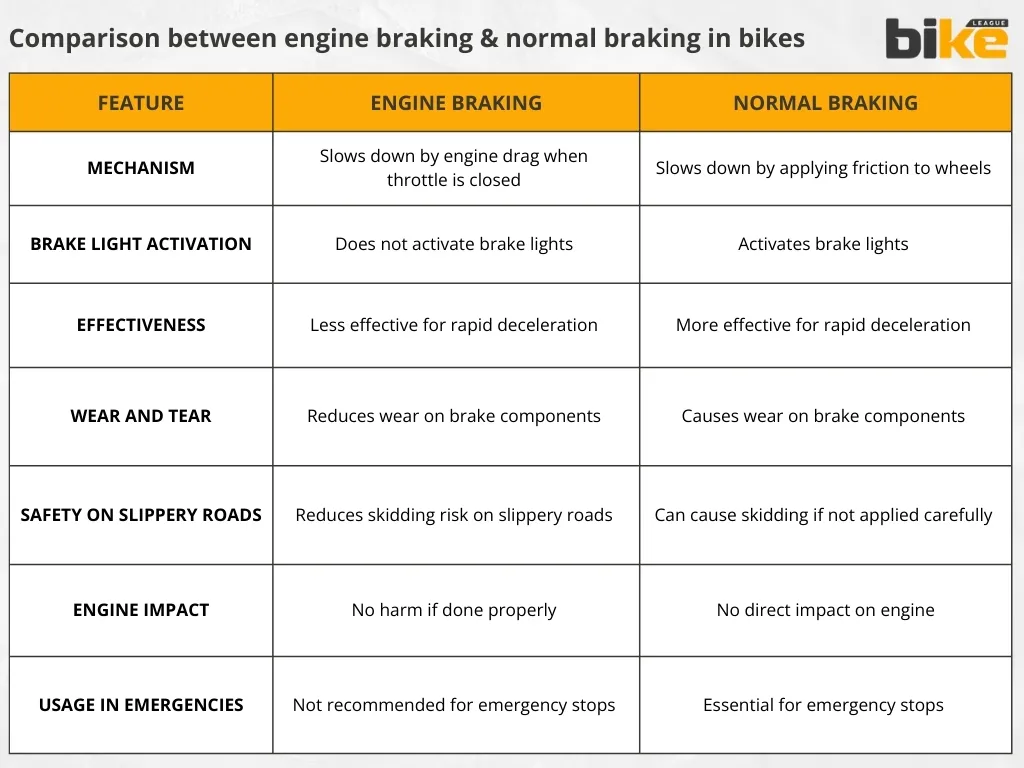
Engine braking isn’t a replacement for brakes. It’s a partner. Use both together for maximum safety and control.
When to Use Each
| Scenario | Primary Method | Supplement |
|---|---|---|
| Long downhill | Engine braking | Light brake taps |
| Sharp turn | Mechanical brakes | Downshift if manual |
| Emergency stop | Full brakes | Engine drag if engaged |
| Low speed under 15 km/h | Mechanical brakes | None |
Brake-Saving Strategy
- Initiate descent with slight throttle to engage engine braking.
- Let engine resistance control speed. Aim to hold 30 to 40 km/h on moderate hills.
- Apply brakes intermittently if speed increases.
- Pulse the brake lever, 1 to 2 seconds on and 3 to 5 seconds off, to prevent overheating.
Expert Note: On steep grades, engine braking alone may not suffice. Always keep fingers on the brake levers, ready to act.
Recognize When Engine Braking Fails
Even with correct technique, engine braking has limits. Know the signs it’s not working.
Warning Signs
• Scooter accelerates despite throttle input. RPM dropped too low.
• Engine note drops suddenly. Clutch disengaged.
• No drag felt. Free-wheeling. Re-engage immediately.
How to Fix It
• Gently increase throttle to 2,500 RPM.
• Feel for resistance return. A slight tug on the drivetrain indicates engagement.
• Stabilize throttle once engagement is restored.
Critical: If the hill is too steep for your engine size, like a 50cc on a 10% grade, mechanical braking is mandatory. Don’t rely solely on engine braking.
Prevent Brake Fade on Long Descents
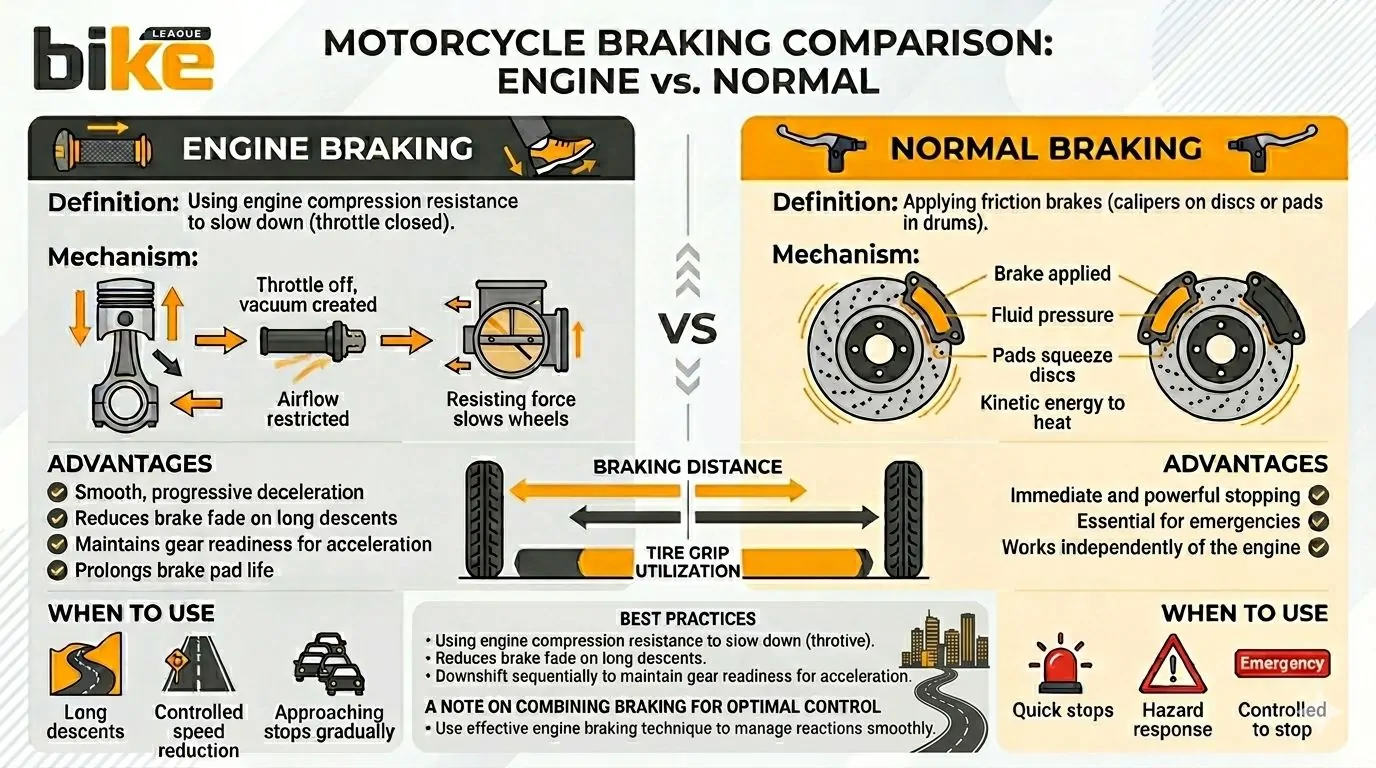
Brake fade occurs when pads overheat and lose stopping power. Engine braking shifts thermal load from brakes to engine and clutch.
How Engine Braking Protects Brakes
• Reduces mechanical brake usage by 60 to 80% on moderate hills.
• Prevents pad glazing and rotor warping.
• Extends brake pad life by thousands of kilometers.
Real-World Example
A rider descending a 5 km hill without engine braking applies brakes continuously. Pads reach over 300°C and fade occurs. With engine braking, brakes are used only 2 to 3 times. Pads stay under 150°C and full function is retained.
Data Point: Studies show engine braking reduces brake temperature by up to 40% during prolonged deceleration.
Debunk Common Misconceptions
Many riders misunderstand how engine braking works on scooters. Let’s clear up the myths.
Automatic Scooters Can’t Engine Brake
False. They can, but only with rider input. Unlike manual bikes, automatic scooters don’t stay engaged when throttle is closed. You must actively maintain RPM to keep the clutch connected.
Engine Braking Charges the Battery
False. On gas scooters, no energy is recovered. The resistance creates heat, not electricity. In fact, maintaining higher RPM uses slightly more fuel, about 5 to 7% more in aggressive braking scenarios.
It Damages the Engine
False. Engine braking is safe when done correctly. The added heat is within design limits. However, cold engines should be warmed up first because cold oil flows poorly, affecting clutch engagement.
Troubleshoot Engine Braking Issues
If your scooter isn’t responding as expected, diagnose these common problems.
Problem: Scooter Accelerates Downhill
• Cause: Throttle fully closed, RPM under 2,000, clutch disengaged.
• Fix: Apply slight throttle to re-engage.
Problem: Jerky or Lurching Sensation
• Cause: Clutch engaging and disengaging rapidly, known as hunting.
• Fix: Stabilize throttle. Avoid small hand tremors. Check idle speed, which may be too low.
Problem: No Resistance Even at High RPM
• Cause: Worn clutch linings, damaged sprag clutch, or broken drive belt.
• Fix: Inspect clutch assembly. Replace worn parts.
Diagnostic Tip: On flat ground, roll off throttle and listen. A healthy clutch produces a noticeable engine drag sound. Silence means disengagement.
Key Takeaways for Engine Braking Your Scooter
Mastering engine braking transforms your descents from risky to controlled. The core technique is simple: maintain 2,000 to 2,500 RPM using slight throttle to keep the centrifugal clutch engaged. This creates drag that slows your scooter naturally without overwhelming your brakes. Combine this with light, intermittent brake use on steep hills, and you’ll prevent brake fade while extending component life. Remember that automatic scooters require active rider input, unlike manual motorcycles. Avoid the common mistake of closing the throttle completely, which causes dangerous free-wheeling. Practice the slight throttle technique on flat roads first, then apply it on gradual descents before tackling steep grades. Your brakes will last longer, your control will improve, and you’ll ride more confidently on any hill.



