
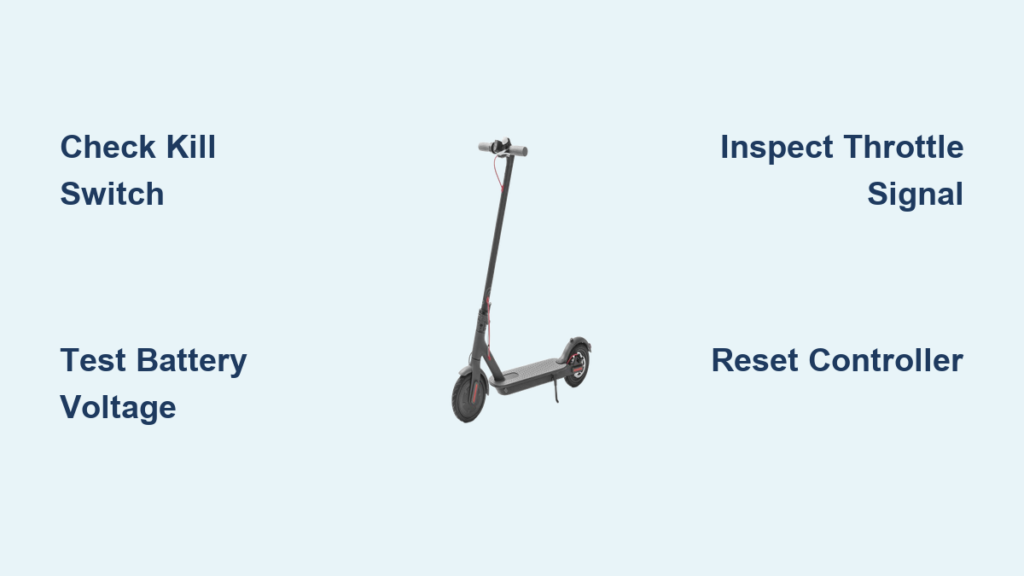
Your electric scooter powers on, lights illuminate, the display shows battery level, but when you twist the throttle, nothing happens. No lurch forward, no motor hum, just silence. This frustrating “power on, no move” scenario is one of the most common electric scooter problems, and the good news is that most cases are fixable at home without replacing the entire unit.
This guide walks you through every possible cause of this issue, from simple safety settings to electrical component failures. You’ll learn how to systematically diagnose each system, test with common tools like a multimeter, and determine whether you need a replacement part or a professional repair.
Check Safety Features First

Before diving into complex diagnostics, rule out simple safety locks that can prevent movement.
Disable Zero-Start Mode
Some scooters require you to push off before the motor engages. If Zero-Start or Kick-to-Start is enabled, the scooter won’t respond to throttle input until it detects motion.
Fix:
• Access settings via the scooter’s display or companion app
• Look for “Zero Start,” “Kick Start,” or “Push Assist” settings
• Disable it for immediate throttle response
Pro Tip: If your scooter suddenly stopped moving after a firmware update, check this setting first.
Test the Kill Switch
A forgotten kill switch can mimic a dead motor. Some models have a physical switch near the handlebars or deck that disables the motor while leaving electronics powered.
Action:
• Locate the kill switch on your model
• Ensure it’s in the “Run” (off) position
• Toggle it a few times to reset the contact
Verify Battery and Charging System

A weak or failing battery is the number one reason for no movement, even if the display lights up. Many riders assume that lights working means the battery is healthy, but a battery can have enough voltage for low-draw electronics while lacking the amperage required to engage the motor under load.
Confirm Full Charge
Low voltage can power the display but not the motor. Always start with a full charge.
Steps:
1. Plug in the charger for 6 to 8 hours, even if the indicator shows green
2. Try a deep charge if the scooter was fully drained: leave connected for 48 to 72 hours
3. Use only the original or compatible charger with matching voltage and Ah rating
Warning: A green light does not guarantee a healthy battery. Some chargers show green if the battery voltage is too low to accept proper charge.
Test Battery Voltage
Use a multimeter to check voltage at the battery terminals.
What to look for:
• Idle voltage should match the label (such as 36V or 48V)
• Under load, voltage should not drop more than 10 to 15 percent of nominal
• A 36V battery dropping to 30V under load likely has dead cells
Example: A scooter that runs when the wheel is in the air but stops immediately when a rider sits on it indicates battery voltage cannot be maintained under load.
Inspect for Corrosion and Loose Connections
Corroded or loose terminals break the power circuit and prevent adequate current flow.
Check:
• Battery connectors for greenish-white buildup (corrosion)
• Bent pins or frayed wires at all plug-in points
• Secure fit of all connectors leading to the controller
Fix:
• Clean with a dry cloth or fine sandpaper
• Re-seat all connectors firmly until they click into place
Replace Old Battery
Batteries typically last 1 to 3 years or 300 to 500 charge cycles. If your battery is older than 2 years and exhibiting power issues, replacement is often the most cost-effective solution.
Rule of Thumb: If the scooter only works when the charger is plugged in, the battery is dead and needs replacement.
Diagnose Throttle Response

No throttle signal means no motor activation. Even if the throttle looks physically fine, internal issues can block communication with the controller.
Perform the Wiggle Test
Intermittent connection issues often go undiagnosed with simple visual inspection.
Steps:
1. Power on the scooter
2. Gently wiggle the throttle and its wiring harness
3. Slowly twist the throttle while watching for motor response
If the motor responds intermittently: The connection is loose, corroded, or the throttle connector needs reseating.
Fix: Disconnect and reconnect the throttle connector at the handlebar and at the controller. Ensure the plug is fully seated.
Measure Throttle Output Voltage
Use a multimeter to test the signal voltage from throttle to controller.
Expected range: 0V at idle to 5V at full twist
How to test:
1. Locate the throttle’s three-wire connector (red is power, black is ground, green or yellow is signal)
2. Back-probe the signal and ground wires with the multimeter
3. Twist the throttle slowly while observing voltage readings
No voltage change? The throttle or its internal Hall sensor is faulty and needs replacement.
Internal Issue: If the magnet inside the throttle is loose or misaligned, it won’t trigger the sensor. Open the throttle housing carefully and reposition the magnet, or replace the entire throttle assembly.
Check for Error 03
Many scooters display Error 03 for throttle-related faults.
Fix:
• Reconnect all throttle wires securely
• Replace the throttle if the error persists after reseating connections
Inspect Brake Sensors

Brake sensors cut power to the motor when engaged. If a sensor is stuck in the “on” position, the scooter will refuse to move even with valid throttle input.
Manually Test the Brake Switch
Most scooters have a small plunger switch located under or near the brake lever.
Test:
1. Locate the brake sensor switch
2. Press it manually with your finger to simulate brake release
3. Try the throttle while holding the switch in the released position
If the scooter moves: The brake lever isn’t fully releasing the switch, creating a constant “brake on” signal.
Common causes:
• Stretched brake cable preventing full lever return
• Misaligned switch position
• Dirt or debris blocking the plunger from moving freely
Fix:
• Clean the switch with compressed air
• Adjust brake cable tension so the lever returns fully to rest
• Replace the switch if cleaning and adjustment don’t resolve the issue
Post-Crash Note: After any fall or impact, brake sensors can become jammed or shorted. Always inspect brake function after any crash scenario.
Examine Controller and Fuses
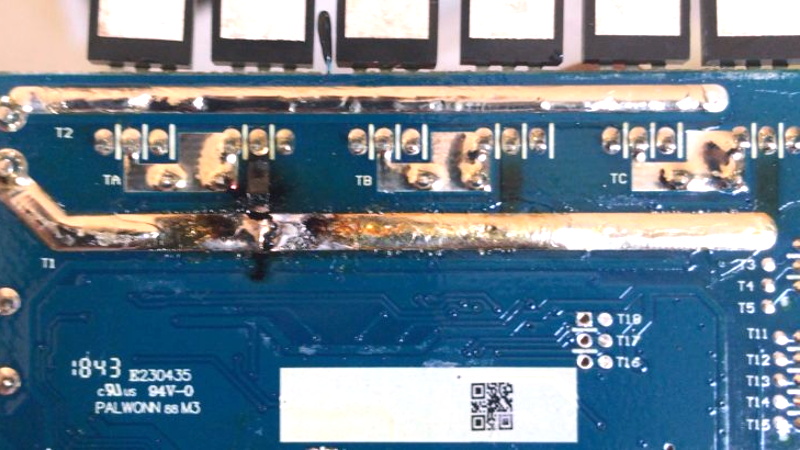
The controller is the brain of your electric scooter. If it fails, no signal reaches the motor, even with perfect battery and throttle function.
Look for Physical Damage
Open the deck panel (if accessible) and inspect the controller unit.
Signs of failure:
• Burnt smell coming from the controller area
• Melted wires or connectors near the controller
• Discolored circuit board
• Bulging or popped capacitors
• Visible burn marks on the MOSFET transistors
Melted Connectors: This often indicates the motor was overloaded (riding uphill, through mud, or with dragging brakes), causing excessive heat buildup that damaged the controller.
Test the Fuse
A blown fuse cuts power to the motor circuit completely.
Where to find it:
• Near the battery pack inside the deck
• On the controller board itself
• In-line with the main power wire
Check:
• Remove the fuse and inspect visually for a broken filament
• Use a multimeter set to continuity mode to test
• Replace only with the same amperage rating
Never bypass a fuse with wire or a higher amperage fuse, as this creates a fire hazard.
Reset the Controller
Software glitches can cause the controller to enter a fault state.
Steps:
1. Turn off the scooter completely
2. Disconnect the battery for 30 to 60 seconds
3. Reconnect the battery and power on
Works for: Temporary signal errors, error codes that won’t clear, or boot loops where the scooter keeps restarting.
Inspect Wiring and Connections
Folding scooters suffer from wire fatigue at hinges and stress points. Every flex cycle weakens connections.
Check High-Stress Zones
Focus your inspection on these areas:
• Handlebar stem and folding joint
• Connection points near the motor hub
• Battery terminal connections
Look for:
• Frayed or pinched wires (especially near folding mechanisms)
• Loose connectors that don’t click into place
• Green corrosion on metal plugs
• Melted insulation on any wires
Action:
• Re-seat all connectors, pushing firmly until you hear a click
• Secure loose wires with zip ties to prevent further movement
• Replace any damaged cables with exact-match replacements
Pro Tip: With the scooter powered on (safely), gently wiggle wires while observing the motor. Any response indicates an intermittent connection that needs attention.
Test Motor and Mechanical Drive
If electrical signals are confirmed good but the wheel still doesn’t move, the issue is mechanical.
Lift and Test the Wheel
- Lift the scooter so the rear wheel spins freely off the ground
- Power on and twist the throttle
If the wheel spins freely: The motor and electrical system work correctly. The problem is mechanical under load.
If the wheel doesn’t spin: The motor, controller output, or wiring to the motor has a fault.
Listen for Hum or Click
A humming motor means power is reaching it, but mechanical resistance is preventing rotation.
Possible causes:
• Seized wheel bearings
• Jammed gear inside a geared motor
• Broken phase wire inside the motor housing
• Freewheel clutch failure
Check the Freewheel Clutch
If the motor spins but the wheel doesn’t turn, the freewheel clutch is likely defective.
Test: Manually push the scooter forward. Does the motor spin independently of the wheel?
Fix: Replace the freewheel clutch assembly or the entire motor if the clutch is integrated.
Inspect Belts, Chains, and Sprockets
For belt or chain-driven scooters, inspect the entire drivetrain.
Check:
• Is the belt off-track, loose, or torn?
• Are chain links rusted or stiff?
• Are sprocket teeth worn down or missing?
Fix: Realign, tension, or replace drivetrain components as needed.
Rule Out Brake Drag
Even slight brake pad contact creates enough resistance to prevent movement or trip the controller’s protection circuits.
Test:
• Lift the wheel off the ground
• Spin it by hand and observe how long it rotates
If it stops quickly: The brakes are dragging and need adjustment.
Fix: Loosen the brake cable adjuster or reposition the brake caliper so pads don’t contact the rotor when released.
Decode Error Codes and Reset System
Modern scooters use error codes to help pinpoint specific failures.
Common Error Codes
• E1 or Error 01: Motor fault
• E2 or Error 02: Controller fault
• E3 or Error 03: Throttle fault
• E4 or Error 04: Battery voltage low
Action: Consult your user manual for model-specific error code meanings, as codes vary by manufacturer.
Perform a Hard Reset
Clear temporary software glitches before replacing any parts.
Steps:
1. Turn off the scooter
2. Unplug the battery connection for 1 to 5 minutes
3. Reconnect everything
4. Power on and test
Try this before replacing parts. A hard reset fixes many unexplained “no move” issues and is often the simplest solution.
When to Seek Professional Help
Some repairs require expertise, special tools, or professional service.
Replace Controller or Motor
Consider professional replacement or warranty service if:
• Multimeter shows no voltage output from the controller to the motor
• Motor has no continuity when tested
• Internal motor windings show burn marks or smell burnt
• The motor makes grinding or scraping sounds internally
Note: Match replacement specs exactly. The new controller must match the original voltage, phase count, and connector type.
Firmware Update
Some scooters need a firmware update after battery or controller replacement.
How:
• Download the manufacturer’s app (Xiaomi, Segway, Apollo, or others)
• Connect via Bluetooth and follow on-screen instructions
• Do not interrupt the update process
Prevent Future Failures
Avoid repeat breakdowns with these simple maintenance habits.
Charge Smart
• Don’t drain the battery to 0% regularly
• Charge every 1 to 2 months if the scooter is in storage
• Never leave the battery uncharged for more than 6 months
• Perform a deep charge (48 to 72 hours) once every few months
Avoid Overloading
• Stay under the manufacturer’s weight limit
• Avoid steep hills that strain the motor
• Don’t ride through deep mud, sand, or standing water
Store Properly
• Keep in a dry, room-temperature environment
• Cover to prevent dust and moisture buildup
• Avoid extreme temperatures (very hot or very cold storage)
Monthly Checkup
• Inspect all wires and connectors for damage
• Test brakes and throttle response
• Check tire pressure and inflate to recommended PSI
• Verify all bolts and clamps are tight
Frequently Asked Questions About Fixing an Electric Scooter Not Moving
Why does my electric scooter turn on but not move when I twist the throttle?
This usually indicates a power delivery or signal issue. The most common causes are a weak battery that can’t provide enough current under load, a faulty throttle that isn’t sending a signal to the controller, or a brake sensor stuck in the “on” position. Start by checking the battery charge level and testing the throttle output with a multimeter.
How do I know if my scooter battery is dead versus the controller being faulty?
If your scooter only runs when the charger is plugged in, the battery is almost certainly dead and needs replacement. If the display shows full charge but the scooter won’t move under rider weight, test the battery voltage under load with a multimeter. A healthy battery should maintain voltage within 10 to 15 percent of its nominal rating when accelerating.
Can I fix a throttle that isn’t working myself?
Yes, most throttle issues are fixable at home. Start with the wiggle test to check for loose connections. If the throttle is loose internally, you can open the housing and reposition the magnet. If the Hall sensor is faulty, replace the entire throttle assembly with a compatible model.
What does Error 03 mean on my electric scooter?
Error 03 typically indicates a throttle fault. This means the controller isn’t receiving a valid signal from the throttle. Fix it by reseating all throttle connections, cleaning any corrosion, and replacing the throttle if the error persists.
Should I try to repair a burnt controller myself?
No. A burnt or damaged controller typically indicates underlying issues (overloading, water damage, or prolonged stress) that may have also damaged other components. Controller replacement requires matching exact specifications, and improper installation can cause further damage. Seek professional repair or replacement.
How long do electric scooter batteries last?
Most electric scooter batteries last 1 to 3 years or 300 to 500 charge cycles, whichever comes first. Battery lifespan depends on usage patterns, charging habits, and storage conditions. If your scooter is more than two years old and showing power issues, the battery is likely near end of life.
Key Takeaways for Fixing Your Electric Scooter Not Moving
An electric scooter that powers on but won’t move is usually fixable at home. Start with the simplest checks: disable Zero-Start mode, verify a full battery charge, and test the kill switch. Then systematically work through throttle function, brake sensor status, and controller output. With a multimeter and basic tools, you can diagnose 90 percent of these issues without professional help.
The battery is the most common culprit, so test voltage under load rather than relying on display indicators. Save the repair shop for burned controllers, failed motors with internal damage, or situations where you lack the tools to safely test electrical components. Keep your scooter rolling with regular maintenance, smart charging habits, and prompt attention to any warning signs.



