
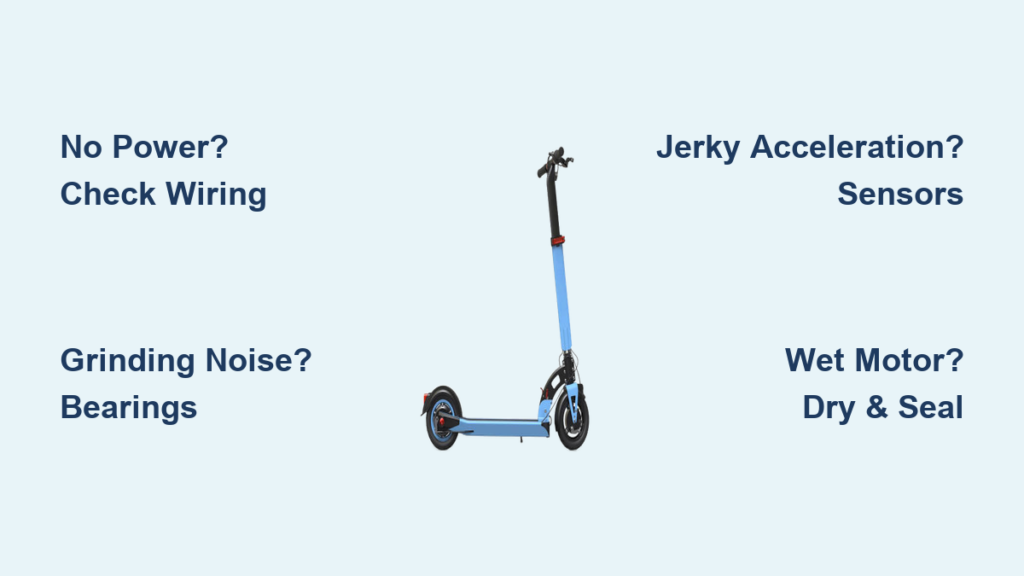
Is your electric scooter struggling to start, losing power, or making strange noises? You are not alone. Electric scooter motor repair is one of the most common maintenance tasks riders face, especially as scooters age or endure rough terrain. Whether you are dealing with a motor that will not spin, jerky acceleration, or grinding sounds, most issues stem from predictable causes like wiring faults, sensor failures, worn bearings, or water damage.
The good news? Many motor problems can be diagnosed and fixed at home with basic tools and a multimeter. This guide walks you through every step, from identifying symptoms to performing targeted repairs, so you can avoid costly replacements and get back on the road fast.
Diagnose Motor Failure Fast
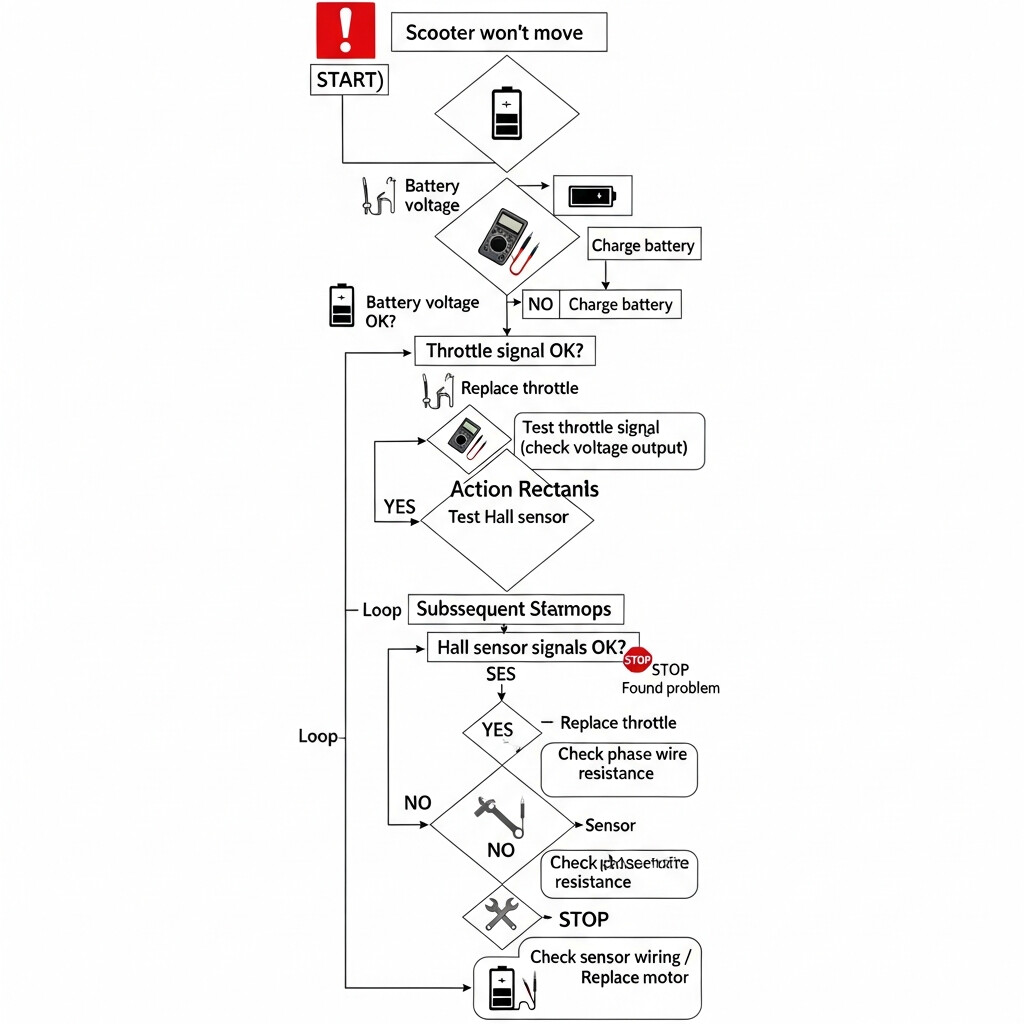
Identifying the root cause saves time and prevents unnecessary part swaps. Most electric scooter motor issues fall into clear symptom categories, each pointing to specific internal or electrical faults.
No Power? Check These First
If the motor does not spin at all, start with the simplest explanations before diving into complex diagnostics.
- Verify battery charge: A fully drained battery mimics motor failure. Plug in and confirm the charger indicator works.
- Inspect wiring harnesses: Look for frayed, pinched, or disconnected wires near the wheel hub, stem, or deck joints.
- Test throttle response: Engage the throttle while listening for a faint click from the controller. No sound may indicate a dead throttle or controller fault.
- Check fuse and power switch: Some models include an inline fuse or resettable breaker. Test continuity with a multimeter.
Only after ruling out these upstream issues should you focus on the motor itself.
Low Power or Weak Acceleration Causes
When your scooter struggles uphill or feels sluggish, the problem often lies outside the motor.
- Low battery voltage: Even a partially charged battery can cause weak performance under load. Use a multimeter to measure voltage under throttle.
- Failing Hall sensors: These magnetic sensors tell the controller when to energize each coil. Misfiring sensors cause hesitation and reduced torque.
- Partial winding damage: Internal wire breaks increase resistance, reducing efficiency and power output.
- Controller limits: Some scooters throttle performance after repeated overheating. Reset by powering off and cooling down.
Grinding or Whining Noise Sources
Unusual sounds mean mechanical wear. Do not ignore them, as continuing to ride risks permanent damage.
- Worn bearings: The most common cause. As bearings degrade, they create friction and noise.
- Rotor scraping stator: If the motor housing is dented or misaligned, magnets may rub against the coil pack.
- Debris inside hub: Dirt, pebbles, or metal fragments trapped between rotor and stator cause grinding.
Lift the wheel and spin it by hand. If you feel resistance or hear grinding, disassemble for inspection.
Jerky or Uneven Acceleration Fix
This erratic behavior almost always points to Hall sensor failure. Sensors send position data to the controller, and if one fails, the timing is off, causing stuttering.
- Test each sensor with a multimeter while slowly rotating the wheel. A healthy sensor toggles between 0V and battery voltage.
- Intermittent wiring can mimic this. Wiggle wires while testing to reveal loose connections.
- Replace faulty sensors or consider full motor replacement if integrated.
Essential Tools and Safety Steps
You cannot fix what you cannot test. Having the right tools ensures accurate diagnosis and safe repairs.
Must-Have Repair Tools
Skip guesswork with this core toolkit:
- Digital multimeter: Test voltage, continuity, and resistance across wires and sensors.
- Phillips and flathead screwdrivers: For housing removal and terminal access.
- Wire strippers and cutters: Prepare new wires cleanly without damaging conductors.
- Bearing puller and installer set: Critical for removing and pressing in new bearings without damage.
- Electrical tape and heat shrink tubing: Seal splices and protect connections from vibration.
- Lubricant (lithium or marine-grade grease): For bearings and moving parts.
Optional but helpful: flexible bore light, magnetic tray, and cable ties for wire management.
Safety First: Avoid Injury
Electric scooter motors carry real risks, especially hub motors with powerful magnets.
- Disconnect the battery first: Always unplug the main power connector before touching any wires.
- Beware of pinch hazards: When opening a hub motor, the rotor magnets can snap violently toward the stator. Keep fingers clear.
- Do not open sealed units unless experienced: Many modern hubs are potted or pressurized. Breaking the seal may make reassembly impossible.
- Wear safety goggles and gloves: Protect against sharp metal edges and flying debris during disassembly.
Never attempt live testing without proper insulation and precautions.
Repair Wiring and Connection Faults

Wiring failures are the number one cause of motor issues, especially in scooters like Zero S and Ninebot where flexing fractures internal wires.
Find Broken Wires with Multimeter
Start with continuity testing:
- Set multimeter to continuity mode.
- Test all three phase wires from controller to motor.
- Test five Hall sensor wires individually.
- Gently bend and twist the wire near the hub entry point. If the beep cuts out, you have found an internal break.
This method reveals invisible fractures hidden inside insulation.
Replace Damaged Wires Safely
Never splice inside the motor housing. Follow this external repair method:
- Cut off damaged wire section near the connector.
- Remove old insulation from the motor side using pliers.
- Thread a new 16-18 AWG stranded wire through the housing using a thin steel wire or fish tape.
- Connect the new wire to the terminal outside the motor using crimp connectors or solder.
- Secure with electrical tape and route carefully to avoid pinching during reassembly.
- Use a strain relief clamp or zip tie to prevent tension on the connection.
Pro tip: Use reinforced wire loom to protect repaired sections from future flexing.
Prevent Future Wire Fatigue
- Avoid sharp bends when routing wires.
- Leave a small service loop near the hub to absorb movement.
- Secure wires with zip ties every 6-8 inches.
- Apply dielectric grease to connectors to prevent corrosion.
Replace Worn Motor Bearings
Grinding noise or motor drag? Worn bearings are likely the culprit. Replacement restores smooth operation and prevents overheating.
Signs of Bearing Failure
- Audible grinding or whining during rotation
- Excessive side-to-side play in the wheel
- Motor feels hot after short rides
- Increased rolling resistance
Spin the wheel by hand. Any roughness or catching means bearings need replacement.
Bearing Replacement Step-by-Step
- Remove the wheel and disassemble the motor housing.
- Use a bearing puller to remove the old bearing from the axle or housing.
- Clean the bearing seat with isopropyl alcohol. Remove all rust and debris.
- Press in the new bearing using a socket that matches the outer diameter. Tap evenly with a mallet.
- Repeat for the opposite side.
- Lubricate with a small amount of lithium-based grease. Do not over-lube.
- Reassemble carefully, ensuring rotor clears stator.
Note: Bearings are model-specific. Match size and type.
Lubricate for Longevity
- Re-lubricate every 6-12 months if the design allows.
- Use waterproof grease for wet climates.
- Avoid oil. It migrates and attracts dirt.
Fix Hall Sensor and Controller Issues

Hall sensors are critical for smooth motor control. When they fail, performance suffers dramatically.
Test Hall Sensors Accurately
You will need a multimeter and an assistant:
- Set multimeter to DC voltage.
- Connect black probe to motor negative.
- Connect red probe to each signal wire.
- Slowly rotate the wheel by hand.
- Each sensor should switch between 0V and 5-12V as the magnet passes.
If one sensor does not toggle, it is dead.
Replace Faulty Hall Sensors
Some motors allow individual sensor replacement:
- Desolder the faulty sensor from the stator board.
- Install an identical replacement. Match part number.
- Re-solder carefully. Avoid overheating.
- Test before reassembly.
If sensors are potted or non-removable, consider motor replacement.
Verify Controller Output
Before blaming the motor, check the controller:
- Measure voltage at the motor connector when throttle is engaged.
- No power? Problem is upstream. Check battery, fuse, throttle, or controller.
- Burnt smell or visible charring on board? Controller is likely fried.
Replace with a compatible unit. Match voltage, phase count, and programming.
Handle Water Damage and Corrosion
Gotrax, Hiboy, and older scooters often fail due to water exposure. But quick action can save the motor.
Rescue a Wet Motor
- Disconnect battery immediately.
- Remove the wheel and open the motor housing.
- Wipe out mud and silt with a dry cloth.
- Blow dry all parts with compressed air.
- Use a soft brush to clean corrosion from terminals and windings.
- Apply corrosion inhibitor to metal contacts.
- Replace rusted bearings and frayed wires.
- Re-seal housing with silicone gasket maker or OEM sealant.
Never power on a wet motor. Risk of short circuit is high.
Prevent Future Water Damage
- Avoid deep puddles and heavy rain.
- Wipe down scooter after wet rides.
- Seal wire entry points with silicone.
- Store indoors when possible.
Repair vs. Replace: Make the Right Call
Not every motor is worth fixing. Use this decision framework to save money and time.
When to Repair
- Only bearings, sensors, or wires are faulty
- Labor and parts cost under $100
- Scooter is high-end like Segway, NIU, or Unagi
- You have tools and moderate skill
Example: Replacing Hall sensors on a $1,200 NIU saves $300 or more versus a new motor.
When to Replace
- Windings are burnt. Look for smell, discoloration, or no continuity.
- Housing is cracked or warped
- Internal wire damage is too close to stator
- Repair cost exceeds 60% of new motor price
Full motor units range from $250-$450 depending on power and model.
Cost Comparison Table
| Repair Type | DIY Cost | Professional Cost | Best For |
|---|---|---|---|
| Bearing replacement | $10-$30 | $80-$120 | Grinding noise |
| Hall sensor fix | $15-$40 | $100-$150 | Jerky acceleration |
| Wiring repair | $20-$50 | $100-$130 | No power, intermittent cutouts |
| Full motor swap | $250-$450 | $350-$550 | Burnt windings, severe damage |
Final Testing and Performance Check
Never skip verification. A few minutes of testing prevents accidents and repeat work.
Post-Repair Test Sequence
- Visual inspection: Confirm all screws are tight, wires are routed safely, no pinched cables.
- Continuity check: Test phase and sensor wires again. Ensure no shorts or opens.
- Static power test: Elevate the wheel, connect battery, and engage throttle. Watch for smooth spinning, no grinding or clicking, no burning smell.
- Monitor temperature: Run at half speed for one minute. Touch motor. It should not be hot.
- Test ride: Ride in a safe area. Check acceleration smoothness, top speed recovery, braking function, and any drag or hesitation.
If anything feels off, shut down and recheck connections.
Prevent Future Failures
- Clean motor area monthly with compressed air.
- Tighten all connectors every 3 months.
- Avoid overloading and steep hills.
- Let motor cool after heavy use.
- Store in dry, temperature-stable environment.
Frequently Asked Questions About Electric Scooter Motor Repair
How do I know if my electric scooter motor is burnt?
A burnt motor usually produces a distinct burning smell, shows discoloration on the windings, and fails continuity tests. The scooter may not spin at all or experience severe power loss. If you smell burning or see dark marks on the motor housing, the windings are likely damaged and replacement is necessary.
Can I repair a motor myself, or do I need a professional?
Minor repairs like bearing replacement, Hall sensor fixes, and wiring repairs can be done at home with basic tools. However, complex issues like burnt windings, cracked housings, or controller failures often require professional service. If you are uncomfortable working with high-current electrical systems, seek a certified technician.
How much does electric scooter motor repair cost?
DIY repairs cost $10-$50 for parts like bearings or sensors. Professional labor adds $80-$150 per repair. Full motor replacement runs $250-$450 plus installation. The exact cost depends on your scooter model and the specific issue.
What causes electric scooter motors to fail?
The most common causes are wiring fatigue from flexing, Hall sensor failure, worn bearings, water damage, and overheating. Regular maintenance and careful riding can prevent most of these issues. Avoid deep puddles, check wiring regularly, and let the motor cool after heavy use.
How long do electric scooter motors last?
With proper maintenance, electric scooter motors can last 3-5 years or 1,000-3,000 miles. Hub motors typically outlast belt-driven systems. Lifespan depends on usage patterns, weight load, terrain, and environmental conditions.
Is it worth repairing an old electric scooter?
It depends on the scooter value and repair cost. If your scooter costs $300 and repairs exceed $180, replacement makes more sense. For high-end models like Segway or NIU, repair is often worthwhile since replacement motors cost $300 or more.
Key Takeaways for Electric Scooter Motor Repair
With the right approach, electric scooter motor repair is accessible, affordable, and effective. Most issues stem from simple causes like wiring faults, sensor failures, or worn bearings that you can fix yourself with basic tools and a multimeter. Always diagnose systematically before replacing parts. Start with the simplest explanations like battery charge and wiring connections, then progress to more complex components like Hall sensors and controllers.
Safety matters. Disconnect the battery before any work, wear protective gear, and be cautious around powerful magnets in hub motors. When in doubt, consult a professional, but now you will know exactly what to ask. Regular maintenance, including cleaning, lubrication, and connector checks, extends motor life significantly and prevents costly repairs down the road.



