
Putting together your new Razor scooter can feel like a puzzle, but with the right steps, it is a quick and satisfying process. Whether you have got an electric E100, a stylish Pocket Mod, or a lightweight A6 kick scooter, how to assemble a razor scooter comes down to a few key actions: attaching the handlebars, securing wheels, inflating tires, and making electrical connections. This guide walks you through each step clearly and safely, so you can be riding in no time.
Most models take under 15 minutes to set up, and all necessary tools are included except for a tire pump, which you will need for pneumatic tires. Let us break down the exact process by model, highlight common mistakes to avoid, and ensure your scooter is ride-ready and secure.
Handlebar Installation Steps
Attaching the handlebars correctly is crucial for control and safety. Every Razor scooter ships with the handlebar detached for compact packaging, but alignment and clamping vary slightly between models.
E100 Series Handlebar Setup
For the Razor E100 Black Label and Power Core E100, start by aligning the handlebar with the front wheel. Lift the handlebar assembly straight up, then slide it down over the threaded stem. Do not screw it in. Push it fully down until the base of the handlebar completely covers the exposed threads.
Secure it using the two bolts on the clamp. With the included 5mm Allen wrench, tighten the bolts alternately, top then bottom, to apply even pressure. This prevents crooked alignment. Stop when the handlebar feels solid and does not wobble when shaken.
Common Mistake: Screwing the handlebar into the stem instead of pushing it down. This weakens the clamp and can damage the stem.
Pocket Mod Handlebar Attachment
The Pocket Mod ships with the fork rotated backward. First, rotate the fork forward so the handlebar sits at a natural riding angle. Remove the black plastic cap from the bottom of the stem by pulling it straight down.
Slide the handlebar straight into the stem tube until fully seated. Use the included 6mm Allen wrench to tighten the top bolt securely. Some models have secondary bolts. Tighten those evenly as well.
Ensure the throttle is on the right-hand side before final tightening. Misalignment here affects control and safety.
A6 Kick Scooter Stem Fix
The Razor A6 uses a simple stem bolt. Align the handlebar with the deck, insert the stem fully, and tighten the central bolt with the included Allen wrench.
Avoid overtightening, which can strip the threads or crack the clamp. Snug is sufficient. Test by trying to twist the handlebar. If it does not move, it is tight enough.
Wheel and Fender Assembly
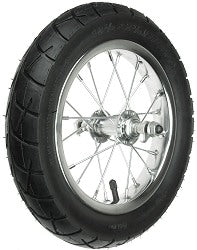
Wheels must be installed with correct washer alignment and torque to prevent wobbling or detachment. This step applies mainly to the Pocket Mod and A6, while E100 models often come with wheels pre-installed.
Pocket Mod Front Wheel Install
Start by removing the plastic protector from the fork legs. Raise the kickstand to keep the scooter stable.
Each side of the wheel requires these components in this order:
• Lock washer with tab
• Flat washer
• Axle nut
Insert the wheel into the fork. Place the lock washer so its tab engages with the hole in the fork leg. Add the flat washer. Screw on the nut.
Tighten by hand first, then use two wrenches to fully secure. One wrench holds the inner bolt while the other tightens the outer nut. This prevents the axle from spinning. Spin the wheel to confirm it turns freely and is centered.
Pro Tip: If the wheel binds or rubs, check washer placement. Tabs must lock into fork holes.
A6 Wheel Installation
The A6 has both front and rear wheels to install. The rear wheel slides onto the rear axle. The front wheel installs with the brake lever mechanism aligned to the hub.
Secure both with axle nuts. Tighten firmly with the Allen wrench. Ensure the front wheel rotates freely and the brake engages when the lever is pressed.
Front Fender Mounting (Pocket Mod)
Align the rear tab of the fender into the slot on the fork. Use the included Phillips screwdriver to fasten the screw at the top.
Ensure the fender does not rub against the tire when spinning. If it does, loosen the screw, reposition slightly, and retighten.
Electrical Connections for Electric Models
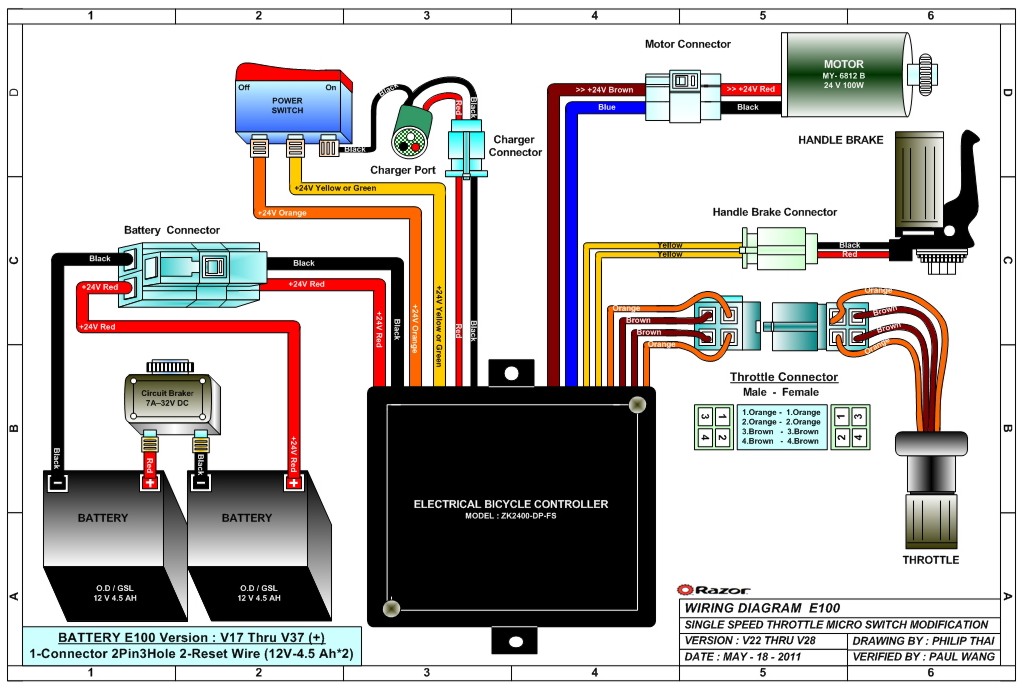
If you own an E100 or Pocket Mod, proper wiring ensures your scooter powers on. Skipping this step or misconnecting can lead to total electrical failure.
E100 Hub Motor Wiring
Locate the wire connector under the deck. Remove the rubber grommet by sliding it straight up. Discard it after removal.
You may find one or two connectors. Match the male and female ends and push them together until you hear a distinct click. The connectors are keyed. Only one orientation fits.
Never force the connection. If it does not click, flip the connector and try again.
After connecting, route wires neatly and ensure they are not pinched under the deck or near moving parts.
Pocket Mod Power Link
The Pocket Mod has a similar under-deck connector. Follow the same procedure. Remove the grommet, align the connector, and press until it clicks.
Verify the power switch turns on and the indicator light responds. If not, recheck the connection. A loose wire is the number one cause of dead scooters.
Tire Inflation Guidelines
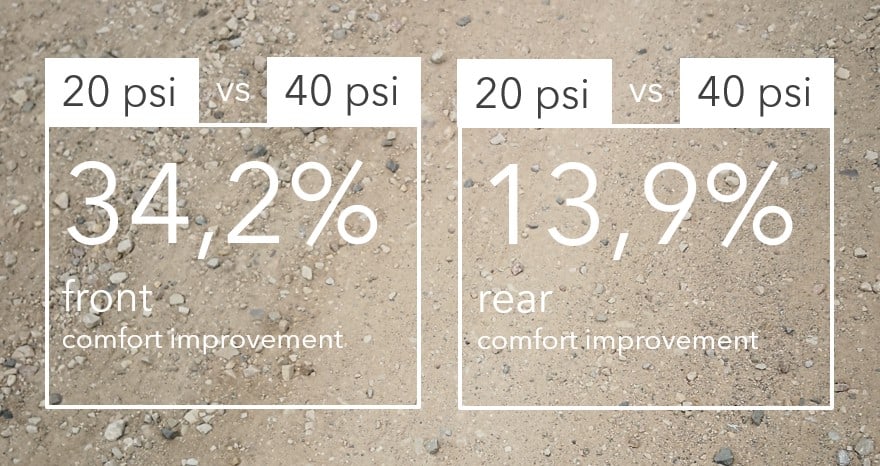
Proper tire pressure improves ride quality, battery life on electric models, and safety. Under-inflated tires increase rolling resistance and risk flats.
E100 Tire Pressure (36 PSI)
The Power Core E100 has a pneumatic front tire. Inflate to exactly 36 PSI. Remove the dust cap from the valve stem. Use a bike pump to reach 36 PSI. Replace the dust cap immediately.
Note: The Black Label E100 also requires inflation, though some manuals omit this step. Always check.
Pocket Mod Tire Inflation (40 PSI)
Both front and rear tires require 40 PSI. Twist off the dust cap. Pump each tire to 40 PSI. Reseal with the cap.
Use a pressure gauge for accuracy. Eyeballing leads to under or over-inflation.
A6 Kick Scooter Tires
The A6 front tire should be inflated to 40 to 50 PSI. The rear is solid, so no inflation needed.
Higher pressure gives a smoother ride on pavement. Avoid exceeding 50 PSI to prevent blowouts.
Battery Charging and First Ride
Before your first ride, charge the battery for 12 hours, even if the indicator turns green earlier. This ensures full cell conditioning.
Charging Procedure
Open the charging port cover. Insert the charger into the port. Plug into a standard outlet. Wait for the indicator to turn solid green.
Never charge longer than 24 hours. Overcharging damages the battery.
For future rides, charge after each use, but limit to 12 hours maximum.
Kick-Start the E100
The E100 series uses a safety kick-start. Step on the deck. Press the power button. Kick forward to reach 3 mph. Twist the throttle to engage the motor.
This prevents accidental acceleration while stationary.
Final Safety and Function Check
Before riding, perform a quick inspection to avoid mid-ride failures.
Pre-Ride Verification Checklist
Run through these checks every time before riding:
• Handlebar is fully seated, aligned with front wheel, no wobble
• Stem, axle, and fender screws are tight
• Wheels spin freely, no rubbing, correct PSI
• Brakes engage when lever is pressed
• Power switch turns on, lights respond, throttle activates after kick-start
Pro Tip: Lift the front wheel and spin it. If it wobbles, check axle tightness and washer alignment.
Troubleshooting Common Issues
Even with careful assembly, problems can arise. Here is how to fix the most frequent ones.
Handlebars Won t Stay Tight
Cause: Stem not pushed down fully over threads.
Fix: Loosen bolts, push handlebar all the way down until the base covers the threads, then retighten alternately.
Wheel Wobbles During Ride
Cause: Loose axle nuts or misaligned lock washers.
Fix: Recheck washer tabs. They must engage with fork holes. Use two wrenches to fully tighten nuts.
Scooter Won t Power On
Cause: Unconnected or partially seated wire harness.
Fix: Remove rubber grommet under deck, disconnect and reconnect wires until you hear a click.
Also verify the battery is charged and the power switch is on.
Tire Loses Air Quickly
Cause: Valve stem damage or improper seating.
Fix: Inspect for punctures. Ensure the dust cap is on to prevent debris. Re-seat the bead if necessary.
Maintenance Tips for Longevity
Keep your Razor scooter in top shape with simple habits.
Regular Bolt Checks
Every 10 rides, check these items:
• Handlebar clamp bolts
• Axle nuts
• Fender screw
Vibration loosens them over time.
Tire Pressure Routine
Check PSI weekly. Cold tires give the most accurate reading. Measure before riding.
Battery Care
Follow these best practices for battery longevity:
• Charge after every ride
• Store indoors, away from moisture
• Avoid full discharge. Recharge before the battery dies
Key Takeaways for Assembling Your Razor Scooter
Now you know how to assemble a razor scooter correctly, whether it is an electric E100, a Pocket Mod, or a kick-powered A6. The key is attention to detail. Push, do not screw, the handlebar into the stem. Connect wires with a click. Inflate to the right PSI for your specific model. Always test before riding.
With proper setup and maintenance, your Razor scooter will deliver smooth, reliable rides for years. Put on your helmet, do a quick check, and enjoy the ride.
Frequently Asked Questions About Assembling a Razor Scooter
How long does it take to assemble a Razor scooter?
Most Razor scooters take 5 to 15 minutes to assemble. The E100 series is the quickest at 5 to 10 minutes. The Pocket Mod takes about 15 minutes due to wheel and fender installation. The A6 kick scooter assembles in under 10 minutes.
What tools are included with a Razor scooter?
All Razor scooters come with the necessary Allen wrenches. The Pocket Mod also includes two wrenches for axle nuts and a Phillips screwdriver for the fender. You will need to provide your own tire pump for any pneumatic tires.
Do I need to charge the battery before first use?
Yes. Charge the battery for 12 hours before your first ride. This conditions the battery cells for optimal performance. Do not exceed 24 hours of charging time.
Why won t my electric scooter turn on after assembly?
The most common cause is a loose or disconnected wire harness under the deck. Remove the rubber grommet, check that all connectors are fully seated with a distinct click, and ensure no wires are pinched.
How do I know if my handlebars are properly tightened?
A properly tightened handlebar will not wobble when you shake it. The base of the handlebar should fully cover the exposed threads on the stem. If you can twist or move the handlebar, retighten the clamp bolts alternately.



