

You’re done with your ride, and now you need to pack up fast. Whether you’re hopping on public transit, stashing it in a car trunk, or carrying it into the office, knowing how to fold a Razor kick scooter quickly and safely is essential. But if you’ve ever struggled with a stuck lever, a stubborn hinge, or that frustrating almost-there fold that just won’t click, you’re not alone. Many riders waste time wrestling with their scooter because they’re missing one key step: proper alignment and technique.
The good news? Once you know the correct method, folding your Razor scooter becomes effortless. This guide walks you through every step, from basic folding to troubleshooting jams and maintaining smooth operation. You’ll learn how to avoid common mistakes, fix a stuck mechanism, and keep your scooter reliable for years.
Prepare the Scooter Correctly
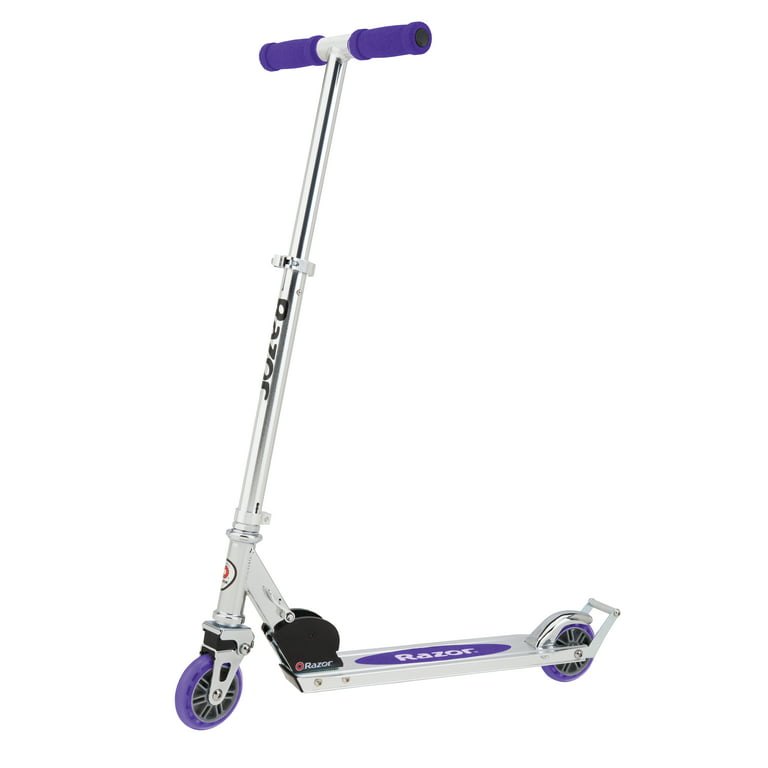
Before attempting to fold, set yourself up for success with simple positioning and stabilization.
Position on Flat, Stable Ground
Start by placing your Razor scooter on a level surface. Uneven flooring can tilt the frame and misalign the internal locking pins, making folding difficult. A garage floor, sidewalk, or indoor tile works best. Avoid grass, gravel, or sloped driveways.
Lift Slightly to Release Tension
Grab the T-bar (handlebars) with one hand and lift the scooter just enough to take the front wheel off the ground. This small lift relieves pressure on the hinge joint and internal pop pin. Without this step, the locking mechanism stays compressed and won’t disengage.
Align the Frame Notch Perpendicular
Look for the small notch near the base of the handlebar stem. Rotate the handlebars until this notch is perfectly perpendicular to the ground (straight up and down). If it’s angled, the internal pins won’t retract. Proper alignment ensures the mechanism can unlock smoothly.
Release the Folding Mechanism
Now that the scooter is aligned and tension-free, it’s time to activate the release. The exact motion depends on your model.
Identify Your Release Type
Razor scooters use three main mechanisms. Pull-out levers require pulling a small tab behind the front wheel outward. Push-down levers need a firm downward press. Lift-up notches require lifting a ridge with your thumb. Check your model to confirm which type you have. Using the wrong motion can damage the mechanism.
Execute the Correct Release Motion
Apply the appropriate action based on your scooter. For pull-out models, gently pull the tab outward, never push down. For push-down models, press the lever firmly downward. For lift-up models, slide your thumb under the notch and lift upward. If nothing happens, don’t force it. Recheck alignment and ensure the scooter is lifted slightly off the ground.
Use the Wiggle Technique if Stuck
If the lever feels jammed, gently wiggle the handlebars forward and backward while holding the release. This small movement helps realign internal components and frees stuck pins. Many users report this wiggle trick solves 90% of folding issues.
Fold the Handlebars Down

With the lock released, collapse the scooter safely and securely.
Push Handlebars Toward the Deck
While keeping pressure on the release mechanism, slowly push the top of the handlebars down toward the deck. Move smoothly. Do not slam or force it. Resistance means something is misaligned.
Listen for the Click
Continue folding until the handlebars lie flat against the deck. You should hear a distinct click. This confirms the internal lock has engaged in the folded position.
Verify the Fold is Secure
After folding, give the handlebars a light tug. They should stay locked without slipping. If the scooter unfolds on its own, repeat the process and ensure the notch was aligned and the lever fully engaged.
Adjust for Portability (If Applicable)
Some models offer extra compactness with adjustable stems.
Lower Adjustable Handlebars
On scooters like the A5 Luxe, press the height adjustment button on the stem and slide the handlebars down further. This reduces overall height for easier carrying or storage in tight spaces.
Secure Any Secondary Locks
If your model has a secondary clip or strap, fasten it now to prevent accidental unfolding during transport.
How to Unfold a Razor Scooter Safely
Before riding, ensure the scooter is fully extended and locked.
Align the Notch Before Extending
Hold the folded scooter upright and rotate the handlebars so the notch is perpendicular to the ground. Misalignment prevents the internal pins from extending.
Release the Fold Lock
Locate the folding lock. This may be a hinge, button, or notch. Push the metal hinge upward or pull the release tab to unlock the folded position.
Pull Handlebars Up Fully
Firmly pull the handlebars upward in one smooth motion. Keep them aligned vertically to avoid stressing the hinge.
Confirm the Locking Click
Stop when you hear a loud, solid click. This means the internal pop pins have engaged and the scooter is safe to ride.
Perform a Pre-Ride Safety Check
Shake the handlebars side to side. There should be no wobble. Also check that the deck is straight and wheels spin freely. Never ride if the stem feels loose.
Troubleshoot a Jammed Folding Mechanism
When the scooter won’t fold despite correct technique, a deeper issue may be present.
Diagnose Common Jamming Symptoms
Watch for these red flags. The lever won’t move or feels frozen. There’s no click when folding or unfolding. Handlebars won’t stay locked open or closed. The internal pin is visible but won’t retract. These often stem from misalignment, debris, or moisture buildup.
Clean Dirt and Debris from the Joint
Remove the plastic cover near the front wheel (if accessible) to expose the sliding bar. Use a dry cloth or soft brush to wipe away dirt, sand, or grime. Avoid water. Moisture causes rust.
Dry a Damp or Rusty Mechanism
If the scooter was exposed to rain or stored in a humid area, moisture may have caused corrosion. Let it air-dry completely in a warm, dry space. Never fold a wet scooter. This traps moisture inside.
Loosen an Over-Tightened Screw
A screw near the hinge may be too tight, restricting movement. Use a 2mm or 2.5mm Allen wrench to slightly loosen it, just one-quarter turn. Test the fold. Don’t remove it completely.
Try the Manual Override (Advanced Fix)
For severely jammed units, bypass the lever system. First, remove the cover plate with an Allen wrench. Next, expose the internal pop pin, a small metal rod inside the housing. Then use a paperclip or pick to gently pop out the pin. Pull the side pins outward manually to release the lock. Finally, fold the scooter, then reassemble. This often resets a misaligned mechanism.
Maintain Smooth Folding Long-Term

Prevent future issues with simple care and smart habits.
Protect Against Moisture and Rust
Always dry the folding joint after riding in damp conditions. Store indoors. Never leave the scooter outside. Moisture is the number one cause of seized mechanisms.
Lubricate Sparingly (If Needed)
Do not use oil or WD-40. These attract dirt. If the joint feels gritty, use a dry silicone lubricant on a cloth and wipe it lightly over moving parts. Never spray directly into the mechanism.
Test the Fold Before Every Ride
Make it a habit. Unfold, listen for the click, tug the handlebars, then ride. This catches developing issues early.
Carry a Mini Repair Kit
Keep a 2.5mm Allen wrench and a bent paperclip in your scooter bag. These let you fix a jam on the go. This is especially useful for commuters.
Avoid Common Folding Mistakes

Even small errors can lead to damage or safety risks.
Never Force the Handlebars Down
If the scooter resists folding, stop. Forcing it can bend the locking bar or shear internal pins. Recheck alignment and try the wiggle technique instead.
Don’t Ride Without Hearing the Click
The audible click is your only guarantee the stem is locked. Riding without it risks sudden collapse and injury.
Avoid Folding on Uneven Surfaces
Tilting the scooter throws off internal alignment. Always fold on flat ground.
Skip the Wet Folds
Folding a wet scooter traps moisture inside the hinge, accelerating rust. Dry it first.
Final Thoughts on Folding Your Razor Scooter
Folding a Razor kick scooter should be quick, quiet, and reliable, under 10 seconds with one hand. The secret isn’t strength. It’s technique. Lift slightly, align the notch, use the correct release motion, and listen for the click. When jams happen, clean, dry, and wiggle before forcing anything. With regular maintenance and the right habits, your scooter will fold smoothly for years.
Now that you know the full process, from prep to troubleshooting, you’ll never struggle with a stuck Razor again. Master these steps, and your scooter stays compact, safe, and ready for wherever you’re headed next.
Frequently Asked Questions About Folding a Razor Kick Scooter
Why won’t my Razor scooter fold even though I’m pressing the lever?
The most common reason is failing to lift the scooter slightly off the ground before pressing the release. This relieves tension on the internal pop pin. Also verify that the notch on the frame is perpendicular to the ground. If alignment is correct, try wiggling the handlebars while pressing the lever.
How do I know which release mechanism my Razor scooter has?
Razor scooters use three main types. Pull-out mechanisms have a small tab behind the front wheel that you pull outward. Push-down mechanisms have a lever you press downward firmly. Lift-up mechanisms have a ridge near the stem that you lift with your thumb. Check your model or try each motion gently to find what works.
Can I damage my scooter by forcing the fold?
Yes, forcing the handlebars down can bend the locking bar or shear internal pins. This causes permanent damage and safety hazards. Always stop if you feel resistance. Recheck alignment, try the wiggle technique, or troubleshoot the jam rather than forcing it.
How often should I maintain the folding mechanism?
Check the mechanism before every ride by unfolding and listening for the click. Clean debris as needed, especially after riding on dusty or sandy paths. Store the scooter in a dry place and dry the hinge immediately if it gets wet.
What should I do if the internal pop pin is stuck?
First try the wiggle technique while holding the release. If that fails, remove the cover plate with an Allen wrench and access the internal pin. Use a paperclip to gently pop it out, then pull the side pins outward manually. This bypasses a jammed lever system.
Is it safe to ride my Razor scooter if the fold feels loose?
No, never ride a scooter that hasn’t locked into place with a distinct click. A loose fold means the internal pins haven’t engaged, and the stem could collapse during riding, causing falls and injuries. Re-fold carefully or troubleshoot the mechanism before riding.



