
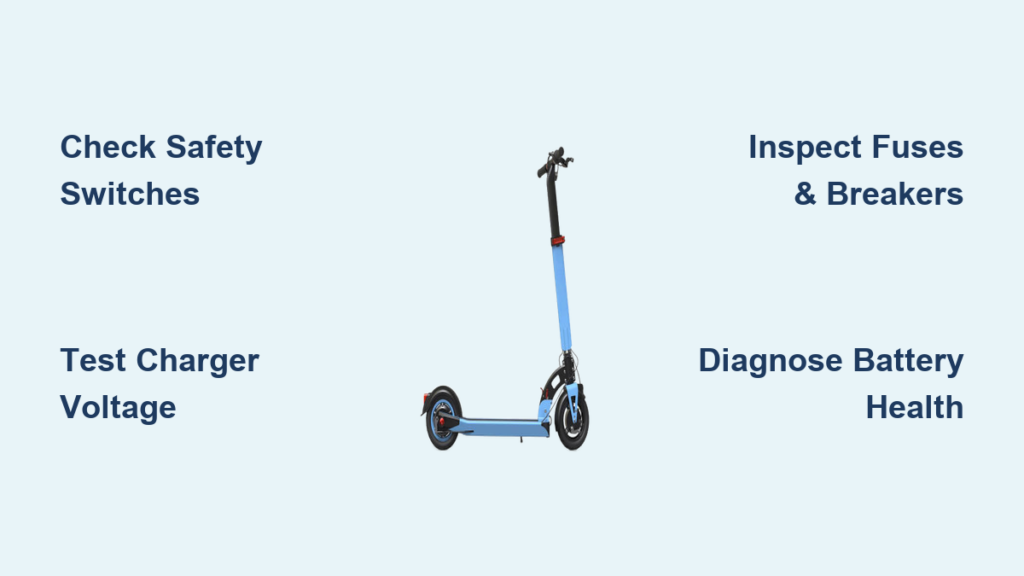
Your electric scooter won’t start. The throttle doesn’t respond. The battery shows no sign of life. You’re not alone. Thousands of riders face these issues every month. But before you write off your scooter as junk, know this: most problems are fixable with basic tools and a methodical approach. The keyword how to repair electric scooter leads to countless forums, but few offer a clear, actionable roadmap. This guide changes that.
Using verified diagnostics from manufacturer-level repair data, we’ll walk you through real-world fixes. From simple safety switch resets to advanced component testing, this guide applies whether you own a budget model or a premium VMAX, Segway, or Ninebot. You’ll learn how to test batteries, diagnose controllers, fix flat tires, and avoid costly mistakes. No fluff. No guesswork. Just proven steps that get your scooter rolling again.
Check Safety Switches First

Many electric scooters fail to start not because of broken parts, but due to active safety interlocks. These systems prevent motor engagement when conditions aren’t safe. Ignoring them leads to unnecessary disassembly and wasted time.
Test the Brake Light Switch
A stuck or misaligned brake switch is the number one cause of no-throttle issues. If the system thinks the brakes are engaged, it disables the motor, even if the lever looks released.
What to look for:
– Brake light stays on or flickers
– Scooter powers on but won’t accelerate
– Throttle response returns only after releasing brake lever fully
How to test:
1. Turn the scooter on.
2. Observe the brake light. If it’s lit without touching the lever, the switch is likely stuck.
3. Use a multimeter in continuity mode. Connect probes to the brake switch wires. With lever released, you should hear a beep (circuit closed). With lever pulled, the beep should stop (circuit open).
Fix:
– Adjust the switch position so it fully releases when the lever is at rest.
– For testing only: unplug the brake cable. If the throttle works now, the switch is faulty.
– Warning: Never ride with the brake switch disconnected. It disables brake lights and creates a safety hazard.
Verify Kill Switch Position
Some scooters have a physical kill switch near the handlebars or dashboard. If accidentally toggled, it cuts power to the motor.
Action:
– Locate the kill switch (often red or labeled “OFF”).
– Ensure it’s in the run position before troubleshooting further.
Disable Zero Start Mode
After an app update or borrowing a scooter, Zero Start may be enabled. This requires a kick-push before the motor activates.
Test:
– Push the scooter forward slightly.
– Then twist the throttle.
Fix:
– Open the manufacturer’s app or dashboard settings.
– Switch from Zero Start to Instant Start.
Confirm Power and Charging Status
A dead scooter often just needs proper charging or a reset from deep sleep mode. Don’t assume the battery is dead without verifying basic power connections first.
Follow Correct Charging Sequence
Some scooters, such as specific Segway and Kaabo models, enter deep sleep when the battery drops too low. Standard charging won’t wake them.
Correct procedure:
1. Plug charger into wall outlet first.
2. Wait for charger light to turn green (indicates power ready).
3. Plug into scooter.
4. Wait 5 to 10 seconds.
5. Unplug from scooter.
6. Attempt to power on.
Note: Most scooters won’t turn on while charging. Always disconnect the charger before powering up.
Read Charger Indicator Lights
Charger LEDs tell you more than just charging or full. Understanding what each light means saves time and prevents unnecessary part replacements.
Indicator meanings:
– Green (no scooter connected): Charger is working and ready.
– Red (connected): Charging in progress, normal operation.
– Green (connected): Battery is fully charged OR battery is disconnected or faulty.
– No light: Bad charger, dead outlet, or damaged cable.
Test the outlet: Plug in another device to confirm the wall outlet has power.
Attempt Deep Charge Recovery
If the battery has been stored uncharged for months, it may recover after a long charge session.
Procedure:
– Connect charger for 48 to 72 hours.
– Monitor voltage with a multimeter.
– If voltage rises above 22V on a 24V system, the battery may still be usable.
Inspect Fuses and Circuit Breakers
Sudden shutdowns during hills or heavy loads often point to thermal protection activation or blown fuses. These safety components are designed to trip before damage occurs.
Reset the Circuit Breaker
Located near the battery or controller, this auto-resetting switch trips under overload conditions.
Signs it tripped:
– Scooter cuts out mid-ride
– Breaker feels warm to the touch
– Power cuts when climbing steep hills
Fix:
– Let it cool for 30 seconds.
– Press the reset button if it’s a manual type.
– Avoid overloading the scooter beyond rated capacity.
Check Fuse Integrity
Fuses protect against short circuits. Vibration can loosen fuse holders and eject the fuse.
Where to find:
– Near battery pack
– Inline with main power wire
Inspect:
– Open the fuse holder.
– Look for broken filament or missing fuse.
– Check if spring and fuse are seated properly.
Replace:
– Use exact amperage rating (for example, 15A or 20A).
– Never use a higher-rated fuse. It defeats safety protection and risks component damage.
Test Charger with Multimeter

A faulty charger mimics battery failure. Always test it before replacing expensive components. This simple check eliminates guesswork.
Measure Output Voltage
Tools needed: Digital multimeter
Steps:
1. Set multimeter to DC Volts (20V or higher range).
2. Insert probes into outer pins of charger plug.
3. Read voltage.
Expected values:
– 24V system: approximately 27V
– 36V system: approximately 42V
– 48V system: approximately 54.6V
Failure signs:
– 0V: Dead charger
– Fluctuating reading when wiggling cord: Internal wire break
– Low voltage: Failing internal circuit
Replacement tip: Use only OEM-spec charger. Mismatched voltage or amperage can damage the BMS.
Diagnose Battery Pack Health
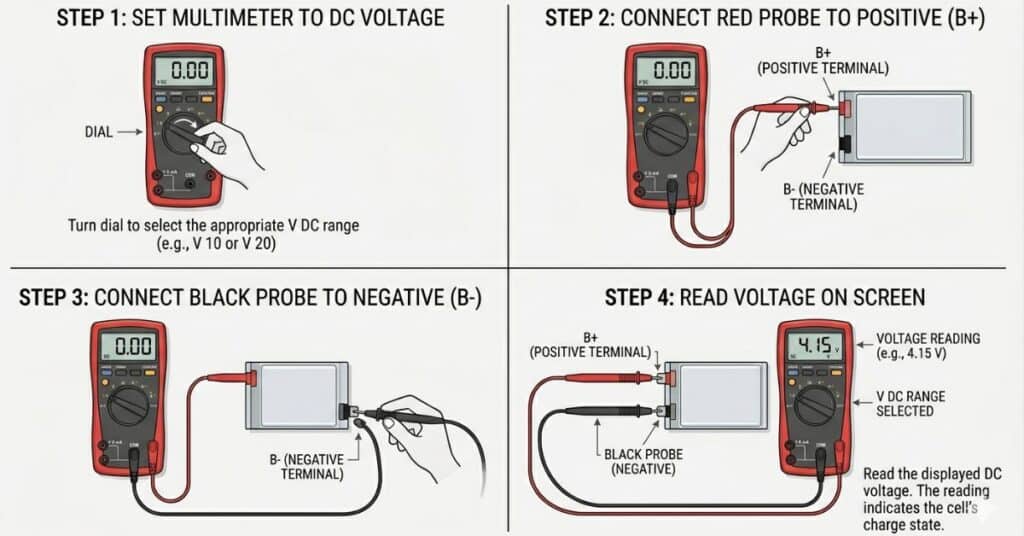
The battery is the heart of your scooter. Weak or unbalanced cells cause poor performance, shutdowns, and reduced range. Testing the battery is the first step in serious diagnostics.
Measure Total Battery Voltage
Procedure:
1. Disconnect battery from controller.
2. Set multimeter to DC Volts.
3. Touch probes to main terminals.
Interpret results for 24V system:
– 24V to 25.5V: Healthy
– 22V to 24V: Low, needs charge
– Below 22V: Likely cell failure
Test Individual Cells (If Accessible)
Some scooters use two 12V batteries in series. Testing each separately reveals balance issues.
Check each:
– If one reads 12V and the other 13V, replace both batteries together.
– Mismatched voltages cause imbalance and premature failure.
Identify Load Failure Symptoms
These signs point to a weak battery that cannot sustain voltage under rider weight:
- Cycles on/off when accelerating: Voltage drops below cutoff, resets, repeats.
- Runs only when lifted off ground: No load means no voltage sag.
- Only works while plugged in: Charger boosts voltage enough to run motor. Battery is dead.
Evaluate the Speed Controller
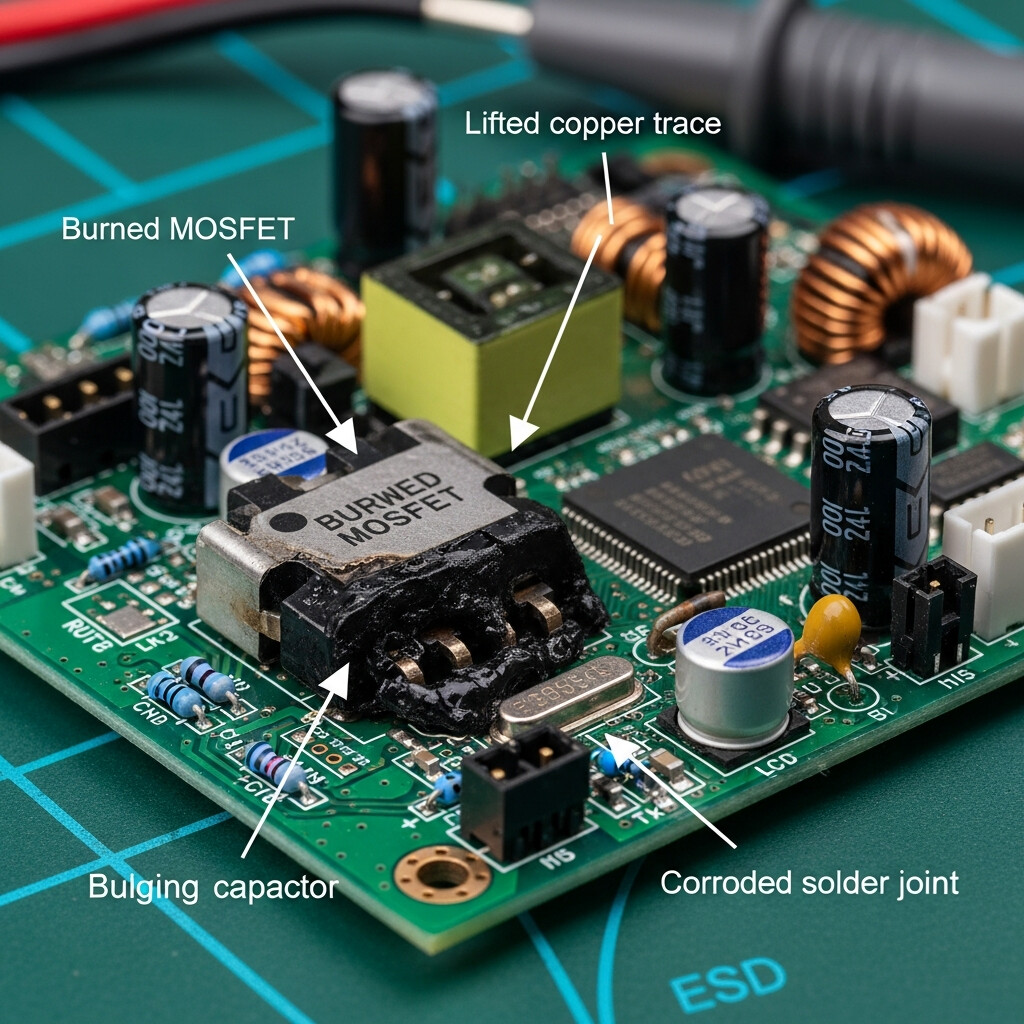
The controller regulates motor power based on throttle input. It’s sensitive to heat, water, and voltage spikes. A failed controller means no throttle response.
Inspect for Physical Damage
Look inside the controller box for:
– Burned or melted wires
– Scorched connectors
– Discolored circuit board
– Melted insulation on copper
Cause: Overload from steep hills, mud, or excessive rider weight.
Test Internal Continuity
Steps:
1. Unplug controller from battery, motor, and throttle.
2. Set multimeter to continuity mode.
3. Test prongs labeled input, output, and switch wire.
4. Should hear a beep on all three if intact.
No beep? Internal relay or MOSFET failed. Replace the entire unit.
Handle Runaway Motor
If the motor runs without throttle input, the controller’s MOSFET is stuck in the on position.
Immediate action:
– Disconnect battery immediately.
– Replace controller. Do not attempt repair.
Replacement tip: Use plug-and-play units matching original voltage, wattage, and phase count.
Test and Replace the Throttle

A broken throttle won’t send signals to the controller. Without a working throttle, the scooter won’t accelerate regardless of battery health.
Check Throttle Continuity
Tools: Multimeter in continuity mode
Steps:
1. Locate throttle connector (usually JST type).
2. Insert probes into orange and brown wires.
3. Twist throttle fully.
4. Should hear a beep only when twisted.
No beep? Internal switch is broken. The entire throttle must be replaced.
Replace Throttle Assembly
Internal parts are not repairable. Replacement is the only option.
Steps:
1. Remove handlebar grip (pull straight off).
2. Unscrew retaining screw behind grip.
3. Slide out old throttle.
4. Plug in new unit and reassemble.
Pro tip: Lubricate the twist mechanism with silicone spray during install for smoother operation.
Assess Motor Function
The motor either works or doesn’t. But drivetrain issues can mimic motor failure. Proper diagnosis saves money on unnecessary replacements.
Measure Motor Resistance
Steps:
1. Disconnect motor wires from controller.
2. Set multimeter to Ohms (Ω).
3. Touch probes to any two motor phase wires.
Expected reading: Approximately 5.23Ω (varies slightly by model)
Failure signs:
– 0Ω: Short circuit (burned windings)
– Infinity: Open circuit (broken wire)
Either reading means the motor is dead. Replace the hub.
Diagnose Mechanical Drive Failure
If motor spins but wheel doesn’t move, the problem is mechanical:
- Inspect freewheel clutch: Worn or broken clutch slips under load.
- Check belt or chain: Look for cracks, stretching, or breakage.
- Examine sprockets and cogs: Missing teeth or misalignment prevent power transfer.
Noise clues:
– Grinding: Worn bearings
– Clicking: Loose parts or damaged gears
Inspect Wiring and Connectors
Poor wiring causes intermittent faults and dangerous shorts. Many phantom problems trace back to loose or damaged connections.
Spot Arcing Damage
Look for:
– Black soot on connectors
– Melted plastic housing
– Exposed copper strands
Cause: Loose connections create resistance, leading to heat and arcing.
Check Wire Type
Low-cost scooters often use solid-core wire instead of flexible stranded wire.
Problem: Solid wire cracks under vibration and breaks.
Fix: Replace damaged sections with stranded wire of same gauge.
Ensure Secure Connections
All keyed connectors (XT30, JST, Anderson) must be fully seated.
Action:
– Unplug and reseat each connector.
– Check for bent pins or debris.
– Apply dielectric grease to prevent corrosion.
Repair Tubeless vs Tubed Tires
Flat tires are common. But repair method depends entirely on tire type. Using the wrong method wastes time and money.
Fix Tubeless Tires with Sealant
This method works best for permanent, no-disassembly repair.
Steps:
1. Remove valve cap.
2. Use valve core tool to unscrew core.
3. Pour half a bottle of sealant (such as Armordillos) into tire.
4. Reinstall and tighten core.
5. Spin wheel to spread sealant.
6. Inflate to recommended PSI.
Advantage: Seals punctures up to one-quarter inch automatically.
Use Plug Kit for Emergency Repair
Use this only if sealant is unavailable.
Steps:
1. Remove object (nail, glass).
2. Ream hole with tool to clean edges.
3. Coat rubber plug in adhesive.
4. Insert plug using tool.
5. Pull tool out. Plug stays behind.
6. Trim excess, inflate.
Warning: Not a long-term fix for high-speed use.
Replace Inner Tube (Tubed Tires)
Sealants and plugs don’t work on tubed tires.
Must:
– Remove wheel
– Demount tire
– Replace entire tube
Tip: Buy a pre-assembled wheel/tire combo to save time.
Perform System Resets
When software glitches lock out functions, a reset can restore operation without replacing parts.
Execute Hard Reset
No universal reset button exists. This method works across many brands.
Steps:
1. Remove dashboard screws.
2. Access stem wiring.
3. Unplug main dashboard cable.
4. Wait 10 seconds.
5. Reconnect.
This clears stuck signals and resets controller logic.
Try Battery Disconnect Reset
Use this as a last resort:
- Disconnect battery from deck.
- Wait 30 seconds.
- Reconnect (expect small spark).
- Power on.
This can reset BMS or controller after fault condition.
Decode Error Codes
Error codes are diagnostic tools, not just error messages. They point directly to the problem area.
Record Code Immediately
Take a photo of the display.
Search online using this format: brand, model, error code (for example, Segway Ninebot E2 error).
Common Codes Explained
- Throttle Error: Loose connector, bent pin, or damaged cable. Fix by reseating throttle connector.
- E2 or E6: Often motor hall sensor, brake switch, or throttle issue. Check all sensor connections.
Display on but no power? Likely throttle or brake interlock issue, or low-voltage cutoff.
Source Parts and Assess Repair Value
Not all scooters are worth fixing. Know when to repair and when to walk away. This saves money and frustration.
Check Warranty Status
- Transferable: VMAX, Segway, Niu, Apollo (keep your receipt).
- Non-transferable: Kaabo, Inmotion, Hiboy, Kugoo (void if used).
File claims online. Upload photos, videos, and descriptions. Keep original box for shipping claims.
Verify Part Availability
Before buying or repairing:
– Can you get a replacement battery?
– Are controllers and dashboards sold separately?
No parts available? The scooter is disposable.
Use Economic Decision Matrix
| Scenario | Verdict |
|---|---|
| Premium brand, modular parts | Repairable |
| Generic brand, integrated stem | Economically totaled |
| Battery costs more than 30% of scooter value | Consider replacement |
Example: 100 EUR battery on a 290 EUR scooter with wiring damage is not worth repairing.
Follow Maintenance Best Practices
Prevention beats repair every time. Small maintenance tasks extend scooter life significantly.
Prevent Common Failures
- Clean regularly: Dirt causes overheating.
- Tighten connections: Monthly check.
- Adjust brakes: Worn pads strain motor.
- Check tire pressure: Prevents pinch flats.
Store Properly
- Never leave battery fully drained.
- Charge to 50% to 60% before long storage.
- Avoid extreme temperatures.
Ride Smart
- Stay under weight limit.
- Avoid deep mud or sand. This causes connector melting.
- Don’t ride in heavy rain unless IP-rated.
Frequently Asked Questions About How to Repair Electric Scooter
Why won’t my electric scooter turn on even though the battery is charged?
Check the safety interlocks first. A stuck brake switch, engaged kill switch, or Zero Start mode can prevent power-up. Also verify the charging sequence. Some scooters require unplugging the charger before powering on.
How do I know if my scooter battery is dead or the charger is bad?
Test the charger output with a multimeter. A 24V charger should output approximately 27V. If it shows 0V or fluctuates, the charger is bad. If the charger works but the scooter still won’t run, the battery likely needs testing or replacement.
Can I repair a flat tire on my electric scooter myself?
Yes. For tubeless tires, use sealant for permanent repair or a plug kit for temporary fixes. For tubed tires, you must remove the wheel and replace the inner tube entirely.
When should I replace vs repair my electric scooter?
Replace if the scooter is a generic brand with integrated parts and no parts available. Repair if it’s a premium brand with modular parts. Also consider repair if replacement parts cost less than 30% of the scooter’s value.
What tools do I need to repair an electric scooter?
A multimeter is essential. You’ll also need screwdrivers, Allen keys, pry tools, tire tools (valve core remover, plug kit), and zip ties. A quality auto-ranging multimeter with continuity testing costs approximately $50.
How do I reset my electric scooter after a fault?
Try a battery disconnect reset first. Disconnect the battery, wait 30 seconds, then reconnect. If that doesn’t work, perform a hard reset by accessing the stem wiring and unplugging the dashboard cable for 10 seconds.
Key Takeaways for Repairing Your Electric Scooter
Most electric scooter problems stem from simple issues: safety interlocks, loose connections, dead chargers, or weak batteries. Always start with the basics before replacing expensive components. A multimeter is your most valuable tool for diagnosing electrical problems accurately.
Know when to walk away. If parts aren’t available or repair costs exceed 30% of the scooter’s value, consider replacement. Premium brands with modular parts are worth repairing. Generic scooters with integrated stems often aren’t.
Regular maintenance prevents most failures. Keep connections tight, tires inflated, and store batteries properly. Following these practices extends your scooter’s life and saves money on repairs. Ride smart, repair smart, and keep rolling.



