
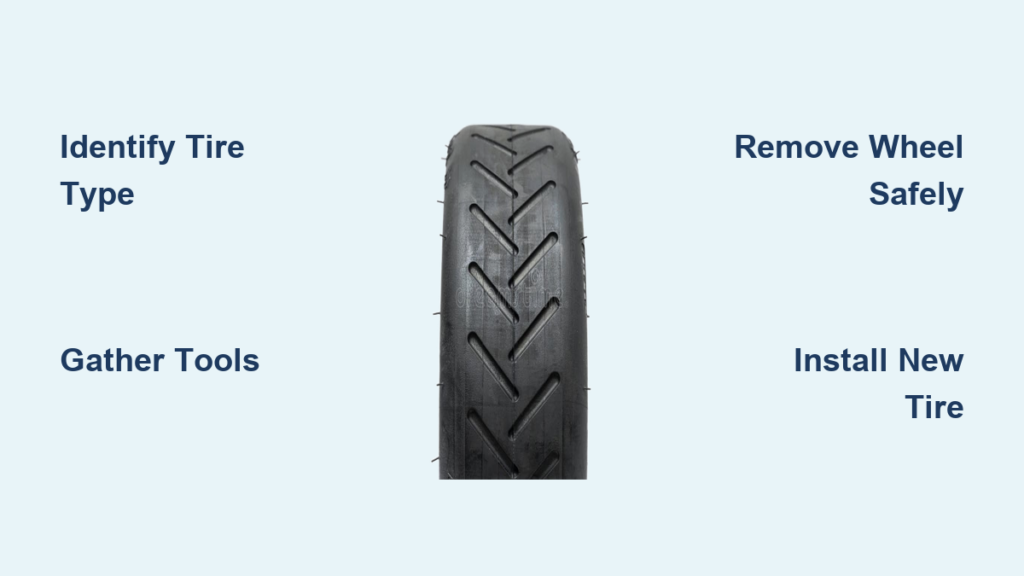
Dealing with a flat tire on your scooter can disrupt your daily commute, but learning how to replace a scooter tire saves you time and money on professional repairs. Whether you own a basic commuter model or a high-performance electric scooter, understanding the replacement process ensures you get back on the road quickly and safely. This guide covers every major tire type, from pneumatic tubed setups to solid tire conversions, with clear steps you can follow at home.
Identify Your Scooter Tire Type

Before purchasing replacement parts or starting work, you must confirm what kind of tire your scooter uses. Using the wrong replacement method causes damage or fitment issues.
Pneumatic Tire Variants
Most scooters use pneumatic tires filled with compressed air. These fall into two categories:
- Tubed tires contain a separate inner tube that holds the air
- Tubeless tires seal directly against the rim using sealant
Some premium models include self-healing gel linings that automatically seal small punctures, extending tire life significantly.
Solid and Hybrid Configurations
Solid tires consist of dense rubber or foam and never go flat, though they provide a harsher ride. Many scooters use a hybrid setup with a pneumatic front tire for better handling and a solid rear tire for reliability.
Check Tire Size and Valve Type
Locate the size printed on the tire sidewall, such as 10×2.5 or 8.5×2.125. Match this exactly when buying replacements. Also note the valve type:
- Presta or Schrader valves (standard bike-style)
- Angled or side valves (common on compact scooters)
Using the wrong valve type prevents inflation entirely.
Gather Essential Tools and Supplies
Having the correct tools before starting prevents frustration and potential damage to your scooter.
Tools for All Tire Replacements
- Scooter stand or sturdy crates to elevate the scooter
- Hex keys (Allen wrenches) for removing panels and brackets
- Wrench or socket set for axle nuts
- Screwdrivers for prying and panel removal
- Plastic tire levers to prevent rim scratches
- Air pump with pressure gauge
Additional Tools for Tubeless Tires
- Channel locks and hand clamps for compressing sidewalls
- Tire strap for seating stubborn beads
- DeB D40 silicone spray for bead lubrication
- WD-40 and plastic brush for rim cleaning
Tools for Solid Tires
- Ultrasonic heater to warm tire to 160°F (71°C)
- Vice grips or tongs for guiding rigid beads
- General-purpose grease for installation
- Wheel mounting fixture for stability
Replacement Parts Checklist
- New inner tube (for tubed tires)
- Matching pneumatic or solid tire
- Tire sealant (for tubeless setups)
- Valve stem caps
Remove the Scooter Wheel Safely
Proper disassembly protects brakes, wiring, and alignment components from damage.
Prepare the Scooter
Park on a flat surface and turn off the scooter. Disconnect the battery if accessible. Elevate the scooter using crates or a stand so the wheel hangs freely.
Access the Wheel
Use hex keys to remove plastic side covers blocking wheel access. For disc brake setups:
- Loosen the brake caliper bolt to pivot it away from the rotor
- Remove the tire alignment guide by unscrewing its two mounting screws
- Label all screws by side to avoid mix-ups during reassembly
Extract the Wheel
Locate the central axle nut and use a wrench to loosen and remove it. Slide the wheel out carefully.
Critical Check: Look for a woodruff key (magnet) on the axle. This self-aligning component ensures proper motor engagement and must be reinstalled.
Replace Inner Tube in Pneumatic Tires
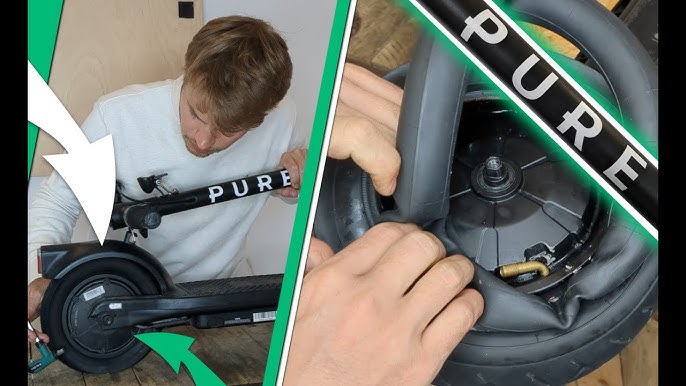
This procedure applies to scooters with tubed tires.
Remove the Old Tire and Tube
- Press the valve stem to release all air completely
- Insert a plastic tire lever between the bead and rim
- Work around the tire, prying one side of the bead off the rim
- Pull the inner tube out completely
Inspect Thoroughly: Check the inside of the tire for embedded glass, nails, or thorns. Run fingers along the rim for sharp edges. Examine the old tube to identify the puncture location.
Install the New Inner Tube
- Inflate the new tube slightly, just enough to hold its shape (prevents pinching)
- Insert it into the tire casing without twists
- Push the valve stem through the rim hole, ensuring it faces outward
- Secure with the valve nut (hand-tight only)
Reseat the Tire Bead
- Push one side of the tire bead fully onto the rim by hand
- Work the second side over the rim lip gradually
- Use a screwdriver or tire lever only if necessary
- Stop and reposition if resistance increases to avoid puncturing the tube
Fix Common Tubed Tire Mistakes
Avoid these frequent errors that cause immediate flats or failed installations.
Prevent Pinched Tubes
The number one cause of immediate flats is a pinched tube during reassembly. Always pre-inflate the tube slightly, ensure it sits evenly inside the casing, use hands instead of tools whenever possible, and double-check for trapped rubber before final seating.
Avoid Backward Valve Installation
If the valve faces inward toward the frame, you cannot attach a pump. Before seating the final bead, confirm the valve protrudes through the rim hole and points straight out.
Eliminate Tire Rub
After reinstallation, spin the wheel. If the tire rubs the frame or motor, loosen the axle nuts slightly, re-center the wheel, and retighten evenly. Verify the tire width matches the original specification.
Replace or Convert to Tubeless Tires
Tubeless tires offer better puncture resistance but require precise installation.
Disassemble with Cable Care
For the front wheel, brake and motor wires often share a single fork hole. Disconnect small connectors from the control harness before removal. For the rear wheel, you can disconnect the motor wire entirely. Remove disc brake rotors to protect them during tire work.
Break the Bead Without Damage
- Fully deflate the tire
- Use channel locks to compress the sidewall at multiple points
- Hold compression with hand clamps (three total, spaced 3 to 4 inches apart)
- Once compressed, the bead releases easily without pry bars
Clean and Prep the Rim
Scrub the rim with a plastic brush and WD-40 to remove old sealant. Wipe dry completely. Check for dents or scratches on the bead seat, as damaged rims leak air.
Mount the New Tubeless Tire
- Lubricate the rim lightly with WD-40
- Push the first bead onto the rim by hand
- Compress the sidewall using channel locks and hand clamps at three points
- This creates space to drop the second bead into the rim well
- Apply DeB D40 silicone spray to both bead and rim (never use soapy water near motors)
Inflate and Seat the Bead
- Attach a tire strap around the tire’s top to help force the bead outward
- Begin inflating and listen for a loud pop as the bead seals
- Remove the strap once both sides are seated
- Inflate to recommended PSI (usually 35 for 10-inch tires)
Balance High-Speed Tubeless Tires

On scooters exceeding 40 mph, imbalance causes vibration or shimmy.
Diagnose and Correct the Vibration
Set cruise control and let the wheel spin freely. Observe where the wobble occurs to identify the high spot. Use a coarse file or rasp to gently remove material only from the out-of-round section. Re-spin and test until smooth. Repeat if needed.
This imbalance is common with budget tires and rarely noticeable below 30 mph.
Convert to Solid Tires: Step-by-Step
Solid tires eliminate flats entirely but require heat and significant physical effort.
Verify Compatibility First
Match the tire size exactly (e.g., 10×2.5). Confirm rim width supports the tire. Upgrading from 2.125-inch to 2.25-inch width may cause frame interference on Levy or GoTrk models.
Heat the Solid Tire
Use an ultrasonic heater to warm the tire to 160°F (71°C). Heating increases flexibility significantly. Cold solid tires are nearly impossible to install. Expect slight discoloration that wipes clean after cooling.
Prepare and Mount the Tire
- Clean and dry the rim thoroughly
- Apply a thin layer of general-purpose grease (too much causes slippage under load)
- Mount the wheel on a stabilizing fixture
Install with Proper Technique
- Use long tire irons or spoons to start the bead over the rim
- Work symmetrically rather than completing one side before starting the other
- Use vice grips or tongs to straighten and guide the bead
- Push evenly until both sides are fully seated and centered
This process takes approximately one hour including heating time.
Avoid Critical Installation Errors
Even experienced users make preventable mistakes that cause complications.
Never Use Soapy Water Near Motors
Water-based lubricants can seep into hub motors, causing rust or electrical failure. Always use silicone-based sprays like DeB D40 that are safe for rubber and electronics.
Do Not Scratch Aluminum Rims
Metal pry bars gouge the bead seat, leading to air leaks. Use plastic levers or the channel lock compression method instead.
Do Not Over-Grease Solid Tires
Excess grease reduces friction between tire and rim. Under hard acceleration or braking, the tire may spin independently, creating a serious safety hazard.
Always Recheck Alignment
After reassembly, spin the wheel to check for wobble. Ensure the brake rotor clears the caliper. Confirm the tire does not rub the fender or motor. Test brakes at low speed before full operation.
Final Steps: Reinstall and Test
Proper reassembly ensures safety and performance.
Reattach the Wheel
- Slide the wheel back into the fork or frame
- Reinsert the woodruff key or magnet into the axle seat
- Secure with the axle nut and tighten firmly
- Reinstall the alignment guide and brake caliper
- Reconnect all wiring and replace side panels
Inflation and Inspection
Inflate to the PSI marked on the tire sidewall (typically 35 PSI). Spin the wheel and watch for uneven seating or bulges. Listen for hissing that indicates leaks.
Test Ride Safely
Start with a low-speed test at 5 to 10 mph. Check braking, steering, and vibration. Stop immediately if anything feels off.
Maintenance Tips to Prevent Future Flats
Keep your scooter running smoothly with regular care.
Monthly Pressure Checks
Underinflated tires increase pinch flat risk. Use a digital gauge weekly rather than relying on visual inspection.
Pre-Ride Visual Scan
Look for embedded nails, glass, or thorns. Check for cracks or worn tread. Watch for bulges or sidewall damage.
Store Properly
Keep the scooter in a dry, shaded area. Avoid prolonged exposure to UV light or extreme temperatures that degrade rubber.
Frequently Asked Questions About Replacing Scooter Tires
How long does it take to replace a scooter tire?
For pneumatic tubed tires, the process takes 30 to 45 minutes for a first-time DIYer. Solid tire conversions require approximately one hour including heating time. Experience speeds up the process significantly.
Can I replace a scooter tire without professional help?
Yes, most tire replacements are manageable as DIY projects. The most challenging aspects are cable disconnection for tubeless tires and heat application for solid tires. If you feel uncertain, consult a professional for the first attempt.
Why does my scooter tire keep going flat?
Common causes include punctures from sharp objects, valve stem leaks, pinched inner tubes during installation, or rim damage that punctures the tube. Inspect the tire thoroughly to identify the root cause before replacing.
Should I switch from pneumatic to solid tires?
Solid tires eliminate flats entirely but provide a harsher ride and increased rolling resistance. They work well for rental fleets or riders who frequently encounter debris. For daily commuters prioritizing comfort, pneumatic tires remain the better choice.
How often should I check scooter tire pressure?
Check tire pressure monthly for pneumatic tires. Underinflation causes pinch flats and reduced range. Overinflation reduces traction and comfort. Adjust based on rider weight and terrain conditions.
Key Takeaways for Replacing Your Scooter Tire
Replacing a scooter tire is a valuable skill that saves time and money. Identify your tire type first (pneumatic tubed, tubeless, or solid) to gather the correct tools and replacement parts. Use plastic tire levers and silicone sprays to protect components from damage. Always check for the woodruff key during wheel removal and ensure proper valve orientation during installation. Test at low speed before riding at full speed. With the right preparation and attention to detail, you can handle any tire job confidently and correctly.



