
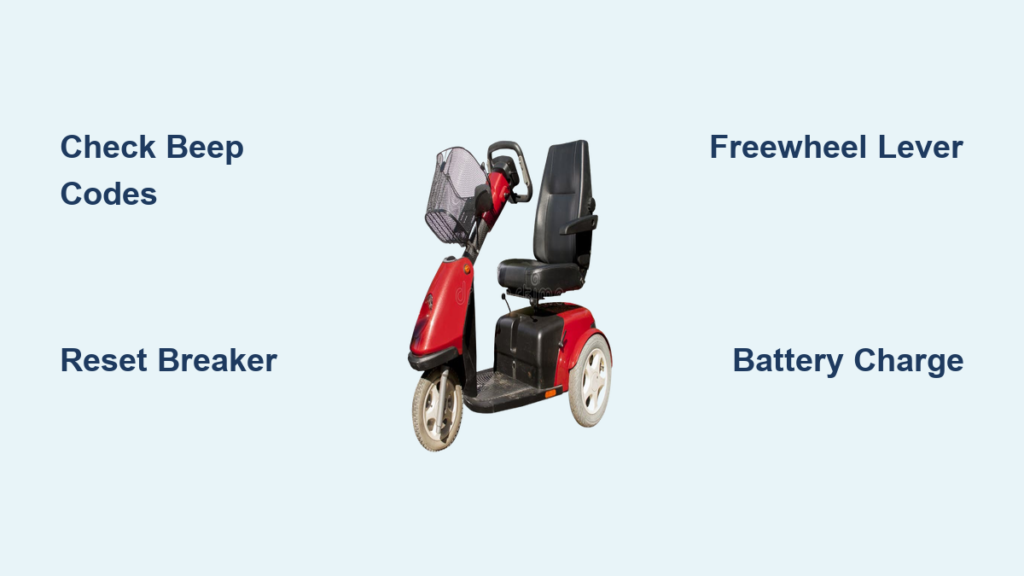
Your mobility scooter not working can be more than just an inconvenience. It can disrupt your independence and daily routine. Whether the scooter won’t start, cuts out unexpectedly, or won’t move despite showing power, most issues stem from a few common causes: low battery, incorrect freewheel settings, tripped breakers, or electrical faults. The good news? Many of these problems can be diagnosed and resolved in under 10 minutes with no tools required.
This guide walks you through a step-by-step troubleshooting process based on real-world service data and manufacturer protocols. You’ll learn how to interpret beep codes, reset system errors, check critical connections, and identify when professional help is needed. By the end, you’ll know exactly what to do when your mobility scooter not working becomes an urgent issue—and how to prevent it from happening again.
Decode Beep Codes First
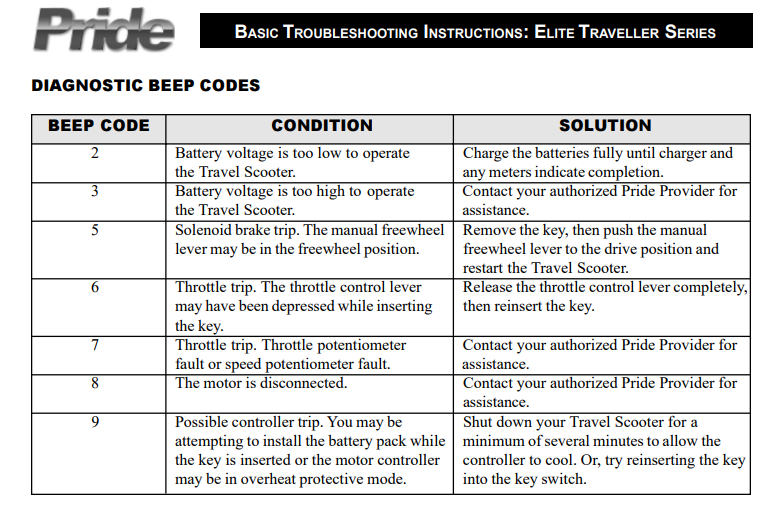
Before inspecting wires or batteries, listen to your scooter. Most modern models use audible beeps to signal specific faults. Ignoring these alerts can lead to misdiagnosis and further damage.
Two Beeps: Low Battery Voltage
If your scooter emits two short beeps when powered on, the battery is too weak to operate. This is the most common reason for a mobility scooter not working.
What to do: Plug in the charger immediately. Check if the charger light shows red (charging) or green (fully charged). If the charger light doesn’t turn on, test the outlet with another device. Even if the display shows charge, a weak battery may collapse under load, so recharge fully before testing again.
Three Beeps: Motor or Brake Fault
Three beeps indicate a problem with the motor wiring or electromagnetic brake system. Common causes include a loose motor connector, damaged brake coil, or wiring harness dislodged during folding. Inspect the motor plug at the rear of the scooter and ensure it’s fully seated and locked. Do not attempt to disassemble the motor; seek professional repair if connections appear intact.
Five Beeps: Throttle Not Centered or Freewheel Mode
Hearing five beeps? Two likely culprits: the throttle wasn’t centered at startup, or the freewheel lever is engaged. For throttle issues, turn the key off, center the joystick or throttle completely, wait 3 seconds, then restart. For freewheel mode, locate the yellow lever near the rear wheels and confirm it’s fully clicked into the Drive position. Golden Technologies Buzzaround XL users often trigger this error by leaving the rear lever in neutral.
Six Beeps: System Initialization Error
Six beeps usually mean one of two things: either the charger is still plugged in, or you engaged the throttle too quickly after turning the key. If the charger is connected, turn off the scooter, unplug the charger from both wall and scooter, then restart. For throttle timing issues, wait at least one second after turning the key to ON before pressing the throttle. Squeezing too soon prevents system handshake.
Six or More Beeps: Controller Failure
Persistent beeping (six or more) signals a controller or internal system fault. Possible causes include water damage, power surge, or internal circuit failure. Try this reset: turn off the scooter, disconnect the main battery plug, wait 5 to 10 minutes, reconnect and restart. If beeping continues, professional diagnostics are required.
Check Power Supply and Battery Health
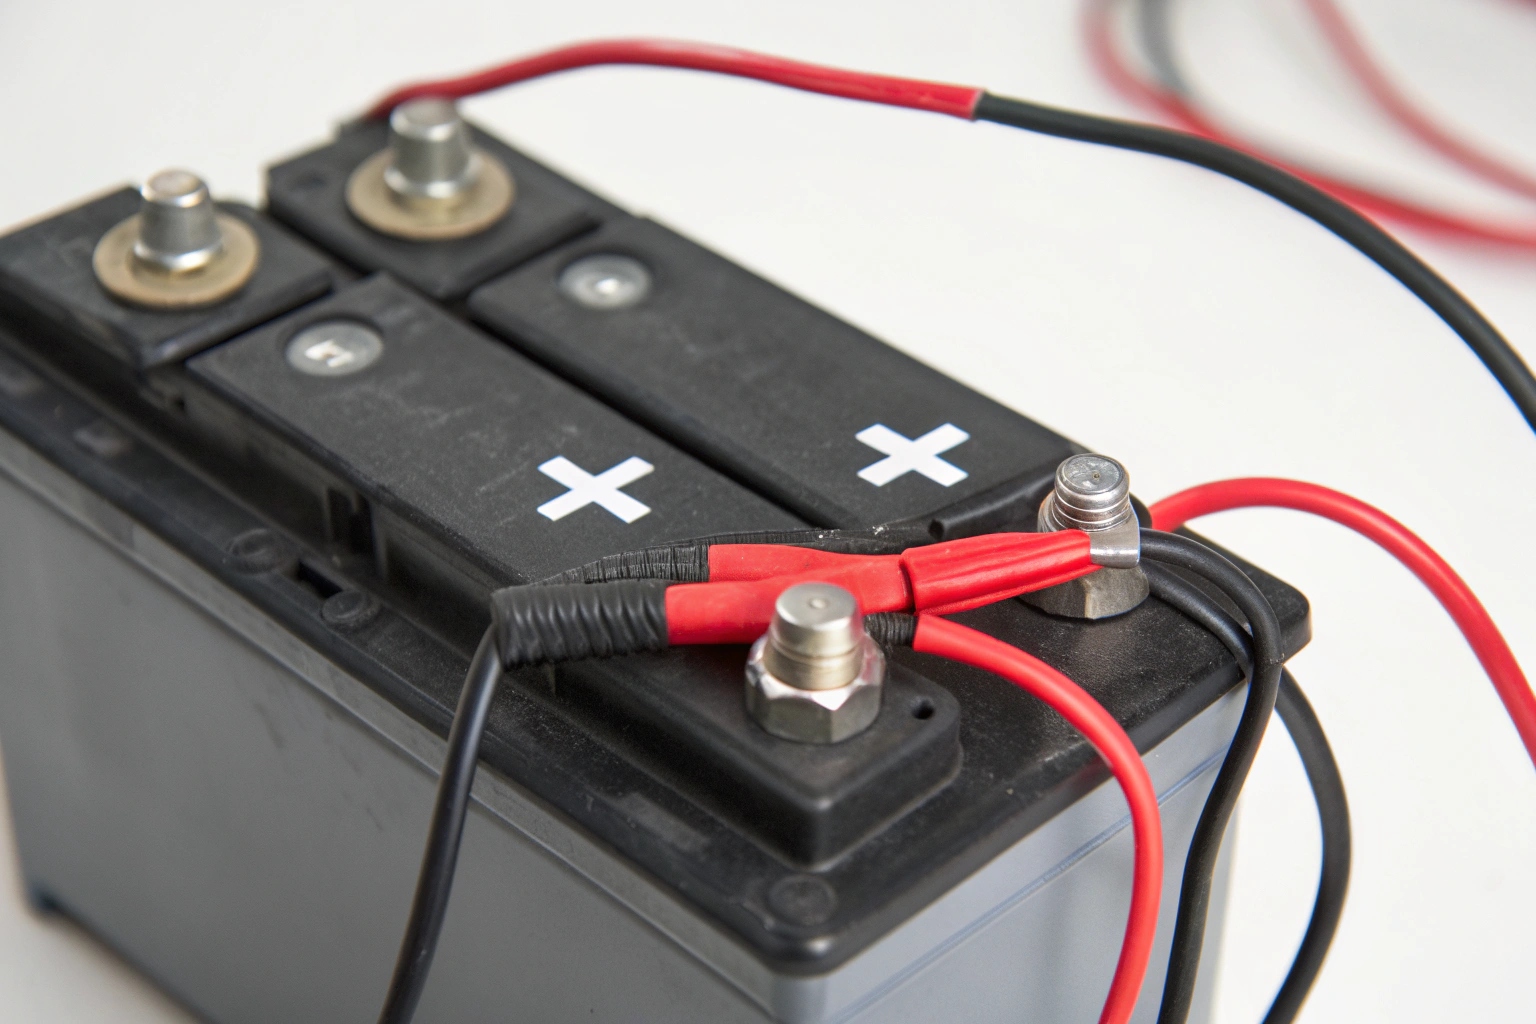
Battery issues cause 60 to 65 percent of all mobility scooter failures. Even if the scooter powers on, a failing battery may not deliver enough current to drive the motor.
Test Battery Seating and Connections
A loose battery is a silent killer. Many scooters won’t run if the battery isn’t fully seated. For removable battery boxes, remove and reinsert the battery pack, ensure it clicks into the guide rails, and secure the Velcro strap tightly. For clip-type batteries, verify both positive and negative clips are fully attached and listen for a firm snap. Inspect terminals for white or blue corrosion, clean with baking soda and water, and dry thoroughly before reconnecting.
Confirm Charging Is Active
No power? Start here. Plug in the charger to an outlet that works (test with a lamp). The charger light should turn red when charging; green means fully charged or no connection. Some chargers have an inline fuse (usually 3A); replace only with the same amperage. Use only the manufacturer-recommended charger, as wrong voltage can destroy the battery pack.
Assess Battery Age and Performance
All batteries degrade. Standard lead-acid or gel batteries typically last 12 to 18 months. Warning signs include range dropping below 3 to 4 miles, needing charging mid-day, or voltage dipping when accelerating. If more than 2 years old and underperforming, assume failure and have it load tested at a service center.
Reset Breakers and Fuses
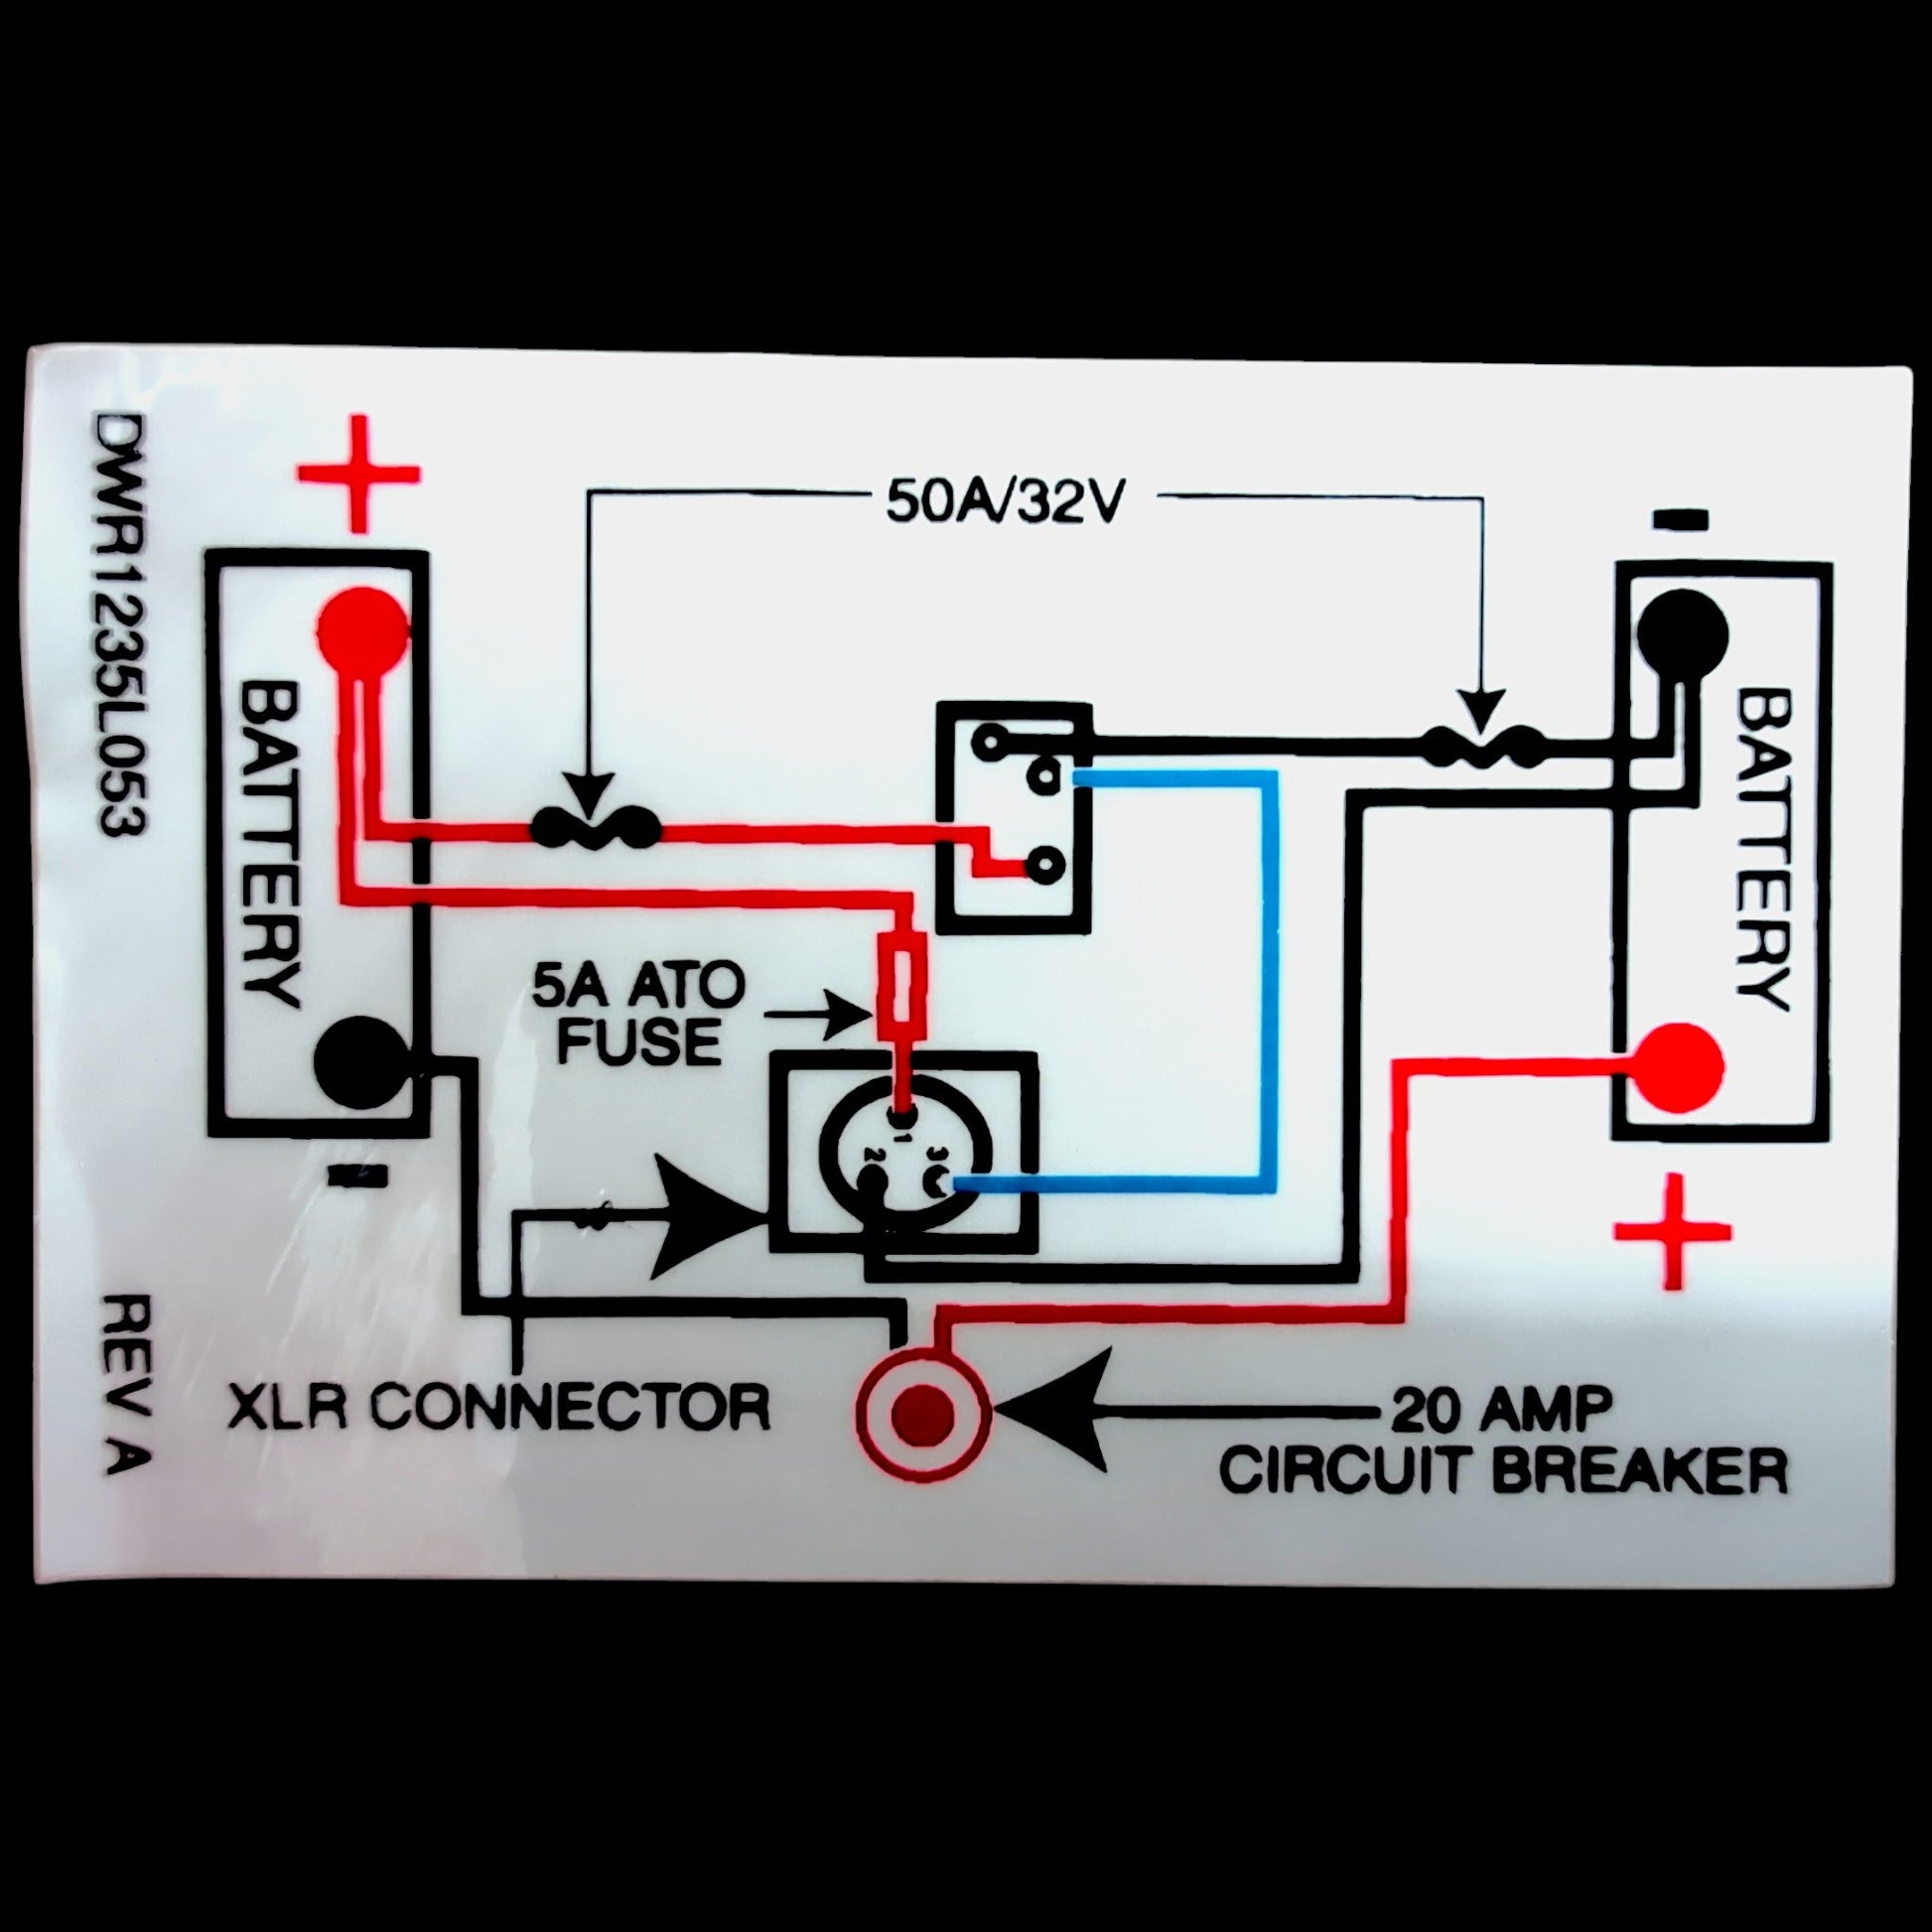
Electrical faults often mimic mechanical failure. A tripped breaker or blown fuse can kill power instantly.
Locate and Reset the Circuit Breaker
The circuit breaker protects the motor from overload. Where to find it: near the battery compartment, usually a small red or black button. How to reset: press firmly until it clicks; do not hold. Why it trips: climbing steep hills, exceeding weight limit, or failing battery. If it trips again immediately, stop use to avoid motor or controller damage.
Inspect and Replace Fuses
Fuses protect individual circuits and blow permanently. Common locations include under the seat, inside the battery box, or near the controller. How to check: remove fuse and inspect filament, or use a multimeter. Replacement rule: match exact amperage (15A, 20A, etc.). Never use a higher-rated fuse due to fire risk.
Verify Mechanical Systems
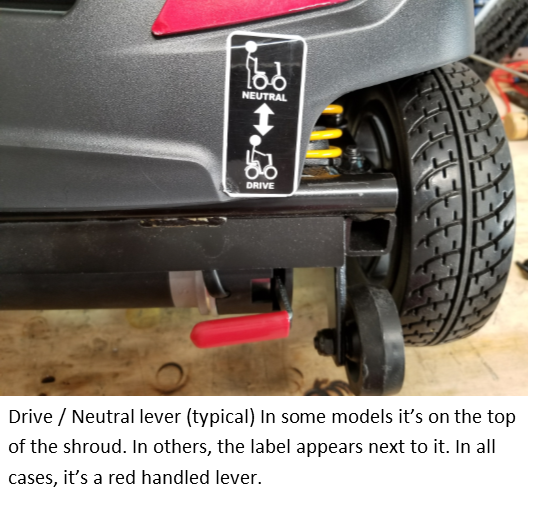
Even with full power, mechanical issues can prevent movement.
Freewheel Lever Must Be in Drive
One of the top reasons scooters won’t move: the freewheel lever is in neutral. Find the lever, usually yellow, located on the rear motor housing. Set to Drive by pulling up and pushing forward until it clicks. It should feel solid, not loose or wobbly. Never operate in Neutral unless manually pushing. Leaving it in neutral on a slope can cause runaway.
Electromagnetic Brake Lockup
If the scooter has power but won’t budge and feels like the wheels are jammed, it may be brake lockup. The brake releases automatically when powered, but if power fails or system errors occur, it stays engaged. Symptoms include not being able to push the scooter even in freewheel mode, or motor making a humming sound but not turning. Do not force it; you could strip gears. If lever is in Drive and power is good, contact a technician.
Inspect Throttle and Joystick
A faulty throttle can make the scooter unresponsive. Common issues include dirt in joystick mechanism, corroded potentiometer, or loose wiring. Test by turning key on, gently wiggle the joystick, and listen for intermittent beeps or motor twitch. Clean with compressed air or electronic contact cleaner. Replace if jerky, delayed, or one-directional.
Motor, Tires, and Drive Train Check

Mechanical resistance or damage can stop your scooter dead.
Clear Debris from Wheels and Motor
Hair, cords, or gravel can jam the wheels. Inspect daily by spinning each wheel by hand and looking for tangled material around axles or hubs. Remove carefully using scissors or pliers; don’t pull hard. Cut away fabric or string wrapped around the motor shaft. Clean after every outdoor use to prevent buildup.
Check Tire Pressure and Condition
Underinflated tires drag the motor and drain the battery. For pneumatic tires, check PSI weekly (typical range 30 to 35 PSI). For solid tires, inspect for cracks, flat spots, or embedded rocks, and replace if worn unevenly. Uneven wear may indicate alignment issues requiring professional attention.
Belt or Gear Drive Inspection
Some scooters use belts; others use direct gear drives. For belt-driven models, open the rear cover if accessible and look for cracks, fraying, or looseness. A broken belt equals no movement. For gear-driven models, listen for grinding or clicking, which indicates worn gears or lack of lubrication. If you smell overheating, stop immediately and let motor cool for 30 minutes or more.
Ignition, Switches, and Sleep Mode
Simple oversights often get mistaken for major failures.
Key Switch and Insertion
A stuck or partially inserted key breaks the circuit. Ensure full insertion by pushing key all the way in before turning. If it sticks, apply graphite lubricant (not oil). If broken, use tweezers or a magnet to remove fragments; never force it.
Safety Interlocks Must Be Engaged
Your scooter has built-in safety switches. The seat switch means the scooter may not start unless weight is on the seat, so sit fully before powering on. The brake lever, if equipped, must be fully released or it disables forward motion. The kill switch (E-stop) must be in the Run position.
Wake from Sleep Mode
Scooters enter sleep mode after 3 to 5 minutes of inactivity with the key on. Symptoms include no response from throttle or display dim or off. Fix by turning key off, waiting 30 seconds, then turning back on. Prevent by always turning off the key when not in use.
Unlock Security Mode
Some models lock automatically. Signs include flashing LED or lock icon on display. Unlock methods vary by model: hold power button 5 to 10 seconds, or use a specific joystick sequence. Consult your manual for your specific model.
Diagnose Performance Issues
Even if the scooter works, poor performance can signal deeper problems.
Scooter Is Slow or Loses Power on Hills
Battery age is the most common cause after 18 months. Check rider plus cargo versus rated capacity. Verify the speed dial is set to max. Terrain may be too steep; scooters have incline limits (usually 6 to 8 degrees).
Unexpected Shuts Off Mid-Ride
Shuts off mid-ride? Likely thermal or electrical. Overheating causes motor or controller to shut down to protect itself; wait 20 to 30 minutes to cool. Loose wiring from vibration can disconnect harnesses; check front-to-rear connection on foldable models. Failing battery cell causes sudden voltage drop; replace battery pack if over 2 years old.
Pulls to One Side or Vibrates
Check tire pressure imbalance on both sides. Tighten loose bolts on steering column, armrests, and motor mounts. Wheel misalignment requires professional adjustment. Worn wheel bearing causes grinding when turning.
Prevent Future Failures
Most breakdowns are preventable with simple habits.
Follow a Maintenance Schedule
Perform these tasks regularly: charge battery after every use (full charge even for short trips); check tire pressure weekly; inspect wiring monthly for frays and loose plugs; clean scooter weekly to remove debris and wipe down; get professional checkup every 6 to 12 months for full system diagnostic.
Store Properly
Store indoors, dry, moderate temperature. For long storage, charge battery fully, recharge every 30 days, and keep charger unplugged when not in use.
When to Call a Professional
Some issues require expert hands.
Seek Technician Help If
Motor fails repeatedly after resets; controller beeps persist (6+ beeps); electromagnetic brake remains locked; structural damage occurs (bent frame, cracked axle); or warranty is still active (use authorized dealer).
Repair vs. Replace
Older than 3 years with recurring issues? Consider upgrading. Lithium-ion models offer longer life, lighter weight, and faster charging. Rentals are available for temporary mobility needs.
Critical Do Nots
Do not operate with the charger plugged in. Do not force the freewheel lever; align and click gently. Do not replace fuses with higher amperage. Do not bypass the circuit breaker. Do not ignore beep codes; they are early warnings. Do not leave in neutral on a slope.
Key Takeaways for Fixing a Mobility Scooter Not Working
A mobility scooter not working is rarely a total loss. In most cases, the fix is simple: recharge, reset, reseat, or re-engage. Start by listening to beep codes, as they pinpoint the exact problem. Battery issues account for most failures, so check connections and age first. Most mechanical problems stem from the freewheel lever being in the wrong position or debris blocking wheels. By following this guide, you can restore function quickly and safely. Keep this checklist handy; next time your scooter fails, you’ll be ready.
Frequently Asked Questions About Mobility Scooter Not Working
Why does my mobility scooter beep but not move?
Two beeps mean low battery voltage. Three beeps indicate a motor or brake fault. Five beeps mean the throttle wasn’t centered or freewheel mode is engaged. Six beeps suggest a system initialization error or charger is still plugged in. Identify the beep pattern first, then follow the corresponding troubleshooting steps.
How do I reset my mobility scooter?
Turn off the scooter, disconnect the main battery plug, wait 5 to 10 minutes, then reconnect and restart. This clears temporary logic errors in the controller. For sleep mode, simply turn the key off, wait 30 seconds, then turn back on.
Why won’t my mobility scooter start even with a full battery?
Check if the freewheel lever is in the Drive position. Verify all safety interlocks are engaged (seat switch, brake lever, kill switch). Inspect for loose battery connections or corroded terminals. The key switch may not be fully inserted.
Can I fix my mobility scooter myself?
Many issues are user-resolvable: recharging the battery, resetting breakers, reseating connections, cleaning terminals, and adjusting the freewheel lever. However, motor failures, controller faults, electromagnetic brake lockup, and structural damage require professional repair.
How often should I replace my mobility scooter battery?
Standard lead-acid or gel batteries last 12 to 18 months. Replace when range drops significantly, the battery won’t hold charge, or voltage drops sharply under load. If over 2 years old and showing degradation, plan for replacement.



