
If your Pride mobility scooter isn’t starting, has flickering lights, or the motor cuts out unexpectedly, you’re not alone. Many Pride scooter owners face recurring issues tied to electrical connectors, battery performance, and mechanical wear. This guide breaks down real-world repair insights from technical service data, offering actionable steps for troubleshooting, maintenance, and knowing when professional intervention is essential.
You’ll learn how to identify melting connectors, test brake engagement, extend battery life, and avoid costly mistakes. Whether you own a travel scooter or a heavy-duty outdoor model, these tips will help you keep your Pride scooter running safely for years.
Locate Authorized Pride Scooter Repair Service Fast
Use the Dealer Locator Tool
Pride Mobility does not offer direct consumer repairs or parts sales. All technical support must go through an authorized dealer. To find one, visit pridemobility.com and click “Buy Online/Find a Dealer.” Enter your zip code or address, select “Mobility Scooters” from the product dropdown, and adjust the search radius between 15 and 250 miles.
The results list includes contact numbers, addresses, and service hours. For European users, contact info@pridemobilityeurope.nl for general inquiries, but route warranty claims and service needs directly to your local dealer.
Why Dealer-Only Service Matters
Dealers have access to genuine Pride parts, diagnostic tools, and training on model-specific systems. Attempting complex repairs without expertise can void warranties and create safety hazards.
You should stop using your scooter immediately and contact a certified provider if you notice:
• Signs of internal damage
• Melted wiring
• Burning smells
• Unusual motor noises
Order Genuine Parts Through Your Dealer
No Direct Parts Sales to Consumers
Pride does not sell components directly to consumers. Even common items like shrouds, fuses, or chargers must be ordered through your dealer. This ensures compatibility and traceability.
Using aftermarket or non-certified parts risks electrical mismatch, fire hazards, and permanent warranty loss. Always insist on genuine Pride components for any repair.
Submit Damage Claims Promptly
If your scooter arrives damaged, report it the same day. Contact the selling dealer with clear photos of both the damaged unit and original packaging.
This documentation is required for warranty processing and fast replacement. Delayed reporting may result in denied claims.
Pride Scooter Warranty Coverage Explained
What Is Covered and for How Long
Pride offers tiered protection on different scooter components. Understanding what is covered helps you avoid unnecessary out-of-pocket expenses.
The warranty structure includes:
• Lifetime Warranty: Frame, platform, fork, seat post, and welds
• 2-Year Limited: Transaxle, motor, and brakes
• 1-Year Limited: Controller, charger, and electrical components
Tampering with sealed electronics voids coverage instantly. Opening the controller or modifying wiring disables all electrical warranties.
Battery Warranty Varies by Type
Standard lead-acid batteries are covered for 12 months by the manufacturer. Lithium-ion packs follow separate Lithium Warranty terms, often with shorter durations due to chemistry sensitivity.
Always confirm battery coverage with your dealer, especially if replacing after six or more months of use.
Common Exclusions to Know
These items wear out through normal use and are not covered:
• Tires and inner tubes
• Light bulbs and fuses
• Lap belts and upholstery
• Plastic shrouds and motor brushes
Damage from flooding, accidents, or overloading also voids claims. Labor costs may not be included, so verify with your dealer whether service fees are covered under warranty.
Daily Safety Checks for Your Pride Scooter
Test Throttle Return Function
Before every ride, turn off the power and inspect the throttle. Pull and release it several times. It must snap back smoothly to neutral.
A sticky or slow-returning throttle can cause runaway acceleration and requires immediate dealer service. This is a critical safety check that should never be skipped.
Verify Brake Engagement Properly
On a flat surface with clear space ahead, perform this test:
1. Turn on the scooter and set speed to low
2. Wait one second. Battery gauge should stay lit
3. Slowly pull the throttle forward
4. Listen for a click within one to two seconds. This is the brake releasing
5. Release the throttle immediately after the click
6. Repeat in reverse direction
No click means the brake may be stuck engaged, draining power or preventing movement. This often points to a failed controller signal or corroded wiring.
Weekly and Monthly Inspection Routine
Check for Corrosion on Connectors
Once a week, unplug the charger and inspect the charging port and controller connections. Look for:
• White or green crust indicating corrosion
• Discoloration on metal pins
• Loose or bent connectors
Clean gently with isopropyl alcohol and a cotton swab. Never use water. Corrosion increases resistance, causing heat buildup and eventual melting.
Examine Anti-Tip Wheels Monthly
Anti-tip wheels should hover slightly above the ground during normal use. If they drag or show extreme wear, they’ll create drag and damage flooring.
Replace anti-tip wheels if cracked or worn flat. Also check mounting bolts for tightness during monthly inspections.
Keep Your Scooter Clean and Dry
Wipe down the frame weekly with a damp cloth. Avoid high-pressure water or submersion, as flooding voids warranties.
Dry thoroughly after cleaning. Moisture accelerates corrosion and degrades plastic shrouds over time.
Schedule Annual Professional Service
Why Annual Checkups Matter
Even with perfect home care, internal issues go unnoticed by users. Professional technicians catch problems like:
• Flat spots on tires from storage
• Loose wire terminals in the controller
• Worn motor brushes
• Degraded grease in steering joints
For daily users, skipping service increases risk of sudden breakdowns, especially in models with known wiring vulnerabilities.
What a Full Service Includes
A complete annual service should cover:
• Bolt tightening for seat, armrests, and tiller
• Greasing seat struts and pivot points
• Wheel bearing inspection
• Wiring harness integrity check
• Battery connection cleaning
• Brake and throttle calibration
After service, the technician should test lights, steering, and load-bearing brake function.
Fix Go-Go Scooter Wiring Tray Cracks

Why Superglue and Heat Repairs Fail
The plastic wiring tray under Go-Go scooters frequently cracks at the base due to stress. Superglue fails because the plastic is too brittle.
Soldering irons or heat guns melt the thin material, creating holes and weakening structure further. These methods cause more damage than they repair.
Secure Temporarily Until Replacement Arrives
If the tray is split but still protective, try this temporary solution:
1. Drill small pilot holes on either side of the crack
2. Insert plastic screws or zip ties to hold pieces together
3. Seal edges with waterproof tape
This keeps debris and moisture out until you receive a genuine replacement tray from your dealer. Never operate with exposed wiring visible.
Repair Tiller Adjustment Thread Wear
Problem: Loose Handlebar Height Lock
The tiller’s tilt adjustment nut is welded to the shaft. Repeated tightening can strip threads, making it impossible to lock the handlebar in place.
This affects models like the Go-Go and Victory series that use threaded adjustment mechanisms.
Avoid Further Damage
Do not attempt to rethread with a tap. It will likely destroy what remains. Forcing it worsens the weld damage and creates additional problems.
Temporary Fix Using Thread Locker
For a temporary solution:
1. Screw the nut down as far as it goes
2. Apply medium-strength thread locker like Loctite 242
3. Let cure fully before use
This prevents loosening but limits adjustability. The permanent fix is replacing the entire tiller assembly through your dealer.
Upgrade Battery Capacity Safely
Increase Runtime Without Compromising Safety
Want longer rides? Upgrade from 35Ah to 40Ah batteries, but only if your model supports it. Higher capacity extends runtime, not top speed.
Speed depends on the controller’s amperage limit, which is usually 40 to 50A on most Pride models.
Match Battery Configuration Exactly
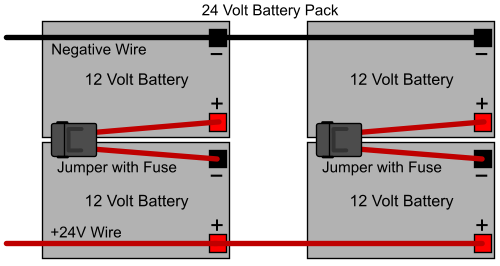
Understanding battery configuration is critical for proper upgrades:
• Parallel configuration: Two 12V batteries connected side by side result in 12V total while Ah adds up. For example, two 12V 10Ah batteries create a 12V 20Ah system
• Series configuration: Batteries linked end-to-end result in voltage adding while Ah stays the same. Two 12V 10Ah batteries in series create a 24V 10Ah system
Use only manufacturer-approved batteries. Mismatched packs cause imbalanced charging and premature failure.
Handle Lithium Packs With Extra Care
Lithium batteries are stored in key-locked enclosures. Always disconnect before servicing.
They’re airline-legal if removed, but check specific airline rules first. Never leave lithium batteries uncharged for months, as this kills cells permanently.
Replace Melted Connectors on Victory LX Sport

Diagnose High-Resistance Damage
Common symptoms of connector failure include:
• Scooter powers on but won’t move
• Burning smell near controller
• Flickering lights or intermittent brakes
• Whining motor noise
Inspect the motor and controller connectors. If wires are fused to plastic or pins are discolored, you have a high-resistance failure caused by poor contact and heat buildup.
Why Salvage Attempts Usually Fail
Using a Dremel to cut out melted sections rarely works. Wires fuse internally, and threading new ones through the frame is blocked by cross-members.
The only reliable fix is replacing both front and rear connector blocks as a matched set.
Follow Correct Pin Orientation
Miswiring causes instant damage. For the rear connector handling power and lights:
• Bottom row: Red for positive, Black for negative
• Top row: Brown for brake one, Green for brake two, Purple for light signal
• Notch position: Bottom
For the front connector handling motor and brakes:
• Larger square housing with same color layout
• Red, Black, and dual Brown wires for brakes
• Double plug for brake wires
• Spring side up, tab down
Always align pins fully before tightening screws. Overtightening crushes wires and causes new problems.
Upgrade to Modern Snap-In Connectors
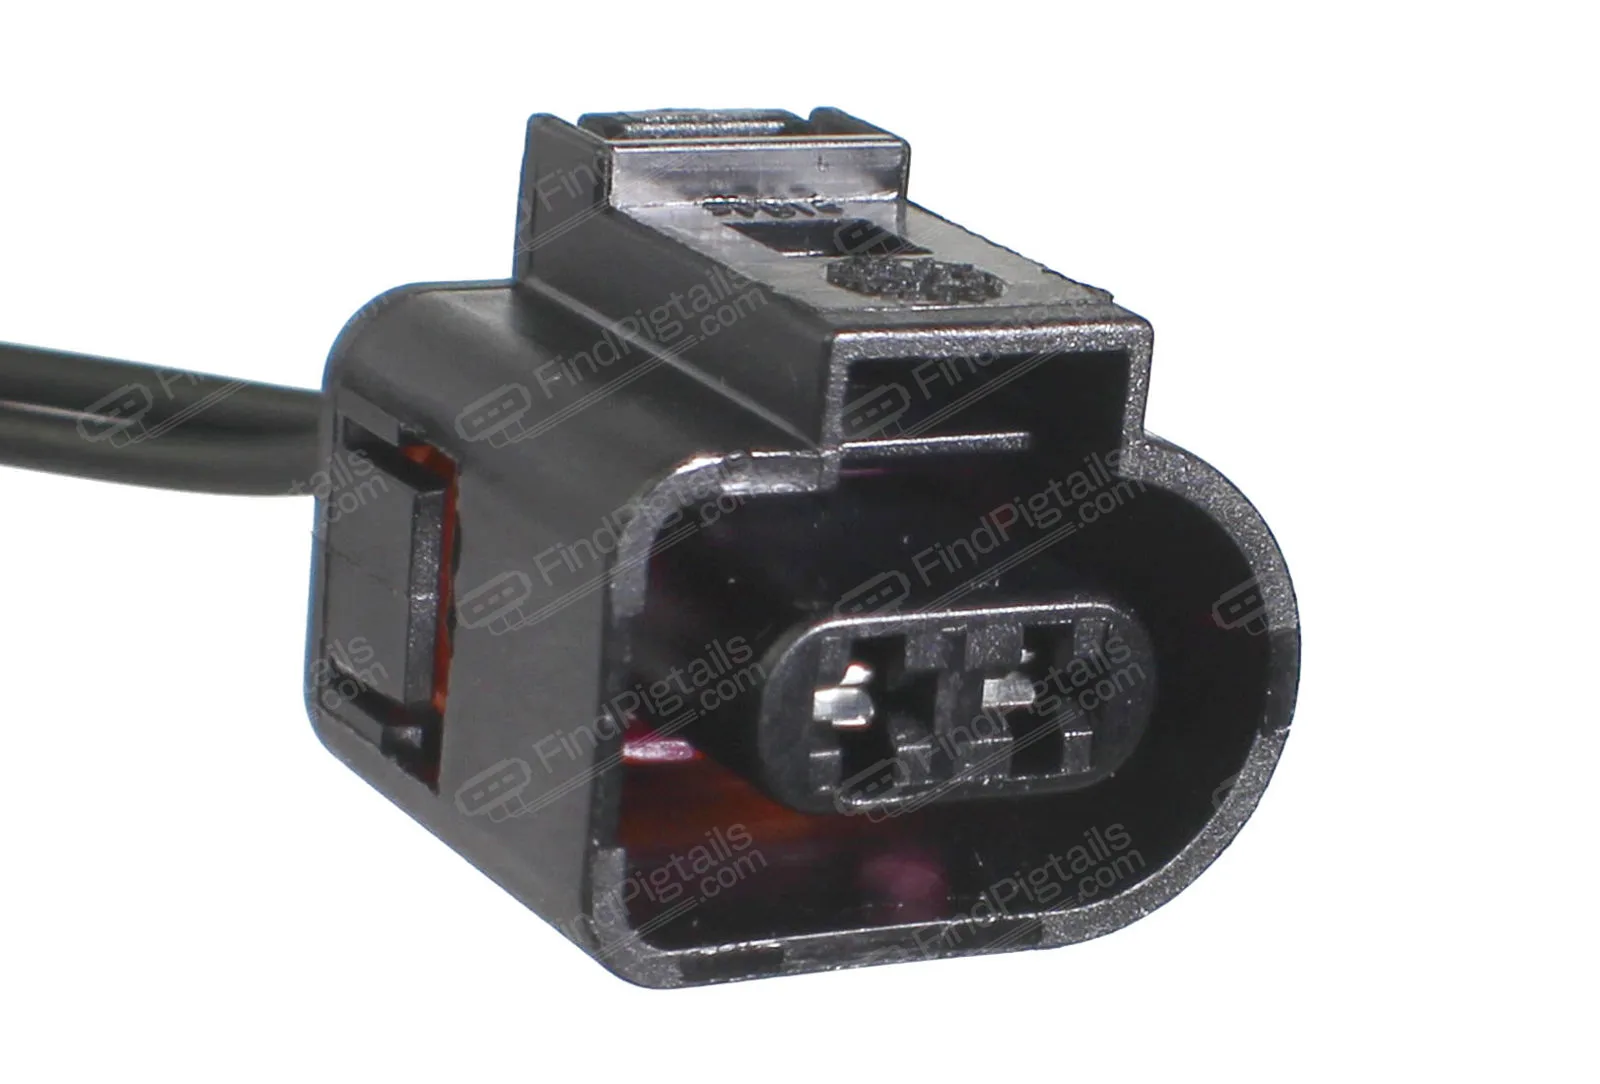
Older Victory models use fragile spring-and-plate connectors prone to bending. Newer replacements feature keyed snap-in designs also used in Golden series scooters.
These prevent misalignment and last longer under frequent use. Consider upgrading when replacing connectors.
Reassemble After Repair With Precision
Remove Shrouds Carefully
To access internal wiring:
1. Remove all visible screws. White shroud on Go-Go models, red clip on Victory models
2. Gently pry edges with a plastic tool
3. Never force. Plastic becomes brittle with age
Clean the area with degreaser and dry thoroughly before reassembling.
Secure Wires and Reconnect Safely
After any repair:
• Use cable ties to bundle loose wires
• Ensure no wires pinch when reinstalling shrouds
• Apply heat shrink tubing over exposed pins
• Use Loctite on nylon screws. They lose grip over time
Test all functions before returning the scooter to full use.
Prevent Future Failures With Proper Care
Avoid Overloading and Water Exposure
Stay under the weight limit specified for your model. Overloading strains the motor and transaxle.
Never ride through puddles or wash with a hose. Water ingress corrodes connectors and voids warranties.
Store Batteries Correctly
Lead-acid batteries need charging every 30 days if unused. Lithium batteries should be stored at 50 to 80% charge.
Dead batteries rarely recover. Proper storage extends battery life significantly.
Book Regular Dealer Checkups
Even if the scooter seems fine, schedule annual service. Technicians spot early signs of connector stress, wire chafing, or bearing wear.
These issues lead to expensive repairs if ignored. Prevention costs far less than major repairs.
Frequently Asked Questions About Pride Scooter Repair
Can I Repair My Pride Scooter Myself?
You can perform daily safety checks and basic maintenance like cleaning connectors and testing brakes. However, complex repairs involving controllers, wiring harnesses, or connector replacement require authorized technicians. Attempting major repairs yourself voids warranties and can create safety hazards.
How Do I Find an Authorized Pride Dealer Near Me?
Visit pridemobility.com and click “Buy Online/Find a Dealer.” Enter your zip code, select “Mobility Scooters,” and adjust the search radius. Results show contact information, addresses, and service hours for local authorized dealers.
What Does the Pride Scooter Warranty Cover?
The lifetime warranty covers the frame, platform, fork, seat post, and welds. The two-year limited warranty covers the transaxle, motor, and brakes. The one-year limited warranty covers controllers and chargers. Batteries have separate coverage, typically 12 months for lead-acid and varies for lithium-ion.
Why Do Victory LX Sport Connectors Melt?
Melting occurs due to high resistance from poor connections. Heat builds up at contact points, breaking down insulation and fusing wires to plastic housings. This happens most often in high-use scooters where connectors undergo repeated mating cycles.
How Often Should I Service My Pride Scooter?
Perform daily throttle and brake checks. Weekly inspect connectors for corrosion. Monthly check anti-tip wheels and clean the scooter. Schedule annual professional service regardless of how the scooter appears to be functioning.
Can I Upgrade My Scooter Batteries for Longer Range?
Yes, you can upgrade from 35Ah to 40Ah batteries if your model supports it. Higher capacity extends runtime. However, speed is determined by the controller’s amperage limit, not battery capacity. Always use manufacturer-approved batteries.
Key Takeaways for Maintaining Your Pride Scooter
Pride scooters are built for durability, but high-use models face predictable failure points, especially in electrical systems. While you can perform daily checks and basic maintenance, complex repairs like connector replacement or controller work require authorized technicians.
Understanding the real causes behind common issues helps you act quickly. Melting connectors result from high-resistance connections. Throttle failure stems from stuck mechanisms. Battery degradation comes from improper storage. Each problem has specific warning signs that, when caught early, prevent expensive repairs.
Protect your investment by scheduling annual professional service, using genuine Pride parts, and following proper storage and charging practices. Your scooter provides reliable mobility when maintained correctly.



