
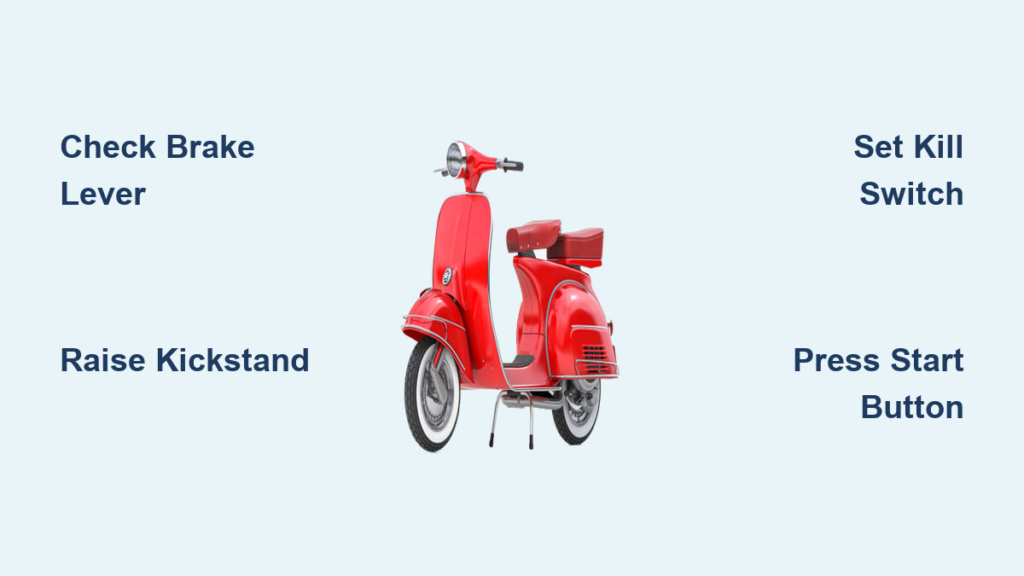
You’re ready to ride, but your motor scooter won’t start. It’s a common frustration, especially for new riders, but most starting issues come down to simple, fixable steps. Whether you’re using an electric starter, a kick start, or troubleshooting a stubborn engine, knowing the correct procedure makes all the difference. This guide breaks down how to start a motor scooter safely and reliably, step by step.
From pre-start checks to emergency workarounds, you’ll learn not just how to start your scooter, but why certain steps matter. Whether you’re on a 50cc commuter or a 300cc maxi-scooter, this guide applies to all automatic models with CVT transmission and standard safety interlocks.
Pre-Start Safety Checks and Positioning
Before touching the starter button, ensure your scooter is ready to fire up safely. Skipping these steps is the number one cause of failed starts.
Position the Scooter Correctly
Choose between two safe starting positions based on your goal:
• On center stand for stationary warm-up or system checks
• Off stand, rider seated, if you plan to ride immediately
Never start with the side stand down. Most scooters block ignition when the kickstand is deployed.
Activate Ignition System
Follow this switch checklist:
- Insert key and turn to “ON” to unlock steering and power the dashboard
- Set kill switch to “RUN” (look for the half-C symbol, not the X)
- Confirm kickstand is fully retracted
- Press and hold either brake lever to trigger the brake interlock
If any of these steps are missed, the scooter won’t start, even if everything else works perfectly.
Check Dashboard Indicators
After turning the key to “ON,” watch the instrument cluster:
• Blue high beam light flashes normally during startup
• ABS light flashes when stationary and turns off once moving
• No warning lights is good, but verify fuel level and battery charge
If lights don’t illuminate, suspect a dead battery or blown fuse.
Electric Start Procedure
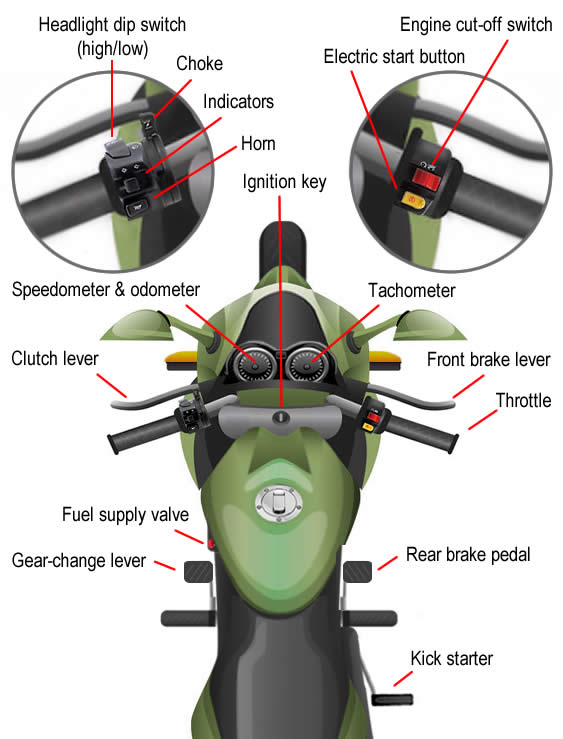
The electric starter is the go-to method for daily use. It’s fast, easy, and reliable when the battery is healthy.
Engage Brake and Start Engine
- Sit on the scooter or stand behind it securely
- Press and hold the rear brake lever (recommended) or front brake
- Twist the throttle one-quarter turn if the engine is cold
- Press and hold the yellow start button on the right handlebar
- Release the button as soon as the engine fires
Use the rear brake during startup. It lets your right hand control throttle and starter while managing the driven wheel, reducing lurch risk.
Cold Engine Warm-Up
After starting, keep the brake engaged and maintain light throttle until the idle stabilizes. Let the engine idle for 30 to 60 seconds before riding. Shutting off too soon disrupts the choke cycle and can cause stalling.
Kick Start Backup Method
When the battery is dead or the electric starter fails, the kick start saves the day, if used correctly.
Prepare for Kick Start
- Place scooter on center stand with rear wheel off the ground
- Turn ignition to “ON”
- Set kill switch to “RUN”
- Hold front brake firmly for stability
The brake must be held. The kick start won’t work otherwise due to the safety interlock.
Execute Proper Kick Technique
- Pull kick lever fully outward
- Deliver a firm, fast kick using full leg momentum
- Don’t ease into it; quick force is required to rotate the engine
If it doesn’t start, reset the lever and repeat two to three times. For cold engines, slightly open the throttle while kicking. A quick, strong kick works better than multiple weak ones, especially in cold weather.
Emergency Starting Techniques

When standard methods fail, these techniques can get you moving. Use them with caution.
Push Start (Roll Start)
This method uses momentum to turn the engine over. It’s best for scooters with manual clutch or low-compression engines.
When to use push start:
• Dead battery
• Starter motor failure
• No access to tools or jump pack
Step-by-step procedure:
- Turn key to “ON” and kill switch to “RUN”
- Push scooter to eight to ten miles per hour (run alongside or roll downhill)
- Jump on and release clutch if manual, or twist throttle slightly if automatic
- Engine should catch. Stabilize and ride immediately
This requires coordination. Practice in an empty parking lot first.
Jump Start with Cables
Use this only if the battery is weak but the starter motor clicks.
Connection order:
- Connect red (positive) to dead battery’s positive terminal
- Connect other red to live battery’s positive
- Connect black (negative) to live battery’s negative
- Connect other black to scooter frame at a clean metal point
Then attempt the electric start. After starting, ride at least 20 minutes to recharge the battery.
Drill Start (Last Resort)
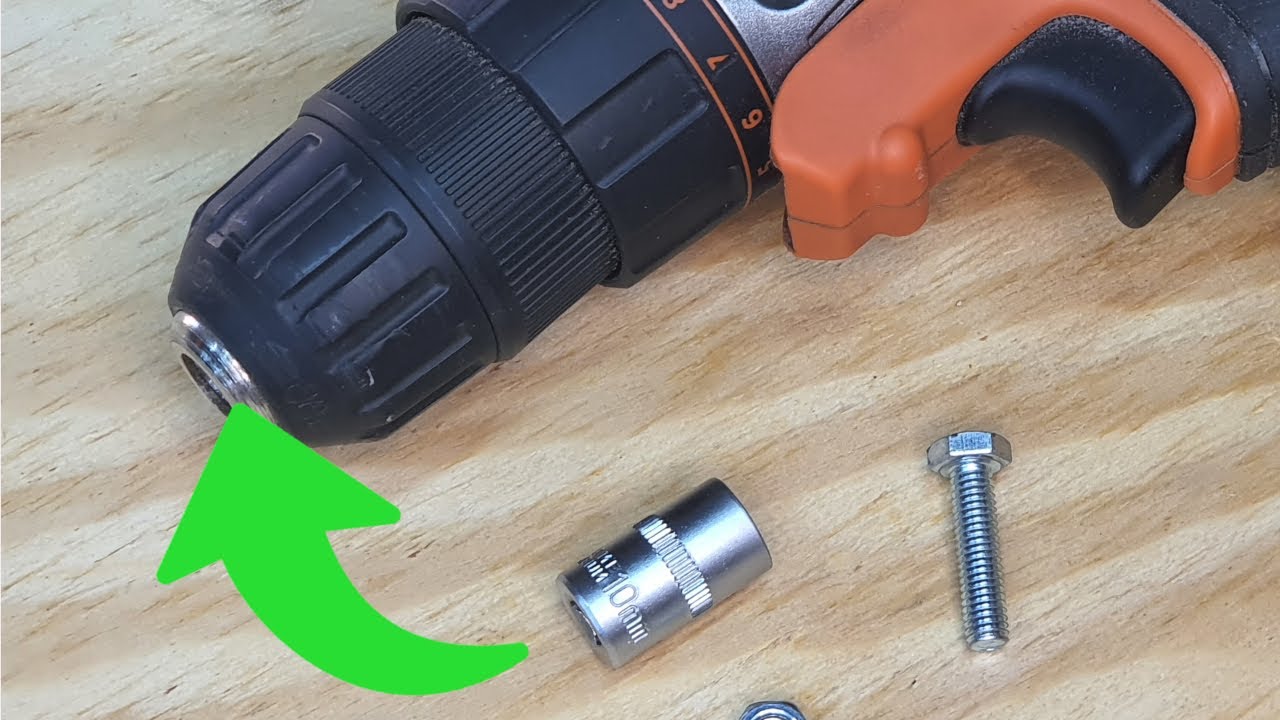
This mechanically spins the flywheel using a power drill. It carries high risk of damage.
Tools needed:
• Power drill with clutch
• Socket (10mm to 13mm) matching the flywheel bolt
Steps:
- Remove engine cover to access the flywheel bolt
- Attach socket to the drill
- Set drill to moderate speed
- Engage bolt and spin clockwise
- Engine may fire. Disconnect drill immediately
This can damage starter gears or the drill. Use only in true emergencies.
Troubleshooting Starting Problems
Most failures stem from one of three categories: user error, electrical issues, or mechanical faults.
Common User Mistakes
• Brake not pressed hard enough. The micro-switch requires full lever pressure.
• Kill switch in OFF position. Flip to RUN (half-C symbol).
• Kickstand down. Raise fully before starting.
• Throttle twisted during start. Only twist slightly if cold; otherwise keep it closed.
These account for over 70 percent of no-start calls.
Electrical Problems
• Weak battery. Lights work, but starter turns slowly or clicks.
• Faulty spark plug. No spark means no ignition. Remove and test.
• Bad starter motor. Clicks but engine doesn’t crank.
• Blown fuse. Check fuse box near battery.
Test the horn. If it’s weak or lights dim, the battery is likely the culprit.
Fuel and Mechanical Issues
• Empty tank. Obvious but often overlooked.
• Clogged carburetor. Causes sputtering or no start. Clean with carb spray.
• Low compression. Engine turns but won’t catch. Indicates internal wear.
• Stale fuel. Replace if the scooter sat for months.
Try a short burst of starting fluid into the air intake. If the engine fires briefly, fuel delivery is the issue.
Post-Start Procedures and Maintenance
Starting is just the beginning. Proper warm-up and shutdown protect your engine.
Warm Up the Engine
Let the engine idle for 30 to 60 seconds, especially when cold. This allows oil to circulate and lets the automatic choke complete its cycle. Target idle speed is 1,200 to 1,500 RPM.
Adjust Idle Speed
If the engine stalls or races:
- Locate the golden idle screw under the seat (covered by cap)
- Turn clockwise to raise RPM
- Turn counterclockwise to lower
Adjust in small increments while the engine runs.
Shut Down Safely
Follow this sequence:
- Stop completely
- Turn engine off with ignition key (preferred) or kill switch
- Lower kickstand after engine stops
- Turn key to lock position to secure steering
Never use kickstand to kill the engine while moving. It causes abrupt shutdown and loss of control.
New Scooter Break-In Tips
For 50cc, 150cc, 250cc, and 300cc models, the first 30 minutes are critical.
First Oil Change
Change oil after the first 30 minutes of runtime. Use 10W-30 motor oil (check manual for confirmation). This removes metal shavings from engine break-in and prevents premature wear. Skipping this step shortens engine life significantly.
Early Ride Guidelines
• Avoid full throttle for the first 500 miles
• Vary speed; don’t cruise at constant RPM
• Check tire pressure and chain tension weekly
Quick Starting Checklist
| Step | Action |
|---|---|
| 1 | Scooter on flat surface, kickstand up |
| 2 | Key turned to “ON,” steering unlocked |
| 3 | Kill switch set to “RUN” |
| 4 | Brake lever pressed firmly |
| 5 | Throttle twisted slightly (cold engine only) |
| 6 | Press start button (or kick firmly) |
| 7 | Let engine warm up before riding |
Final Tips for Reliable Scooter Starts
• Use rear brake when starting. It gives better control over the driven wheel.
• Carry a jump pack. Lightweight and can save you from a tow.
• Inspect spark plug monthly. A five-dollar part prevents hundred-dollar headaches.
• Practice push starts in a safe zone. Knowing how builds confidence.
• Keep tools handy. A small socket set helps with drill starts or repairs.
Frequently Asked Questions About Starting a Motor Scooter
Why won’t my scooter start even though the battery is charged?
The most likely culprits are the safety interlocks. The brake lever must be pressed firmly to activate its micro-switch, the kickstand must be fully raised, and the kill switch must be in the RUN position (half-C symbol, not X). Check all three before troubleshooting further.
Can I start my scooter on the center stand?
Yes, but with caution. Starting on the center stand provides maximum stability for warm-up and system checks. However, the rear wheel will spin as soon as the engine runs. Ensure the area is clear and the scooter is secure. Some riders prefer to start off the stand with the rider seated for better control.
What should I do if the kick start doesn’t work?
First, verify the brake is being held (front brake is recommended for stability). Second, ensure the ignition is ON and kill switch is RUN. Third, try kicking more firmly. A weak kick won’t generate enough momentum. If it still fails, the issue is likely mechanical (compression, fuel, or spark) rather than user error.
How long should I let my scooter warm up before riding?
Allow 30 to 60 seconds of idle time, especially in cold weather. This lets oil circulate and allows the automatic choke to complete its cycle. Shutting off too soon can cause stalling when you try to ride.
Is it bad to jump start my scooter?
Jump starting is safe when done correctly. Connect positive to positive, then negative to frame ground on both batteries. After jump starting, ride for at least 20 minutes to allow the stator to recharge the battery. Frequent jump starts indicate the battery needs replacement.
Key Takeaways for Starting Your Motor Scooter
Starting a motor scooter doesn’t have to be complicated. By following the right sequence, check switches, engage brake, press start, warm up, you’ll fire up every time. When problems arise, refer back to the interlocks: brake, kickstand, kill switch, battery. Nine times out of ten, one of them is the culprit.
Now that you know how to start a motor scooter the right way, you’re ready for smooth, reliable rides, every single time.



